


_ANZ-Group-shot_v2.png?w=100&v=f3a4afac-70ac-4758-8474-ff17fe163b1c&itok=Z_Qi2FlQ)


.png?w=100&v=76611618-74f9-4150-85bd-f3f88e49eece&itok=5ehAJg_Q)


.png?w=100&v=5053a26b-c336-46d9-b44e-ab91738f07c9&itok=efvsqCNL)


.png?w=100&v=d5f9955a-145e-481e-8081-5ddf4d74c7cc&itok=hKuNtBOw)


.png?w=100&v=2695a42f-b099-4e31-bdbd-c1b445ff88c0&itok=Md9-7E8t)


%20(2).png?w=100&v=a9b7928b-cece-4e51-b913-62ae316129a9&itok=fEHREjki)
_ANZ-Group-shot.png?w=100&v=72a4a24c-7670-47f7-a68e-edeaafa41c8d&itok=k25pq8iJ)
_ANZ-Group-shots.png?w=100&v=4d5e1cd2-60a9-45da-bcfb-1b8500ccaea9&itok=v6A67Pxg)


Drill into timber, soft metal and hard materials including brick and concrete with the RYOBI 18V ONE+ Hammer Drill.

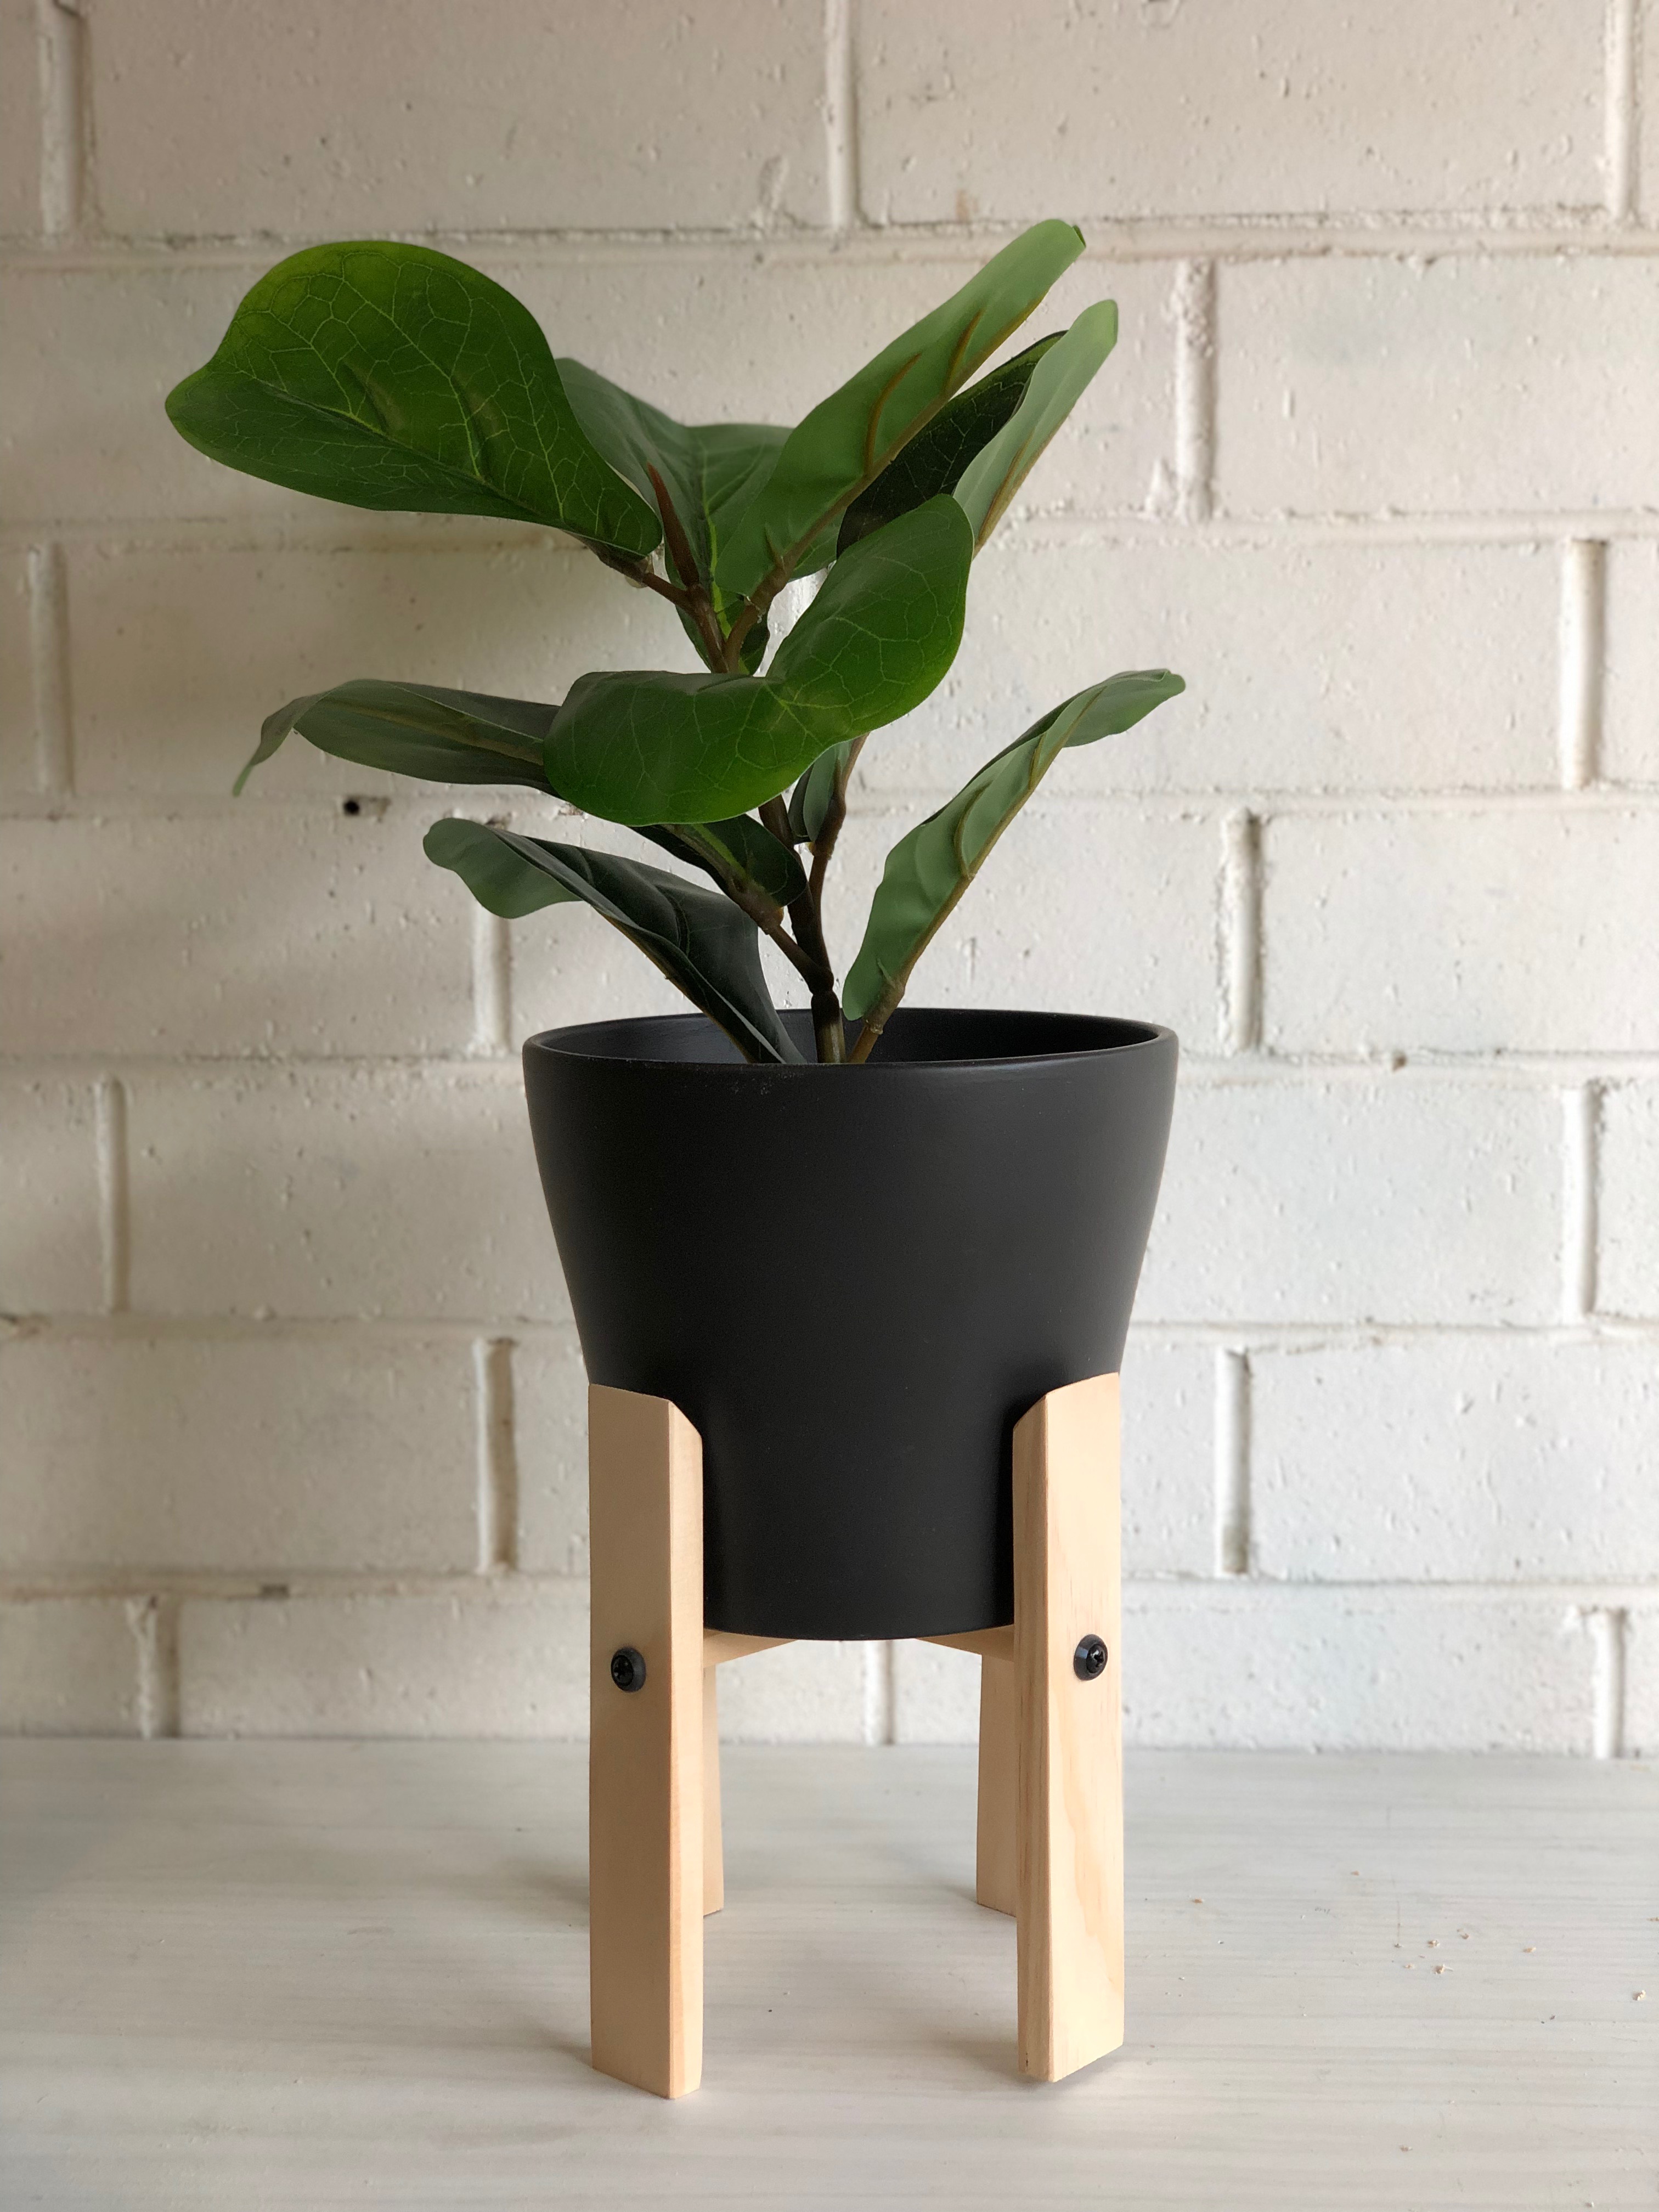
’Buy everything you need for this project from Bunnings, including the plant,’ says DIY specialist Natasha Dickins at Little Red Industries, who designed the stand to fit a standard 170mm x 150mm ceramic pot.
Difficulty: Easy
Category: Outdoor furniture
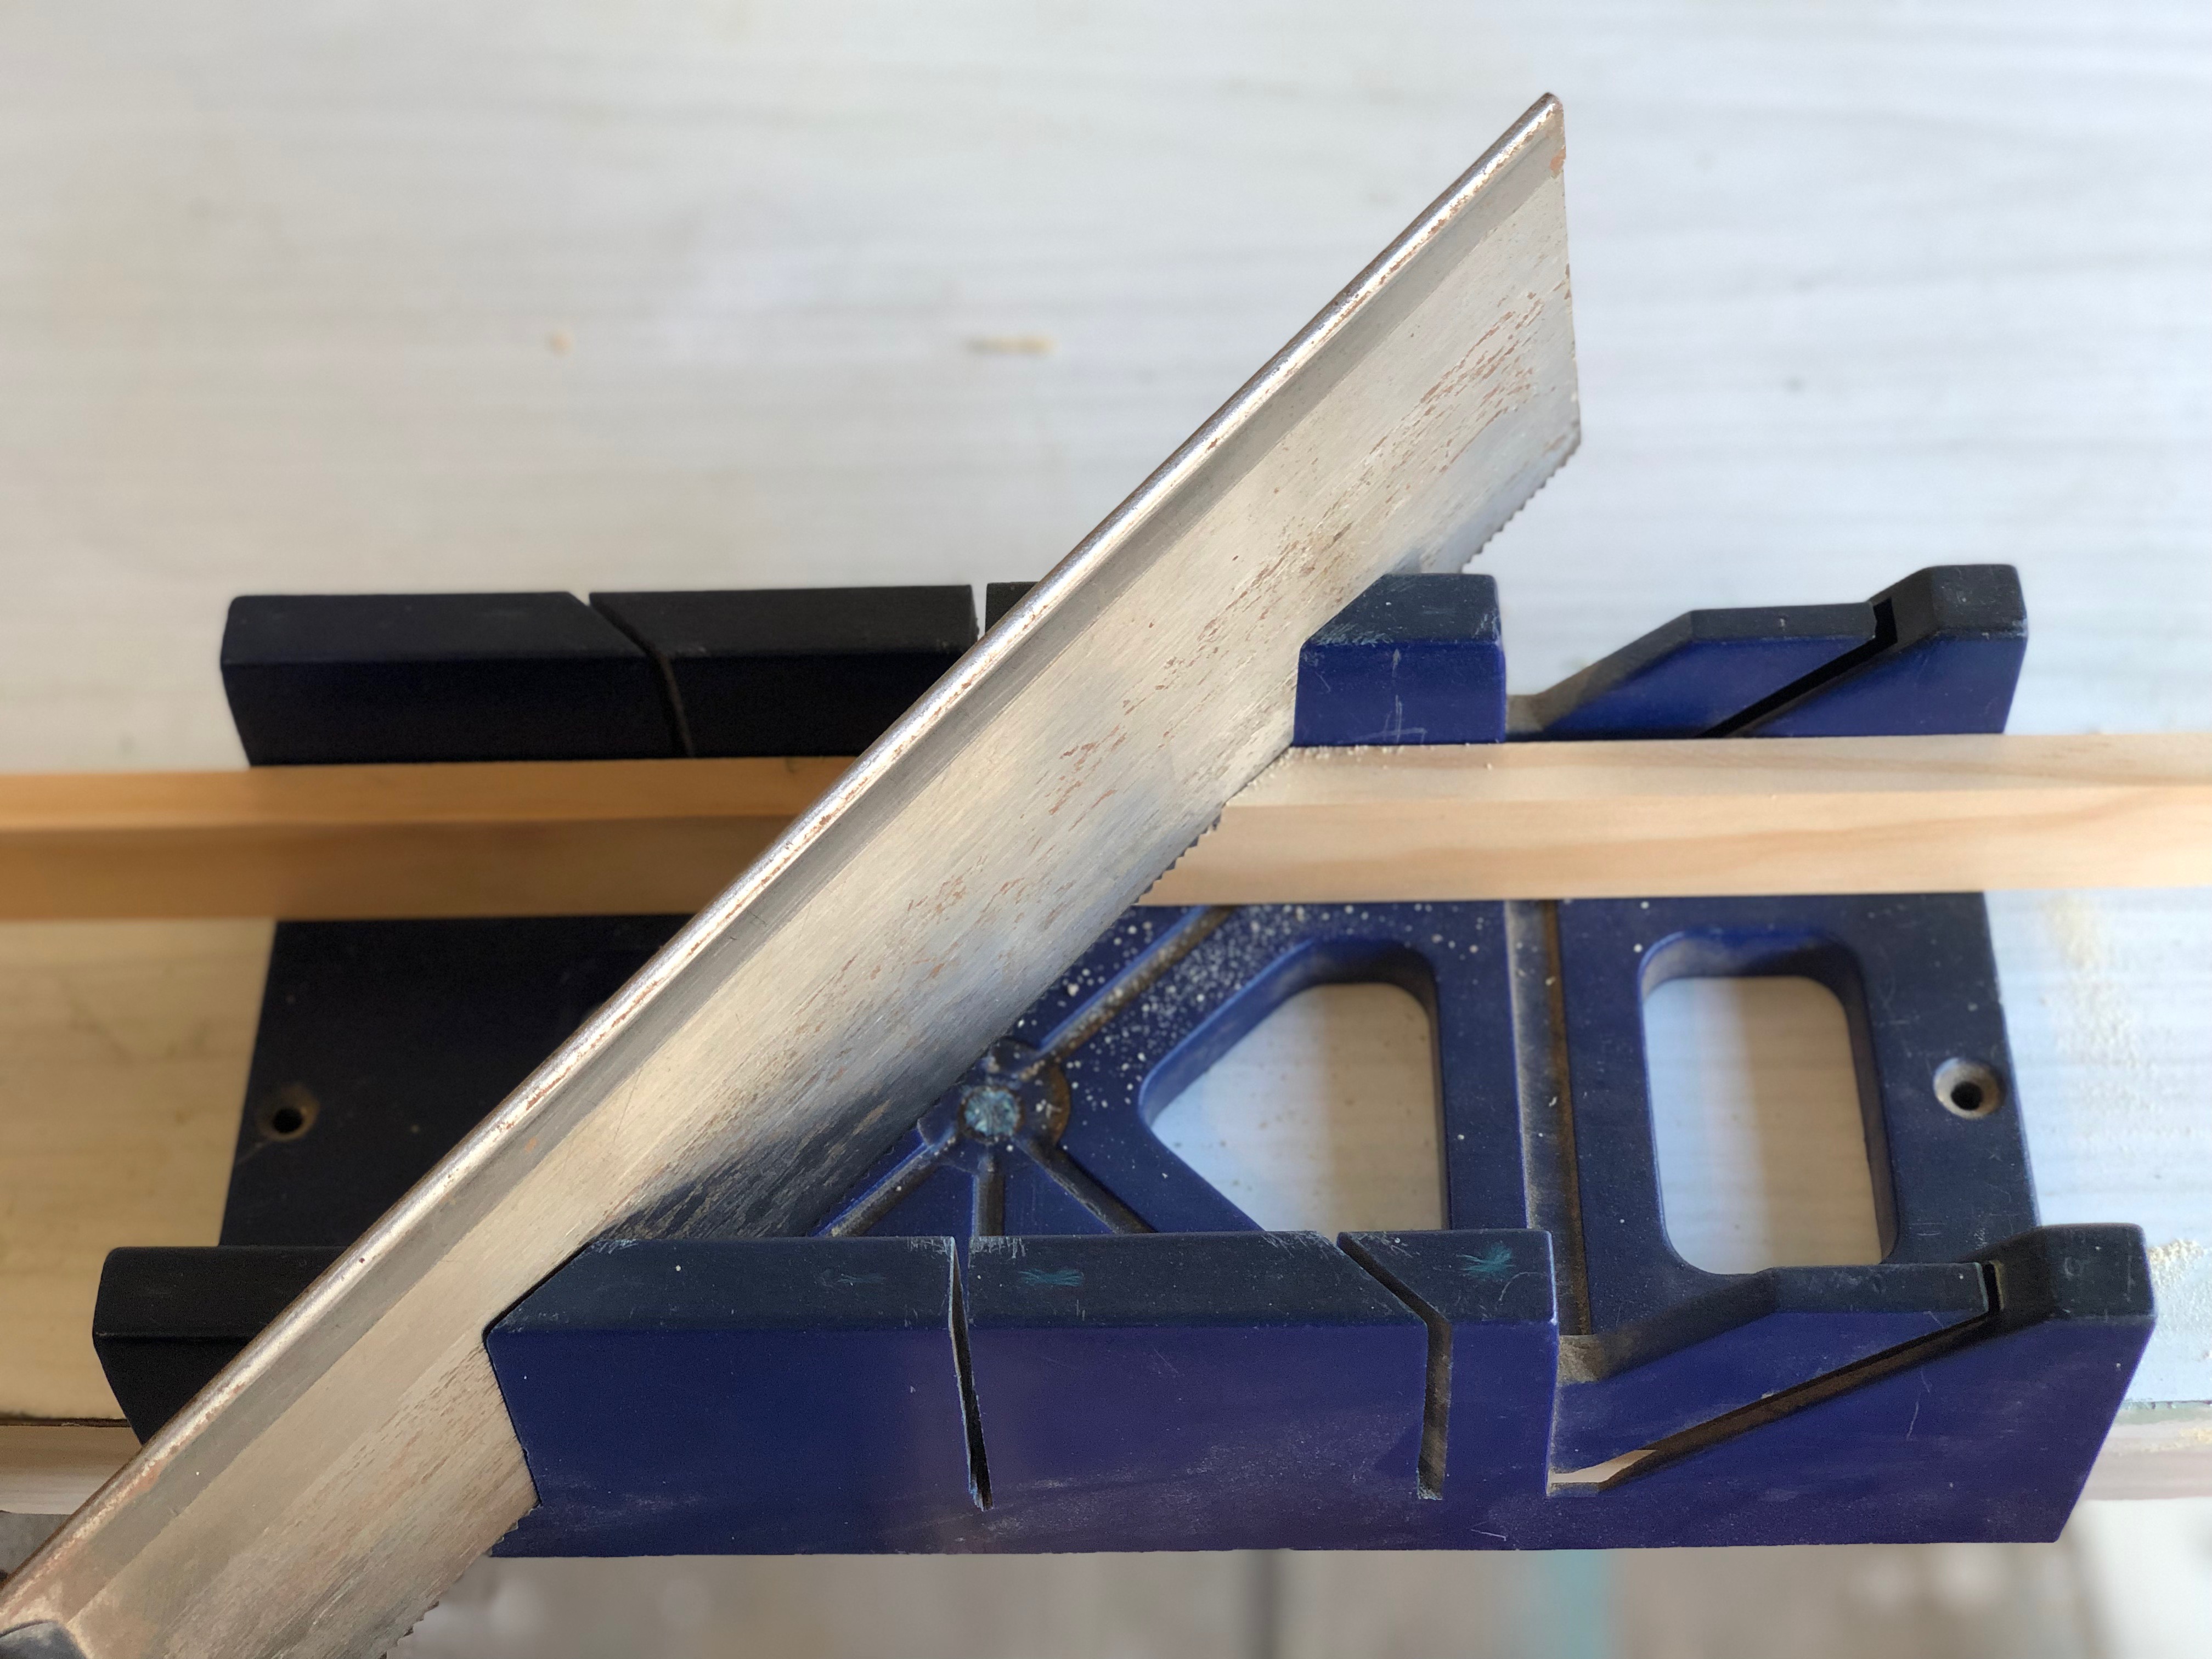
From the 30mm pine, cut four legs 180mm long, using a mitre box and with a tenon saw to trim the top of the legs to 45 degrees, checking they’re all the same length. From the 12mm x 12mm pine, cut two rails to 140mm.
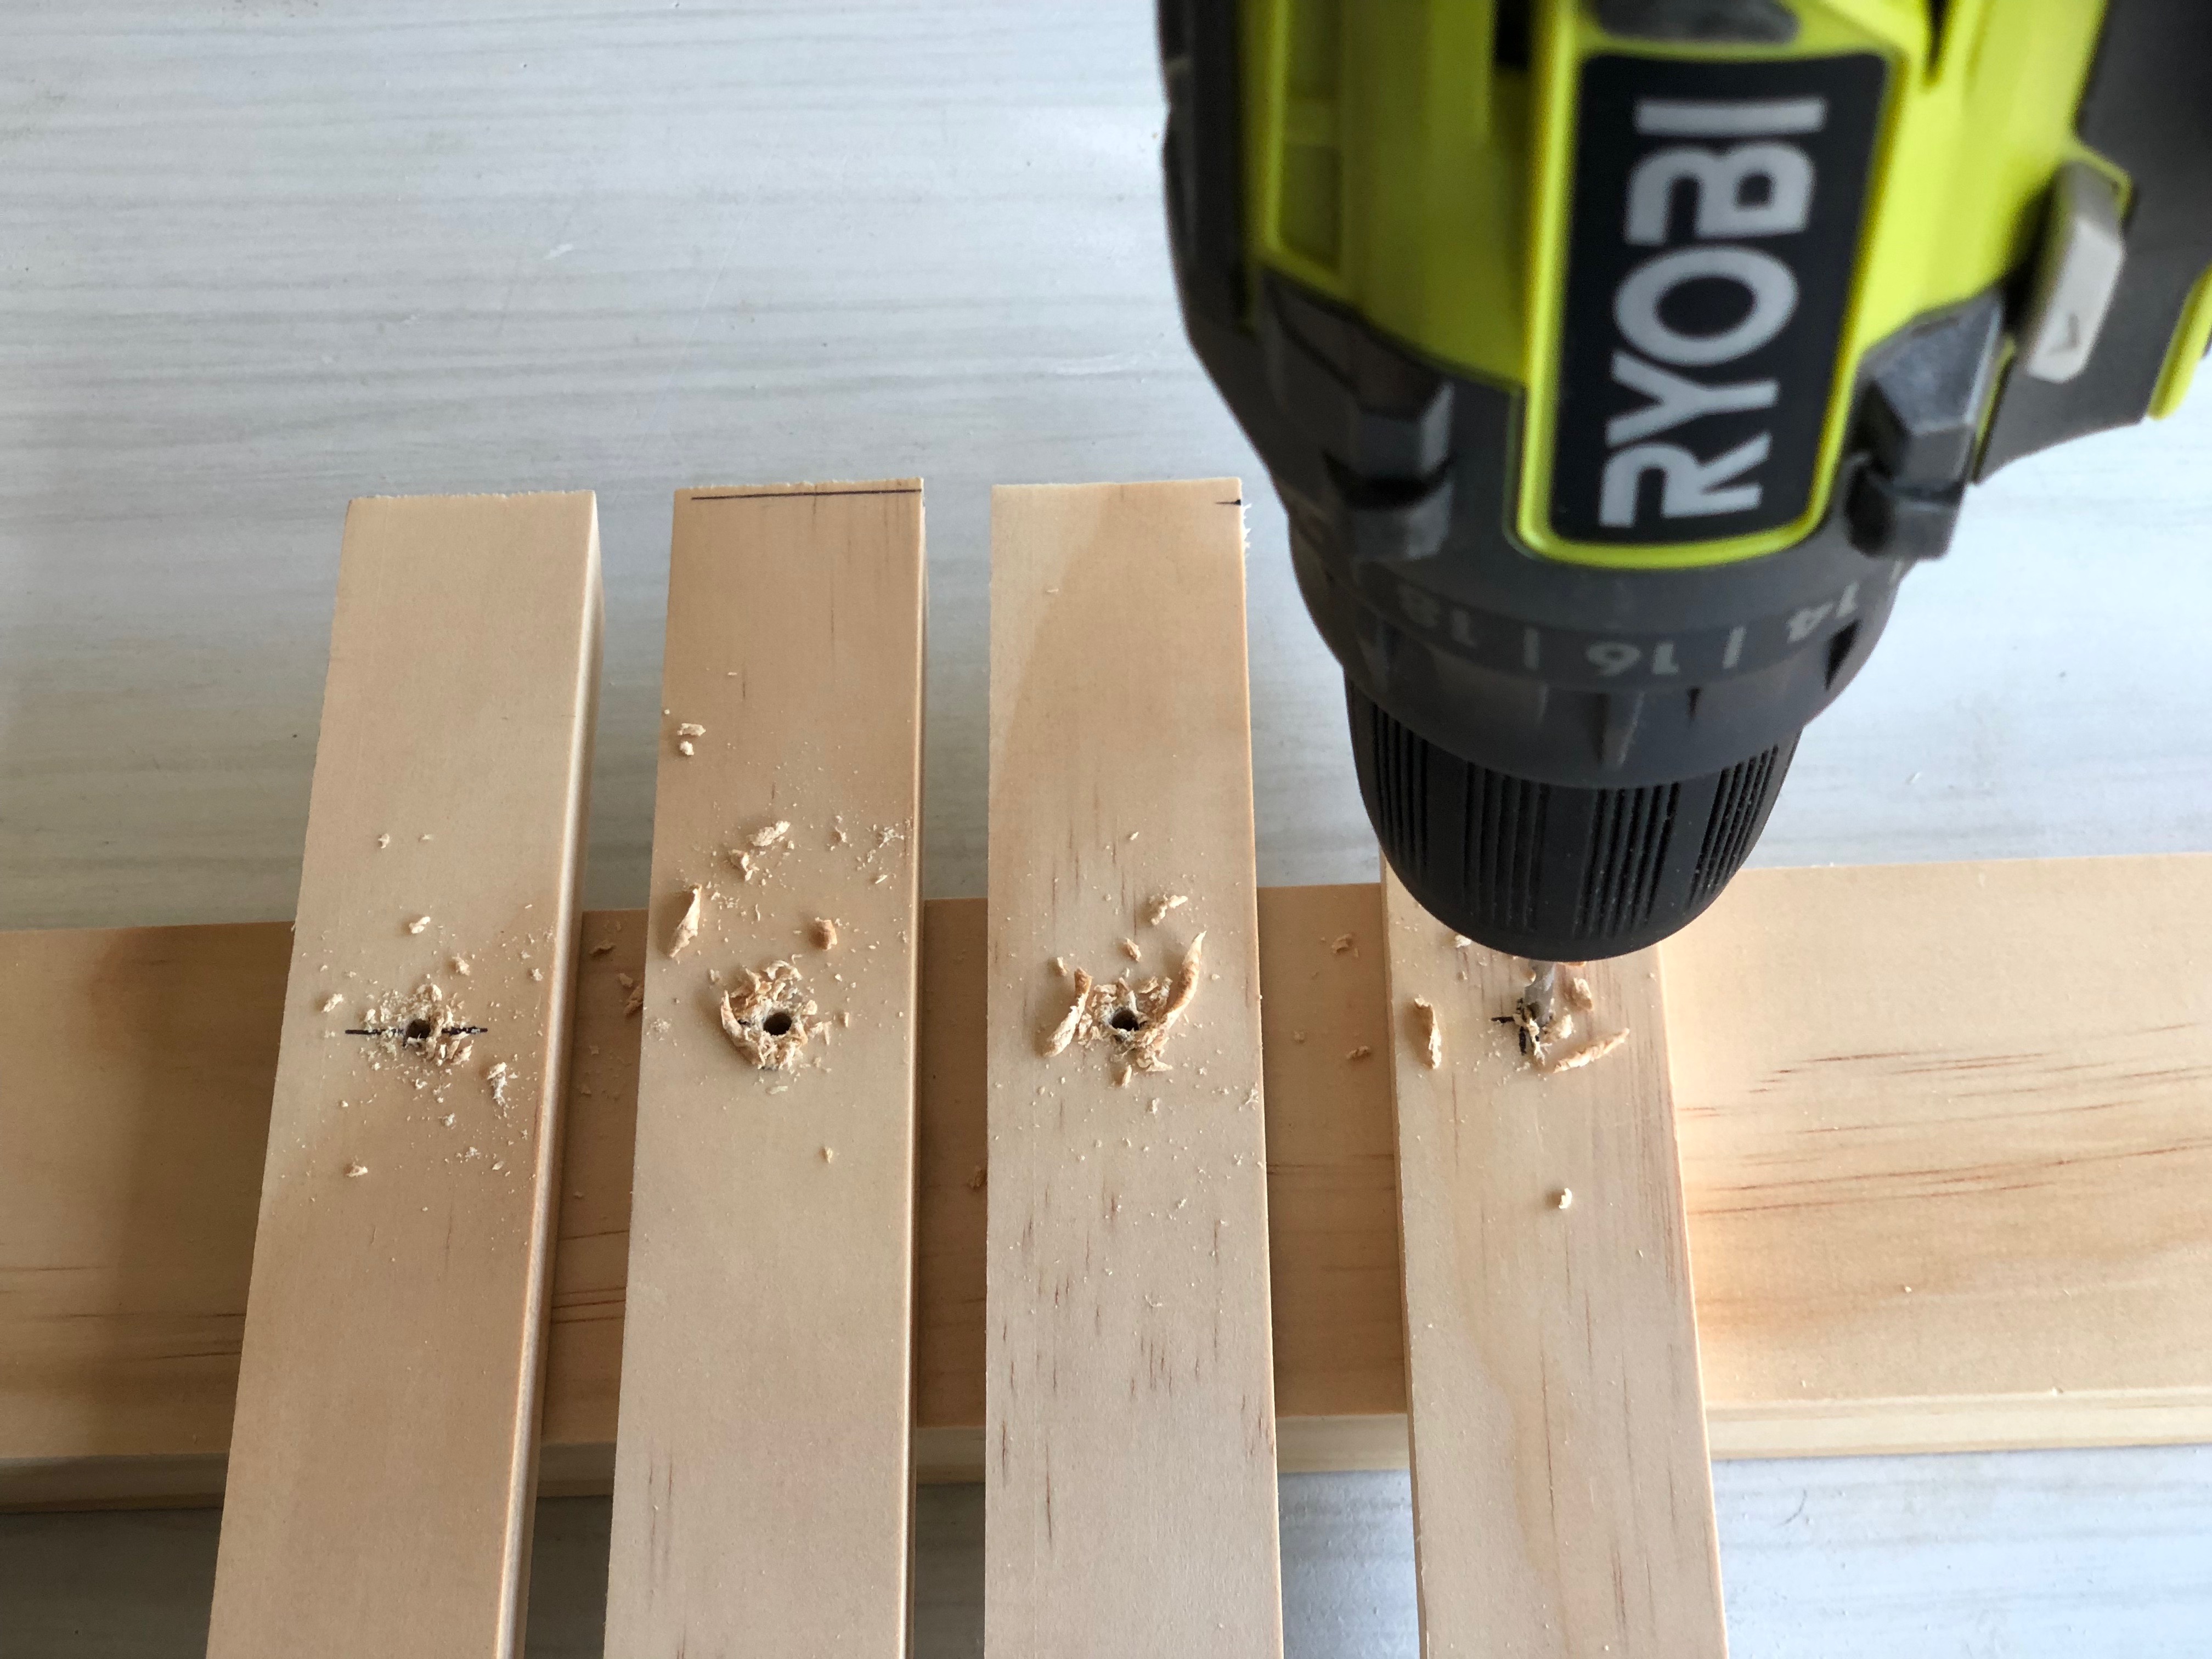
On the outside of each leg (the long side), use a combination square to mark 110mm up from the base and 15mm from the sides to drill pilot holes with a 4mm bit.
NATASHA’S TIP: To avoid damaging the workbench use a timber offcut for drilling.
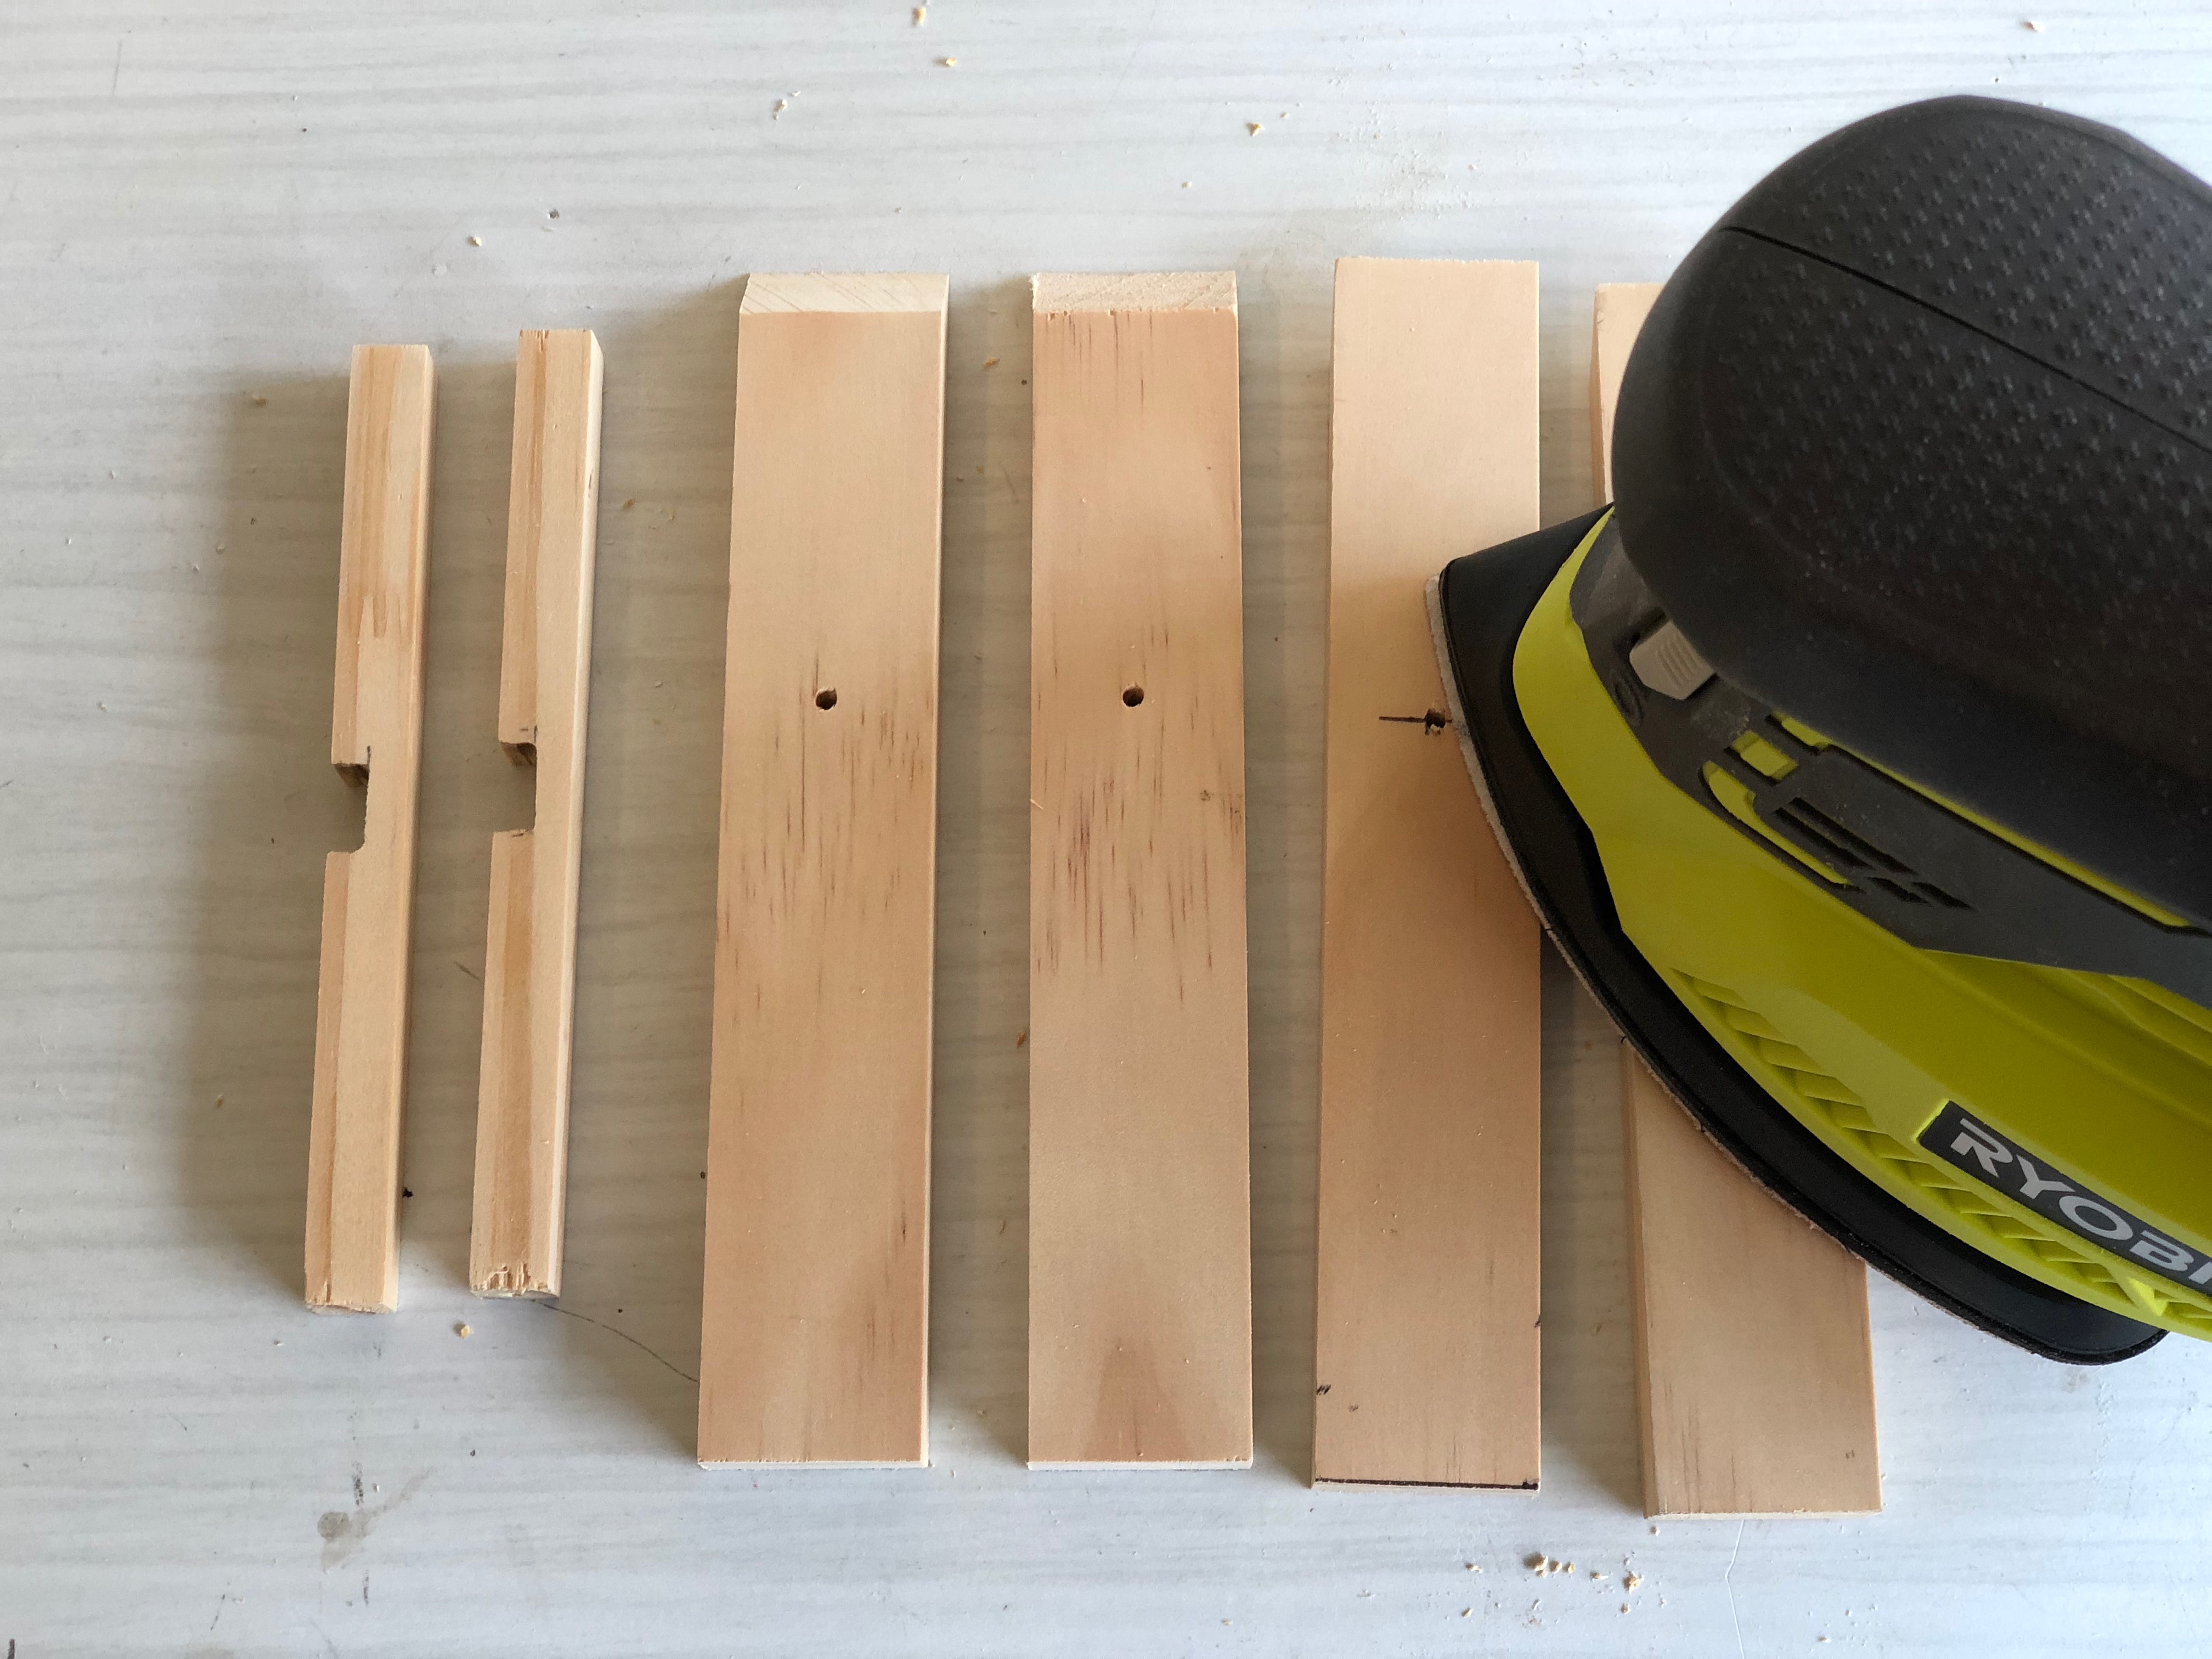
Use a 180-grit sanding pad with the corner sander to smooth over the rails and legs, removing any breakout around the pilot holes and softening the mitred edges.
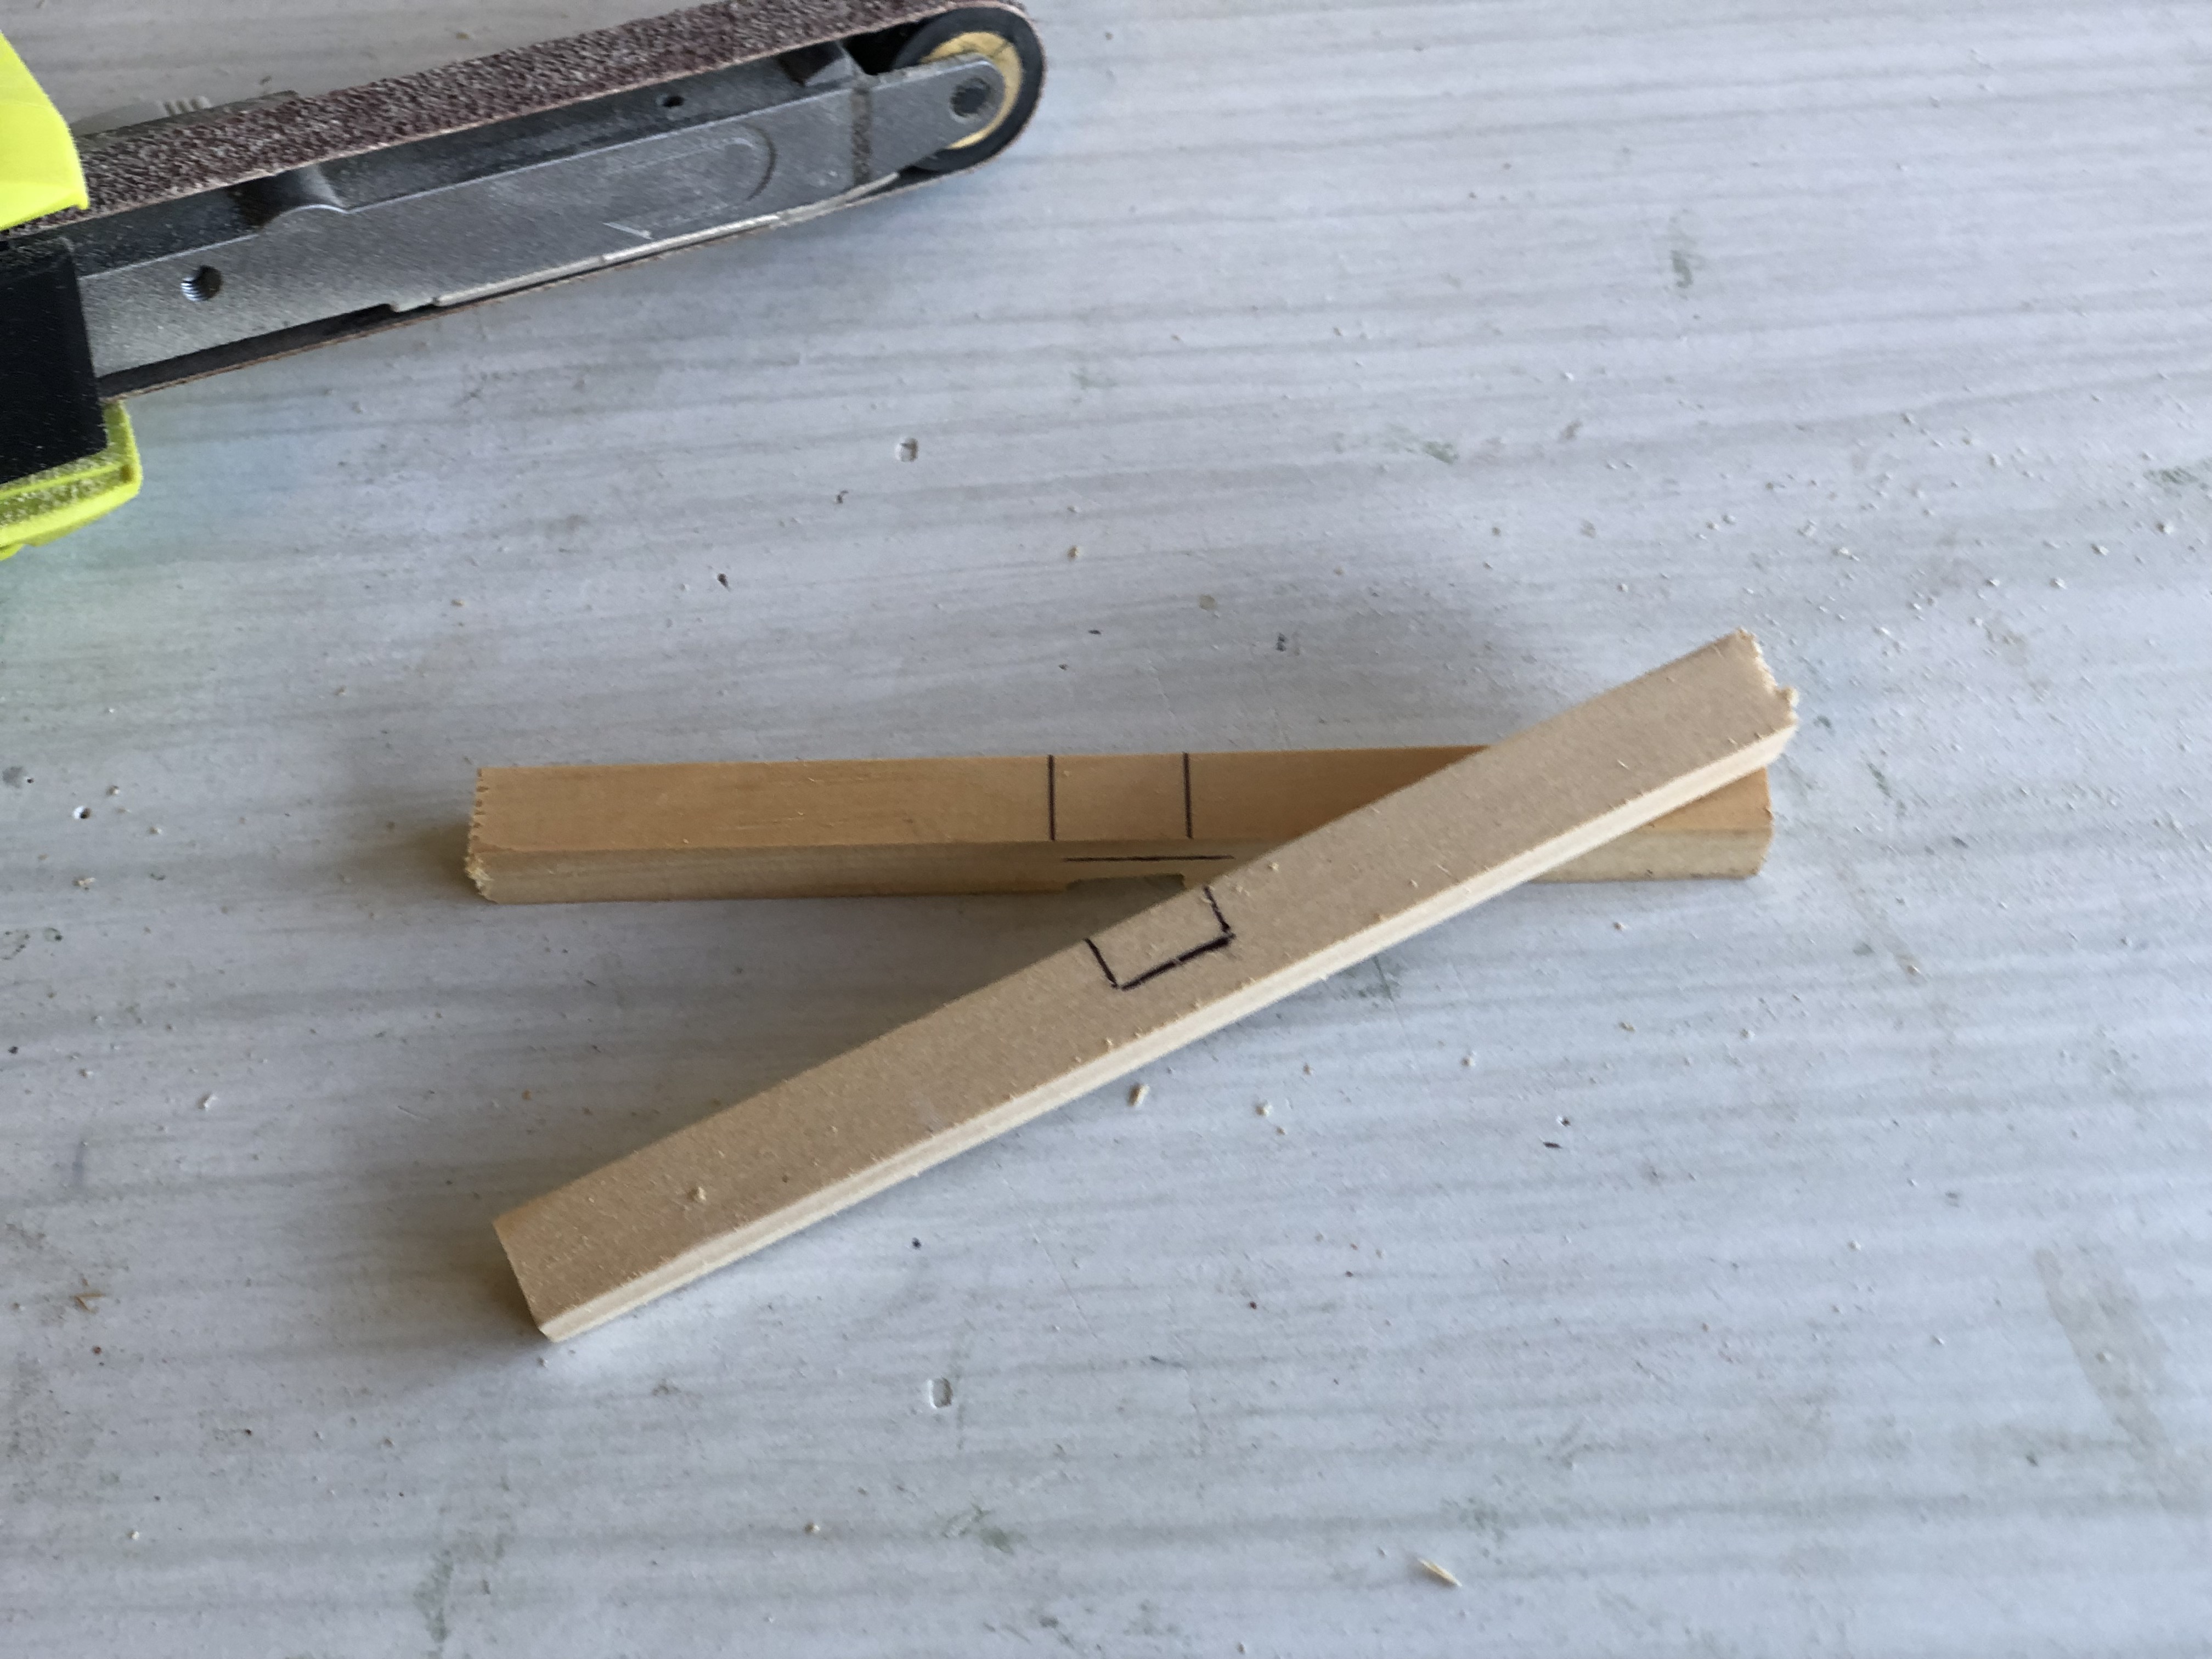
Use a combination square to mark halfway along the rails and 6mm either side to indicate the width of the joint. Mark 6mm down the sides to indicate the depth.
NATASHA'S TIP: The width of the joint is the same as the width of the pine – and the same as the Power File. The depth is half the pine so the rails are flush when assembled.
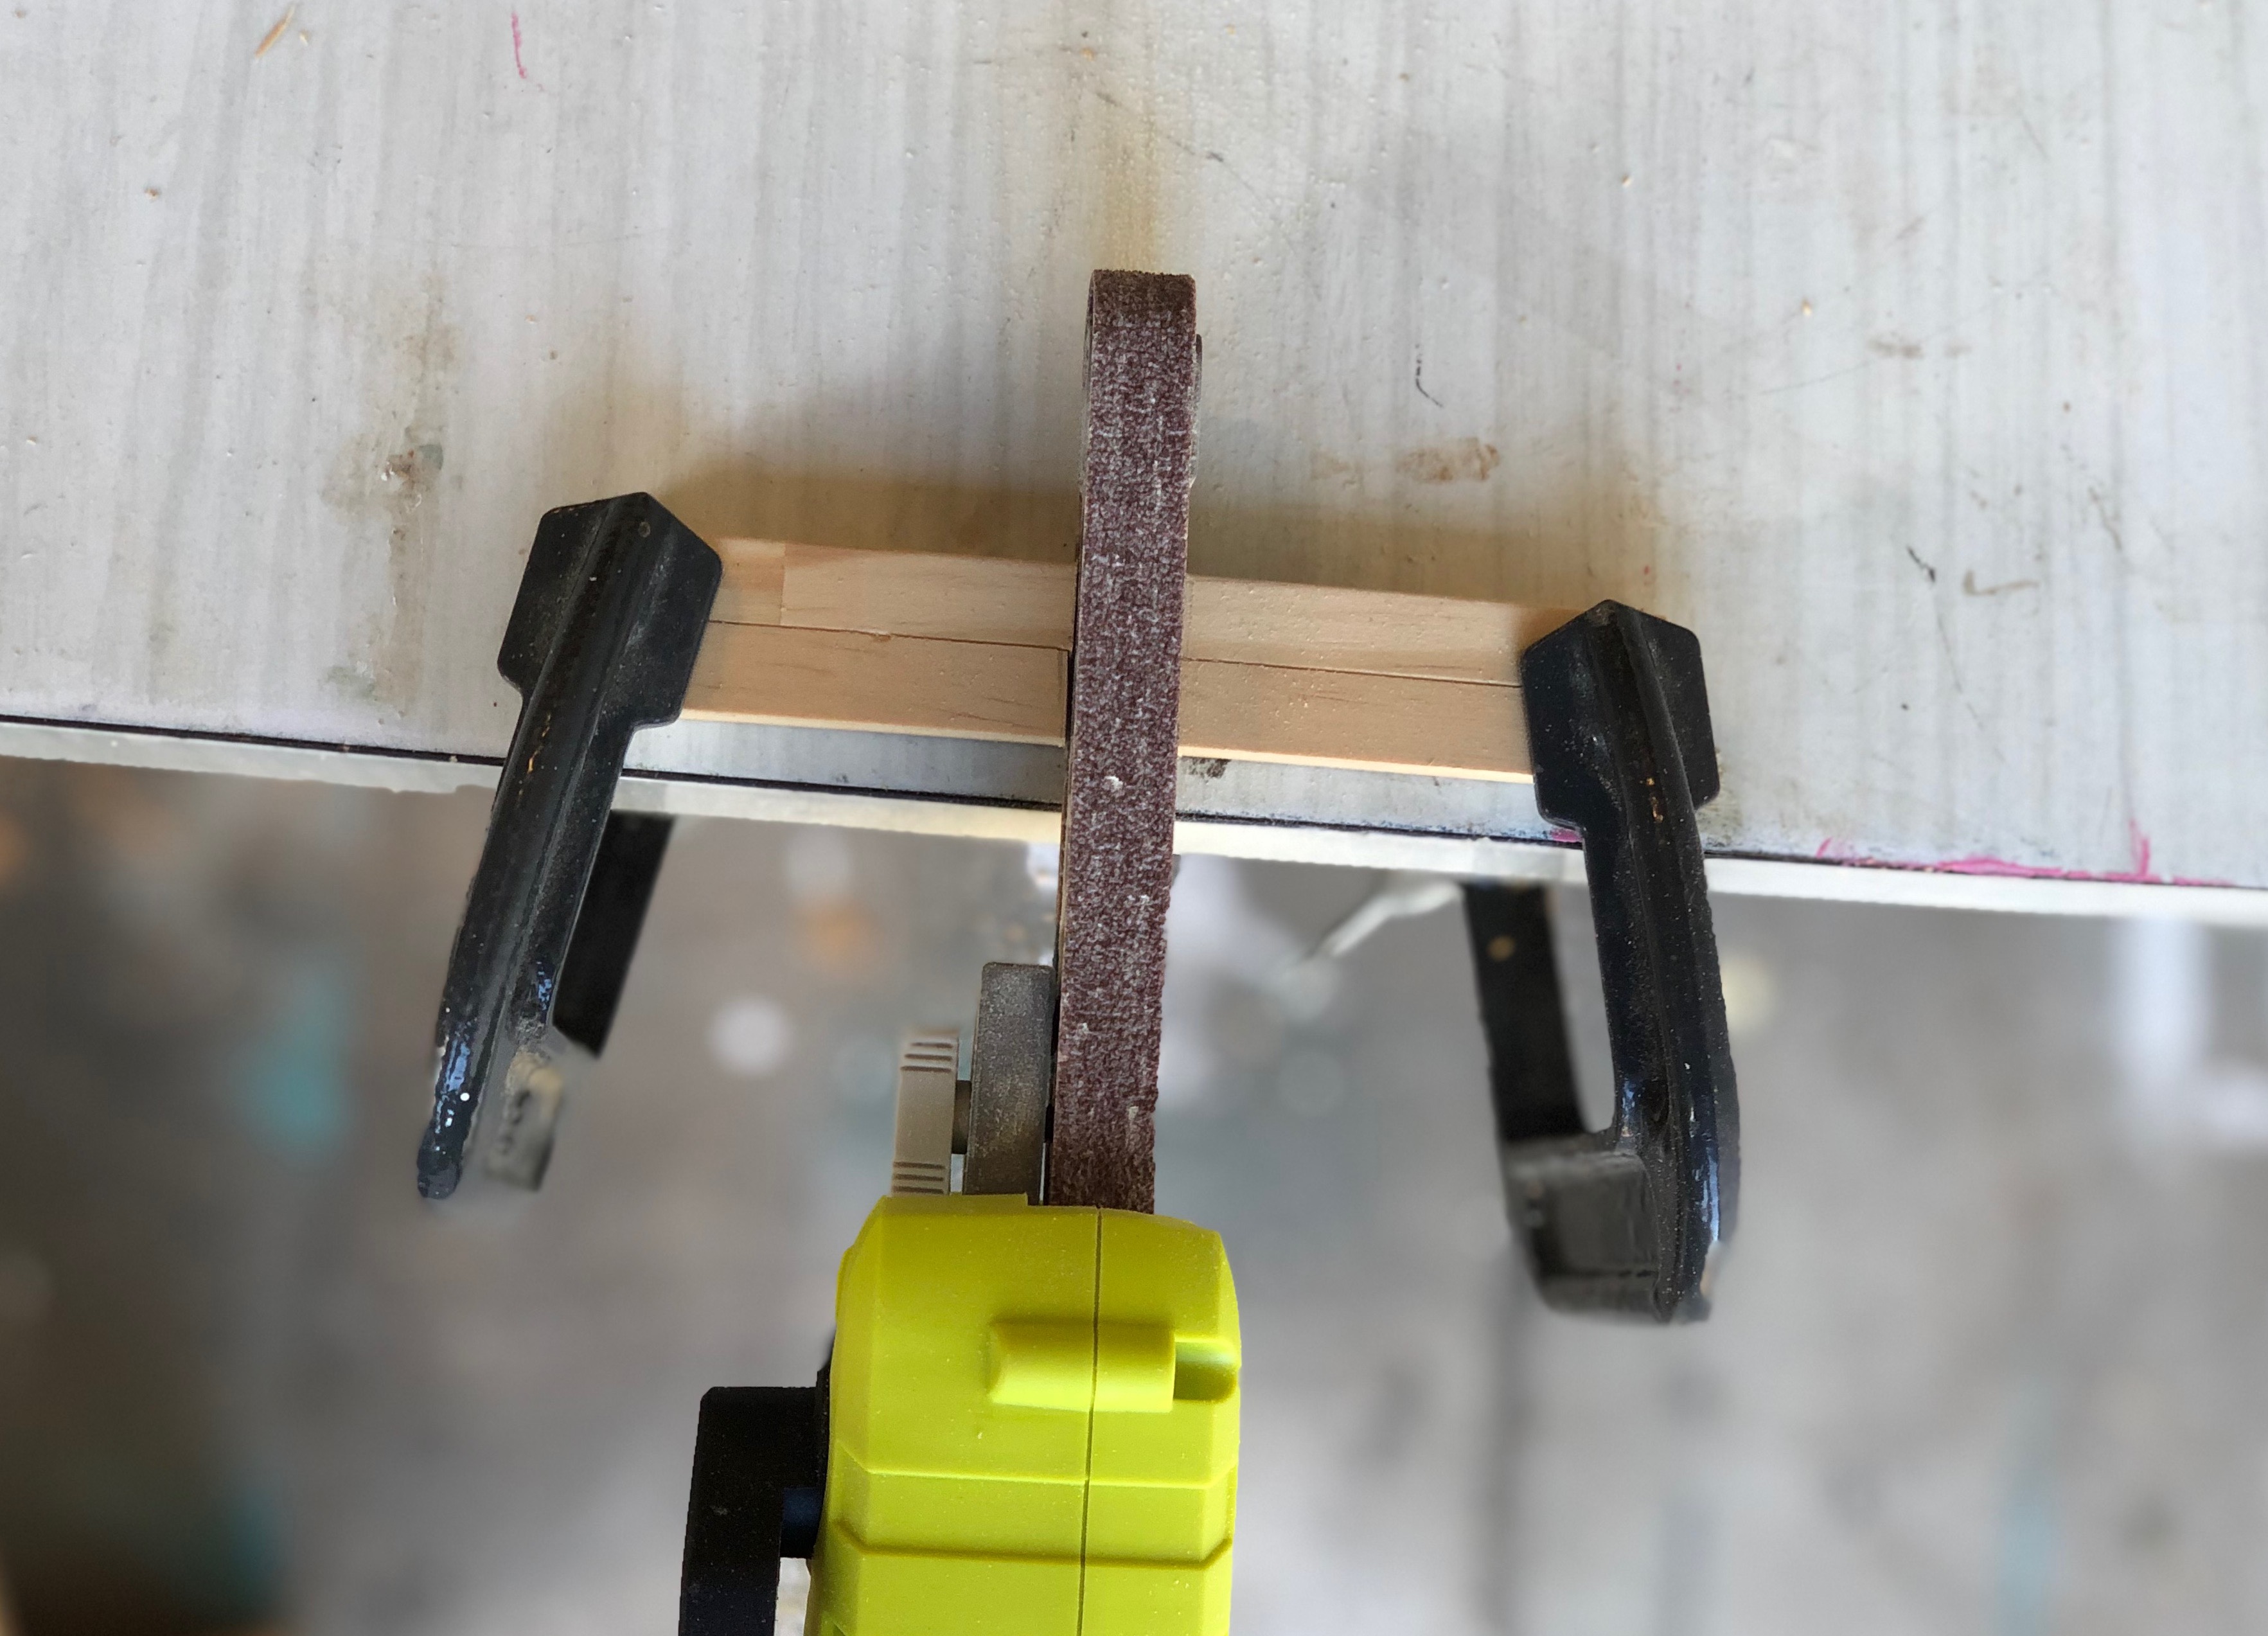
Position the rails together on the edge of the workbench, ensuring they’re straight and even, securing with small G clamps. Set up the power file with the 60-grit sanding belt then hold the file over the marks to make the recess.
NATASHA’S TIP: Keep the power file straight while moving back and forward slightly. Before filing into the mark at the base, stop the tool, flip the rails around and complete the recess, checking the fit.
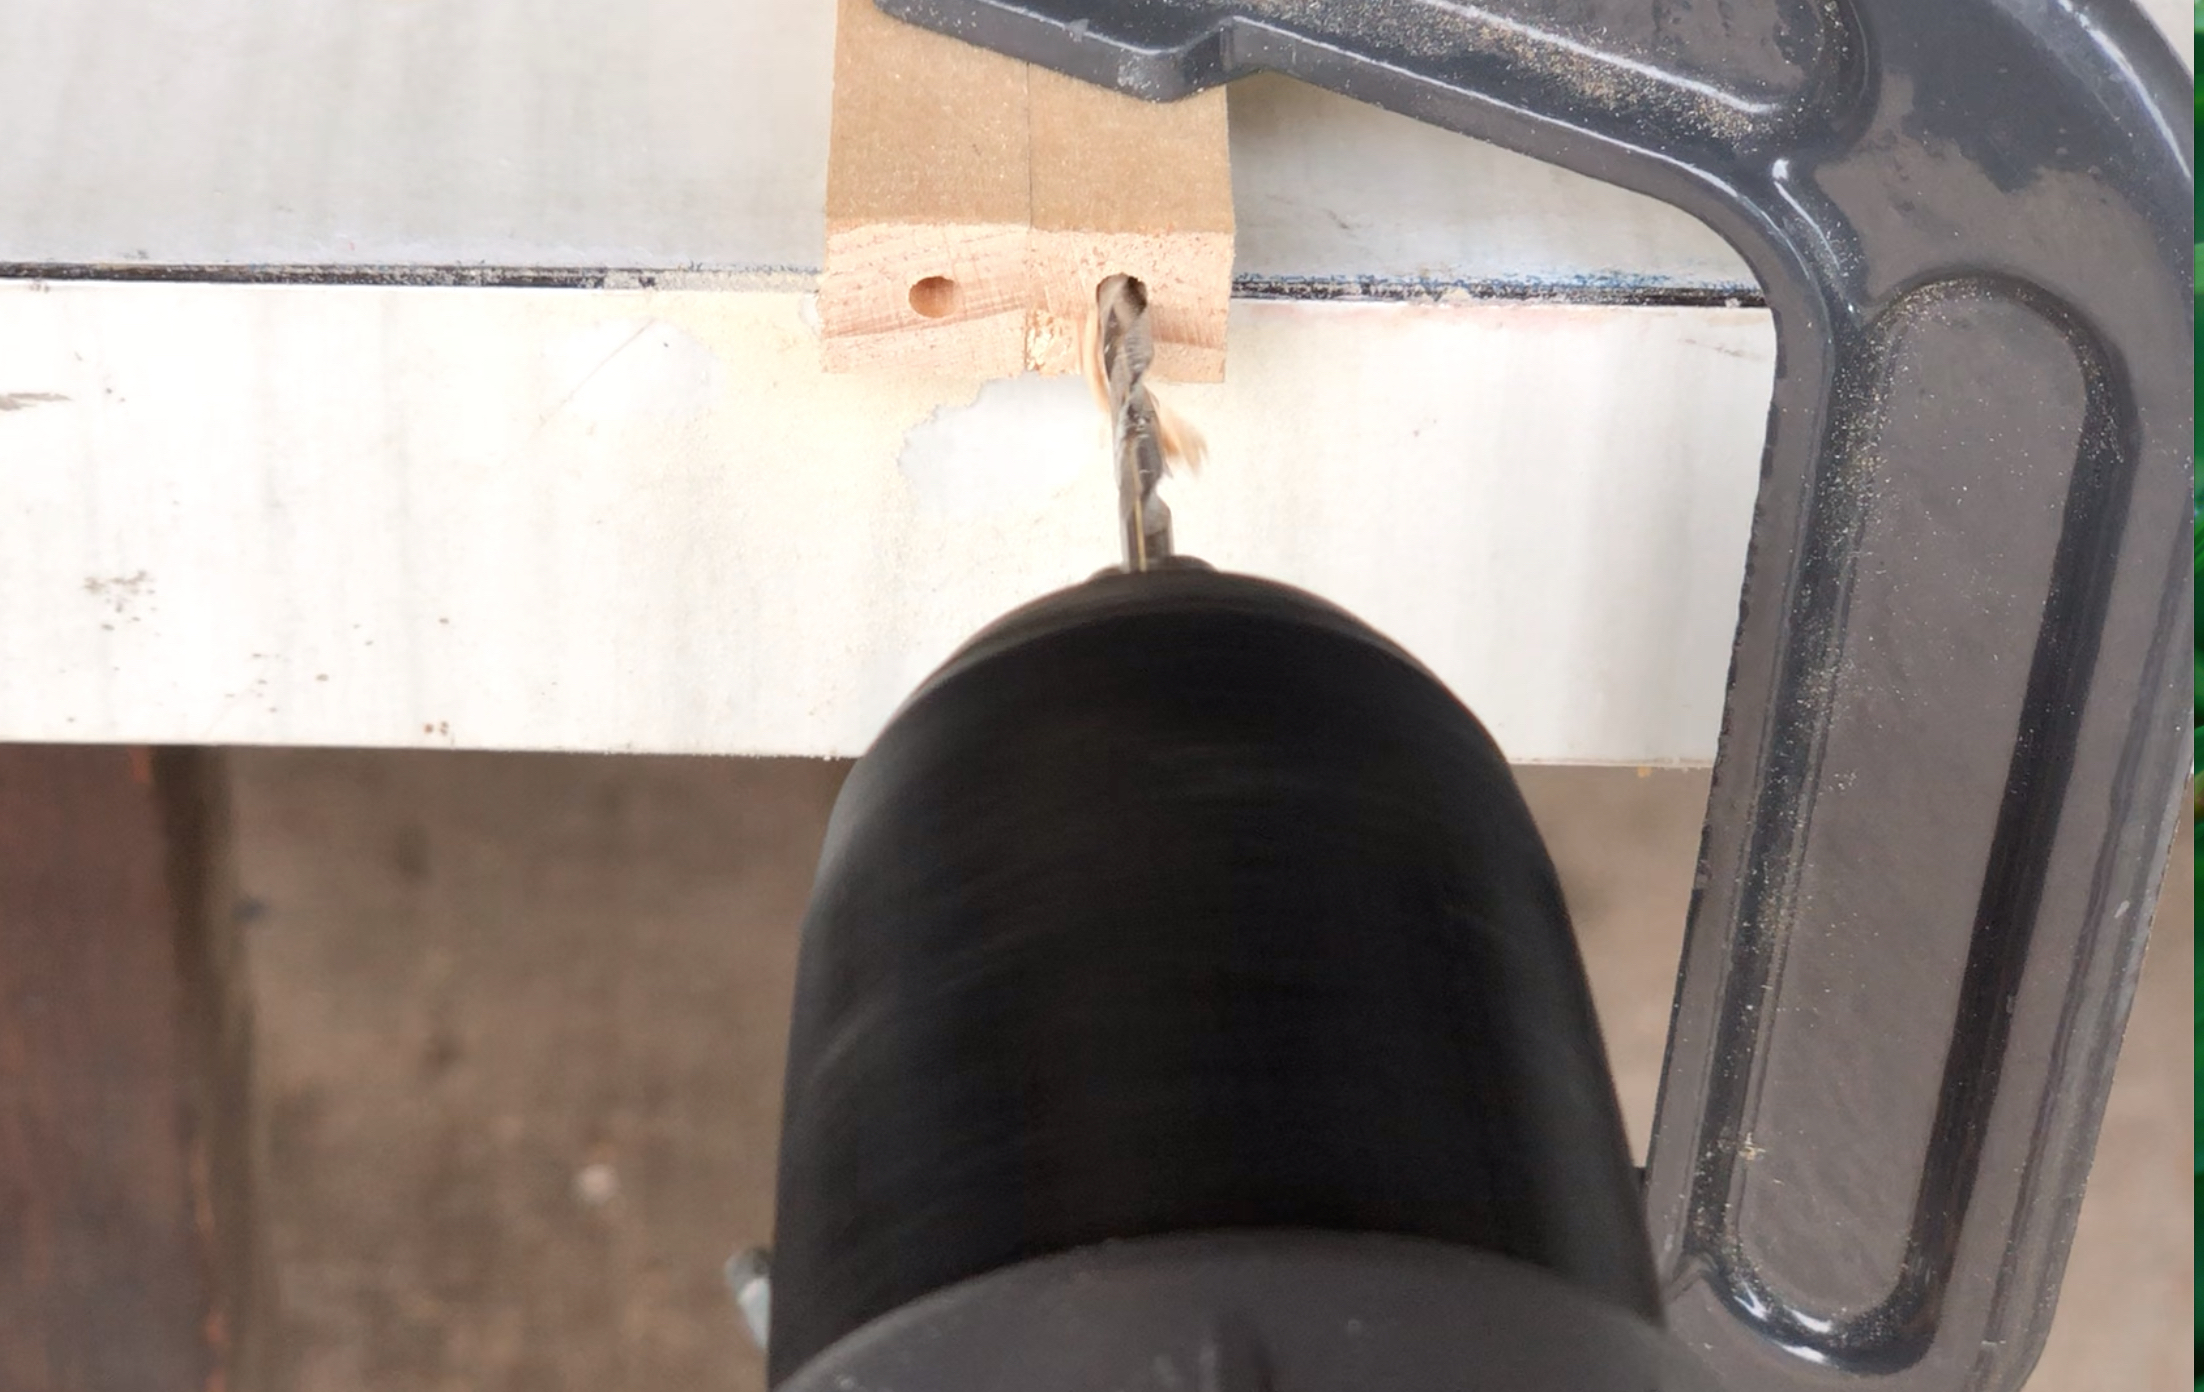
Clamp the rails to drill pilot holes into the ends using the 4mm drill bit then sand all over.
NATASHA’S TIP: Hold the drill straight, begin the hole and drill in about 10mm, keep the drill going while retracting it slightly to remove the breakout then complete drilling the hole.

Put the washers onto four 30mm screws and drill them through the outside of the legs to protrude about 2mm. Position the pilot holes of the rails over the screws and secure, making sure the recess of one rail faces up and the other faces down. Apply adhesive to the joint, position the rails together then clamp and leave to dry.
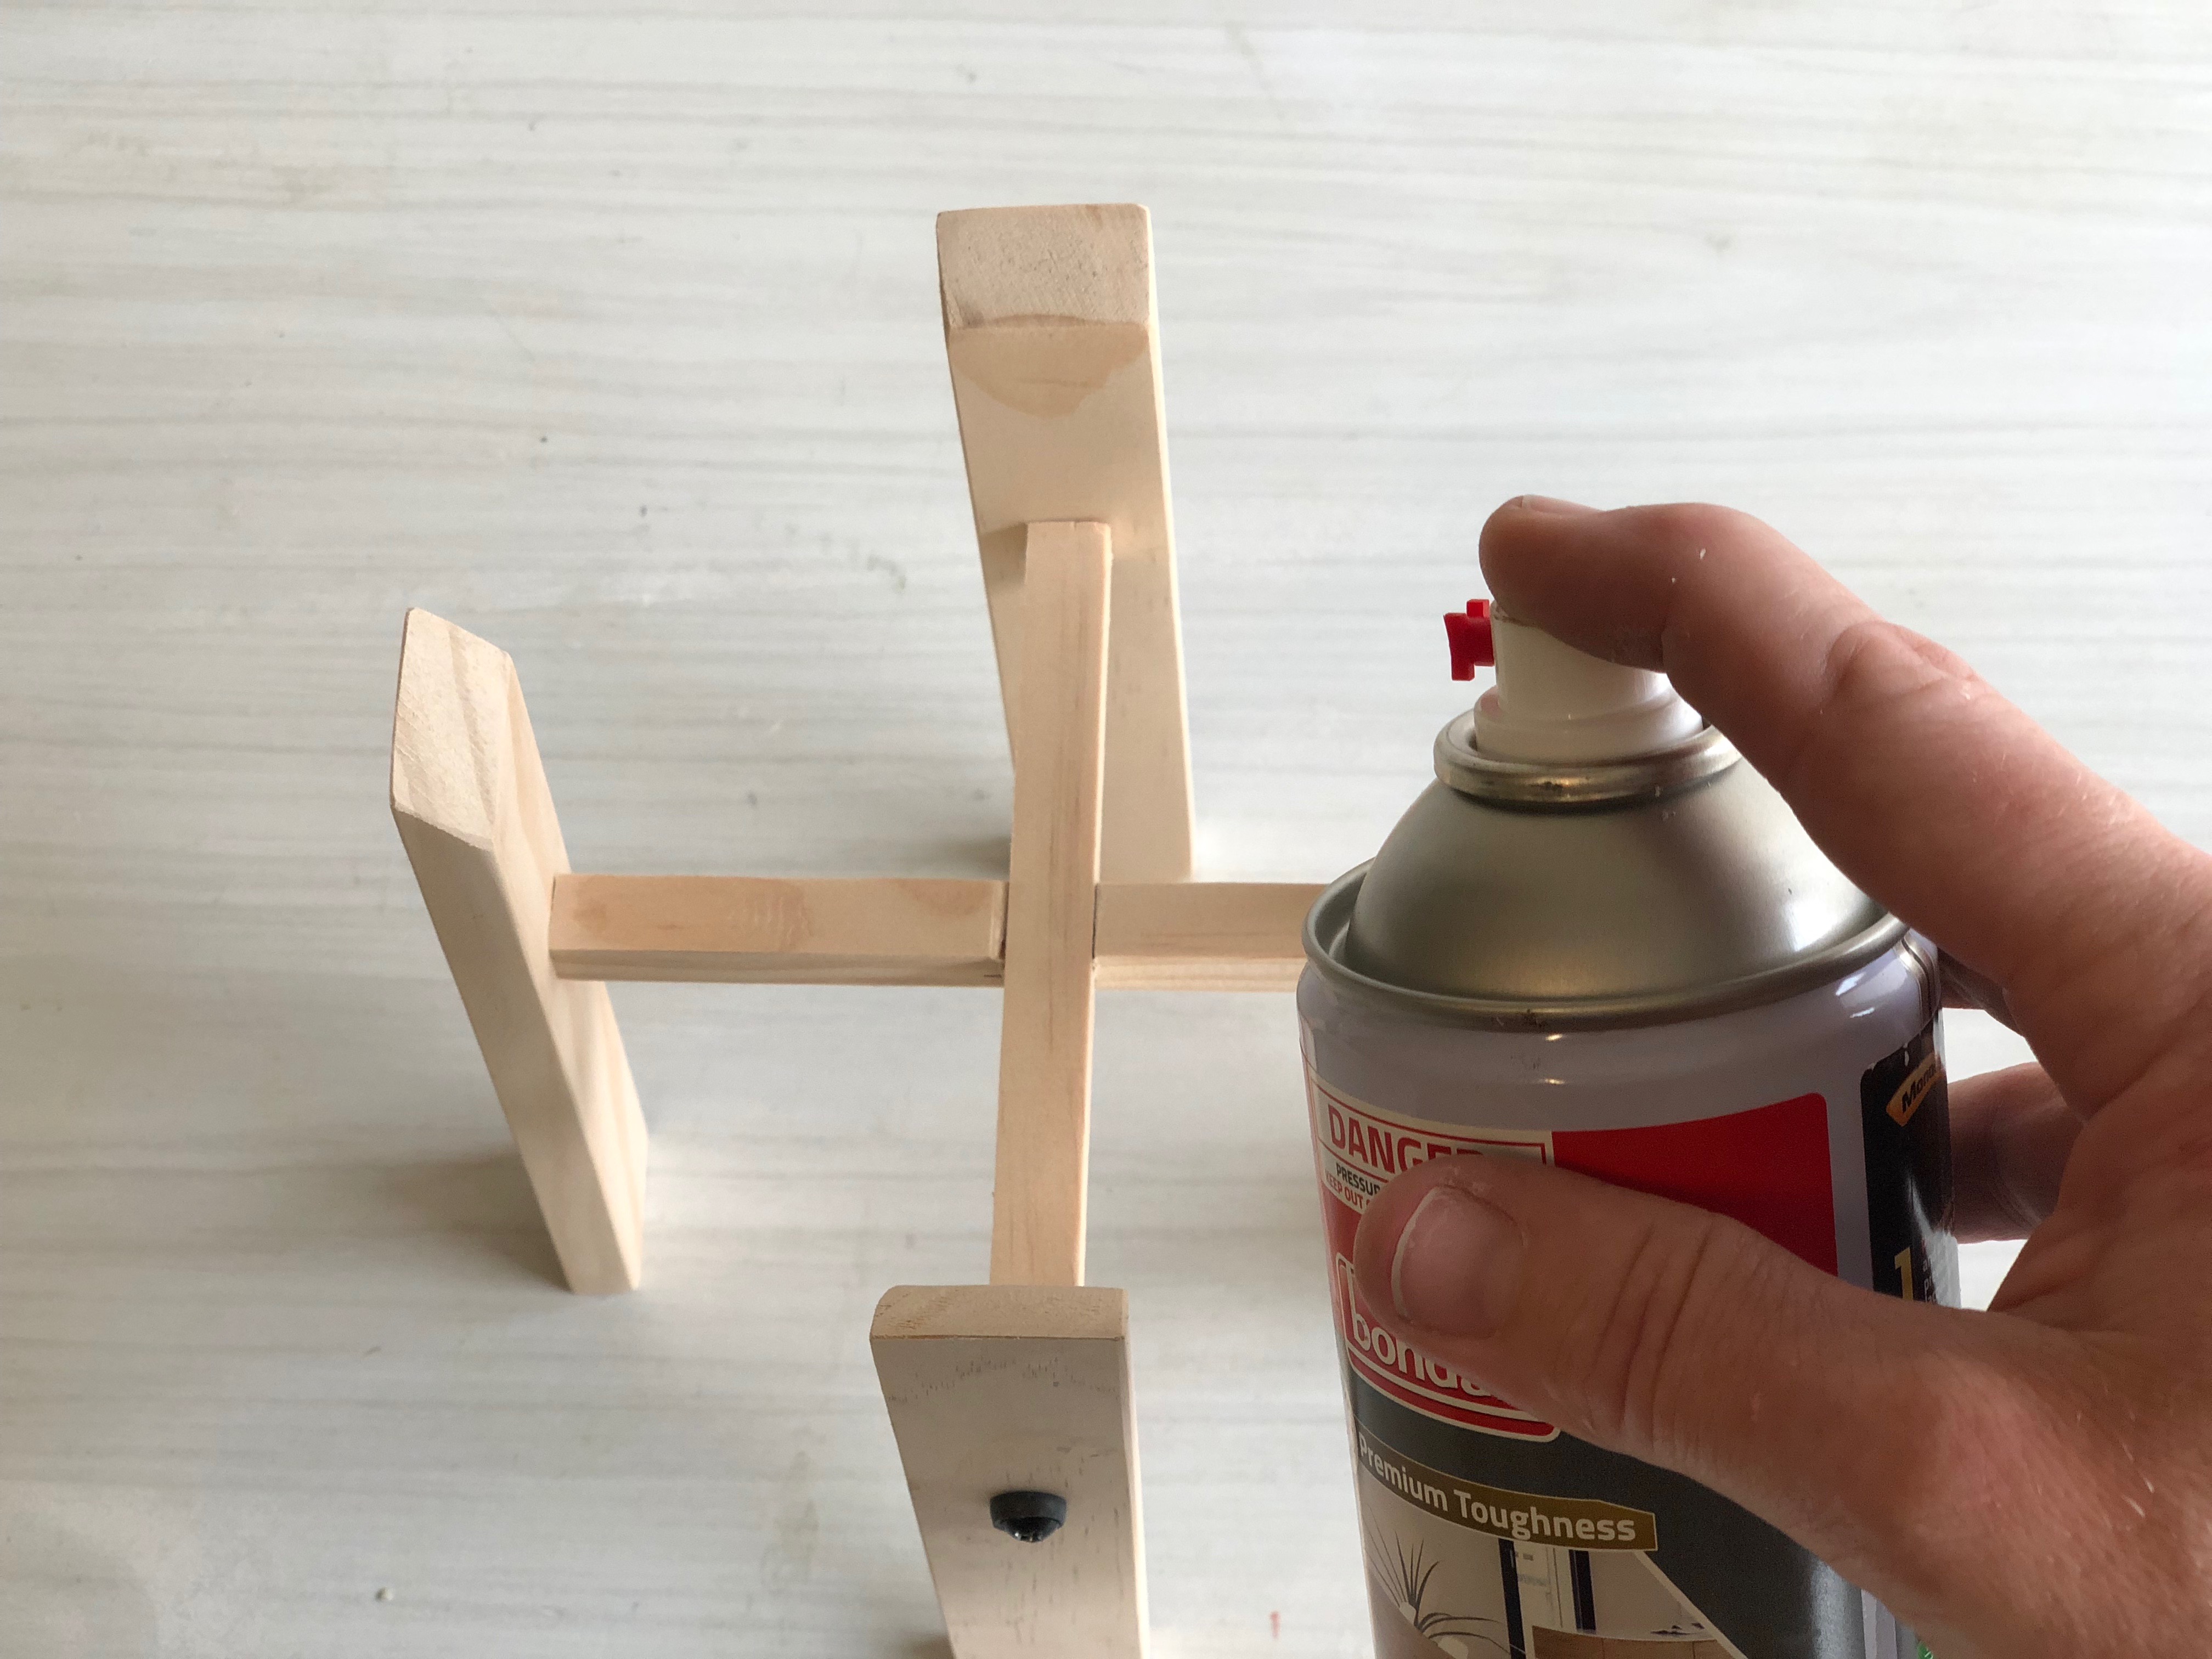
Position the plant stand on a timber offcut to apply the varnish, turning the offcut while spraying to ensure an all-over finish. Leave to dry then repeat for a water-resistant finish.
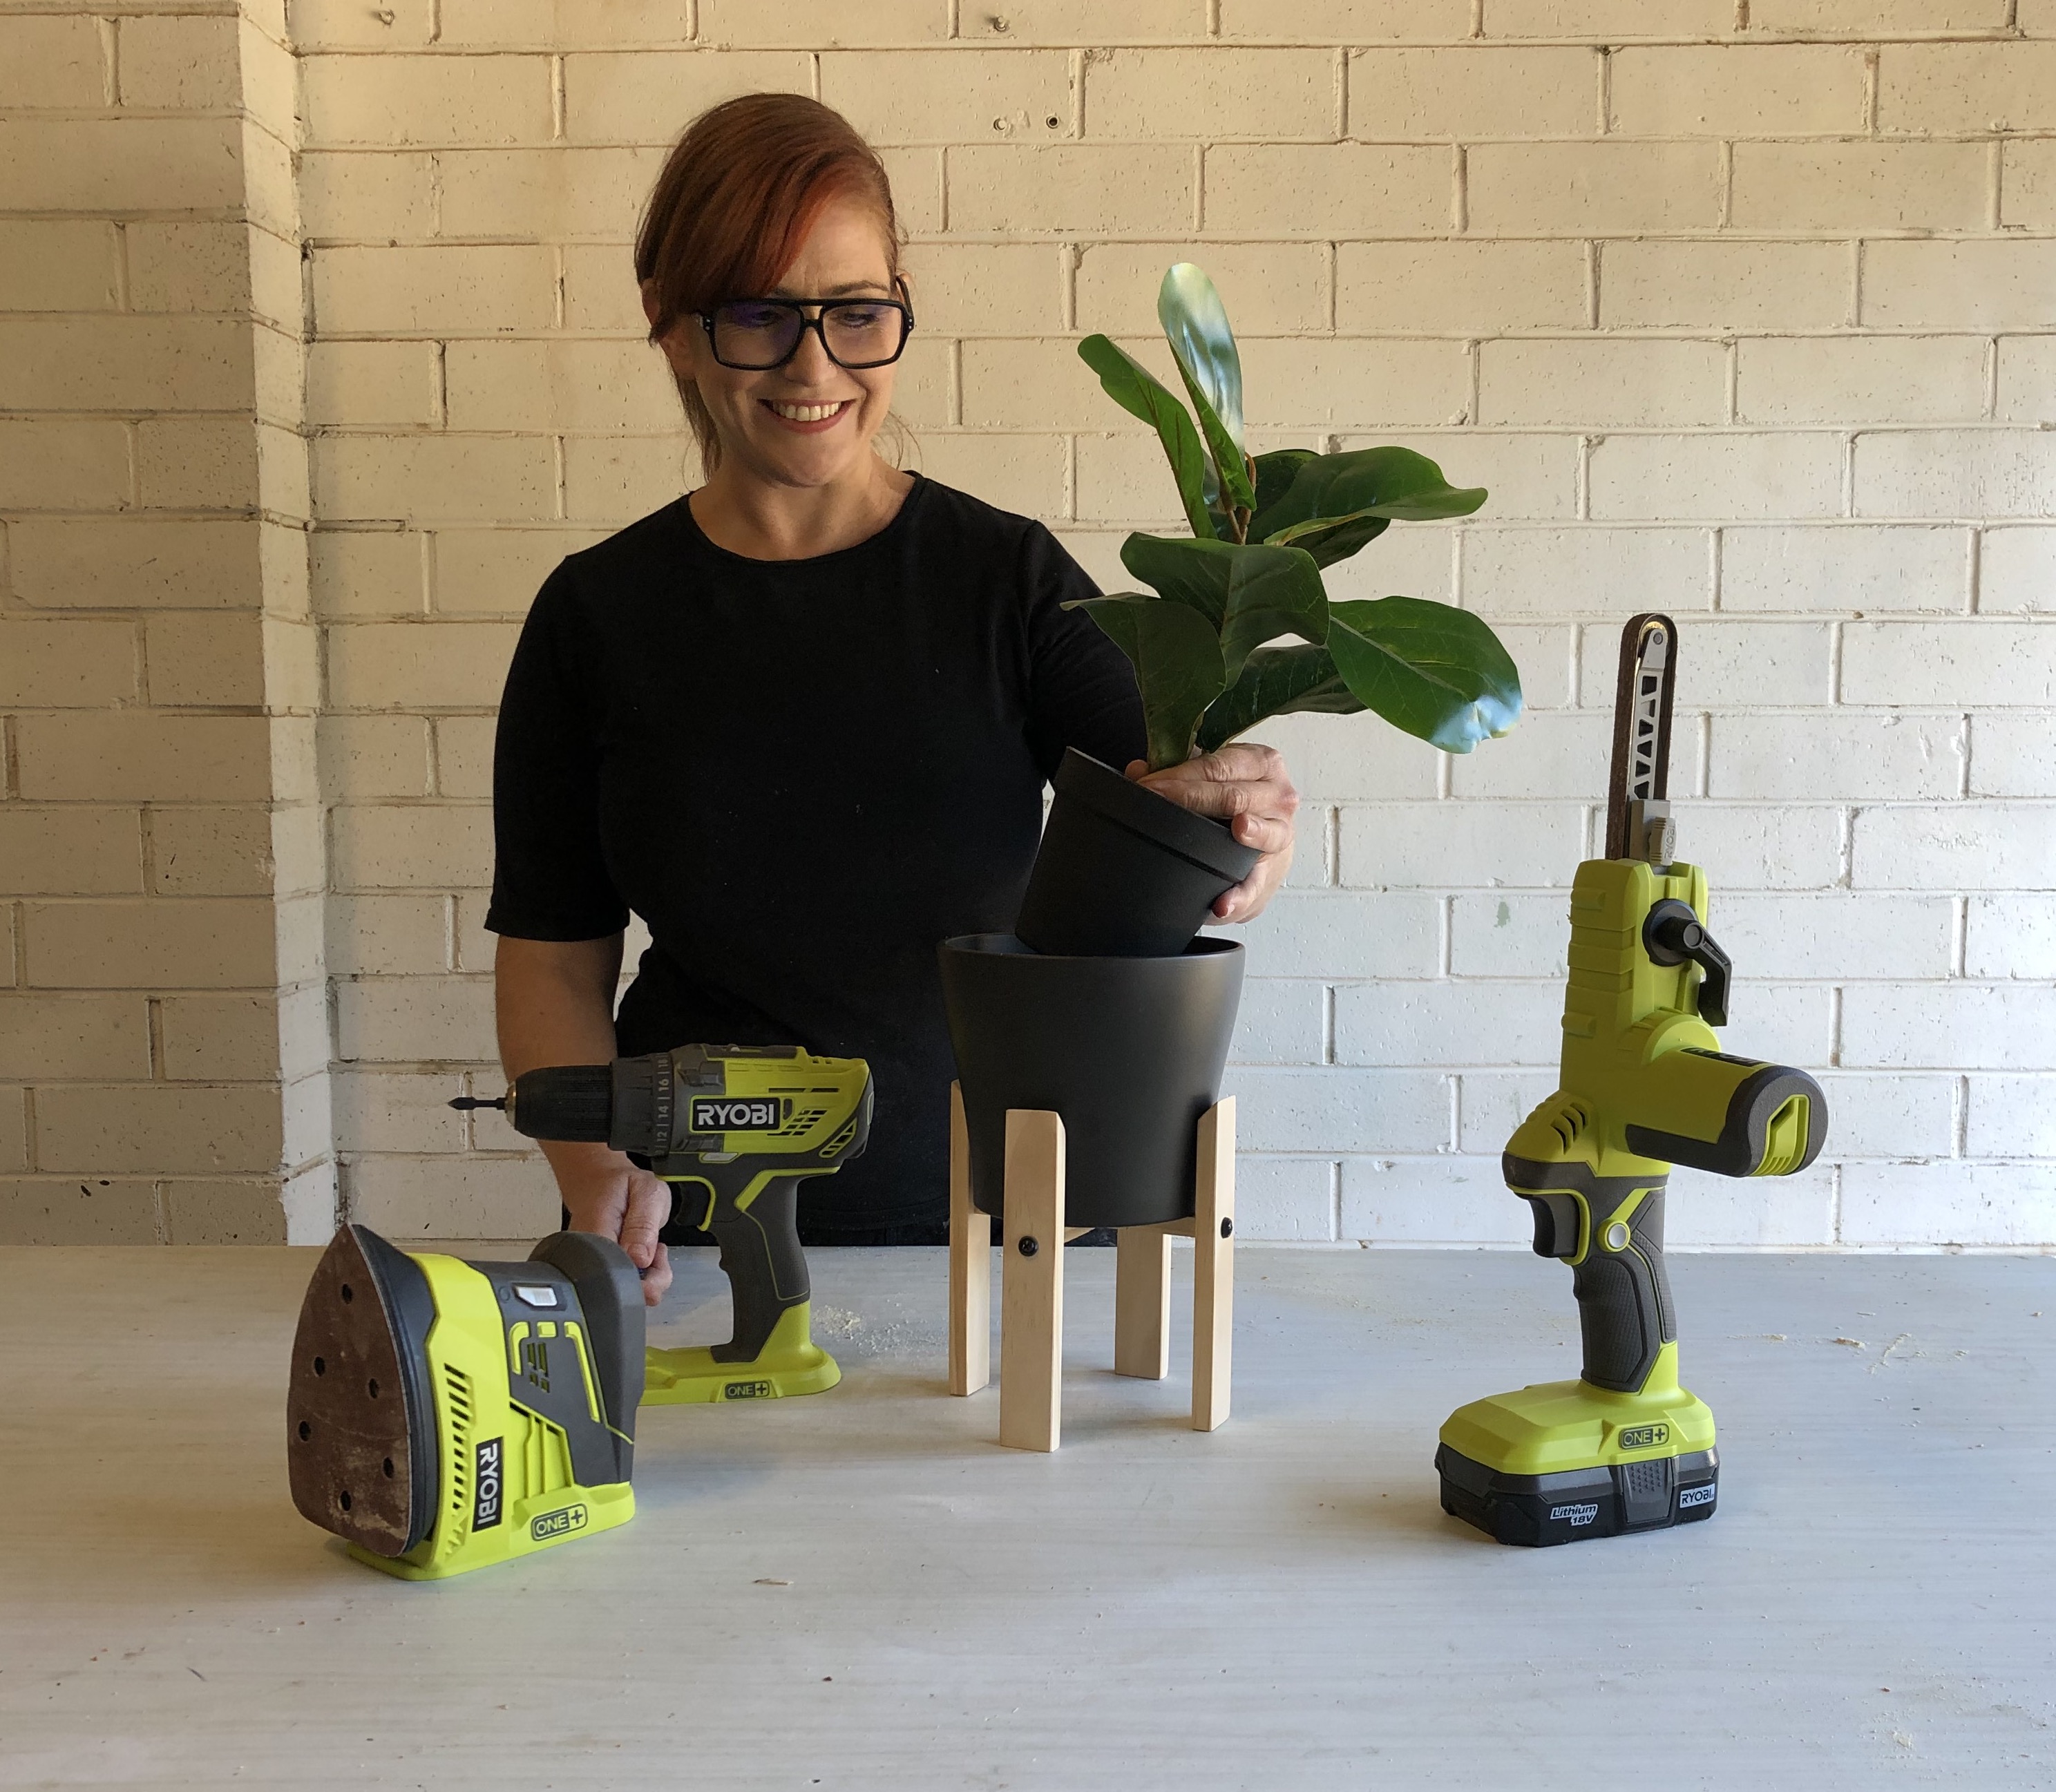
Add the pot and your favourite plant!
.png?w=100&v=6c04e2a3-04b9-449c-97a0-86f8df82dcb1&itok=D7d8Umfz)

.png?w=100&v=07272864-2df4-45f0-aa93-568aa3920466&itok=Lj7SSICT)

.png?w=100&v=4297d0f7-8d6a-4632-bff2-7c593a97d3cb&itok=fnsLcLhG)


.png?w=100&v=6fe76245-ac4a-4aa3-986d-04347f143028&itok=dFif4A99)


_Group%20shots.png?crop=yes&k=c&w=125&h=125)


