


_ANZ-Group-shot_v2.png?w=100&v=f3a4afac-70ac-4758-8474-ff17fe163b1c&itok=Z_Qi2FlQ)


.png?w=100&v=76611618-74f9-4150-85bd-f3f88e49eece&itok=5ehAJg_Q)


.png?w=100&v=5053a26b-c336-46d9-b44e-ab91738f07c9&itok=efvsqCNL)


.png?w=100&v=d5f9955a-145e-481e-8081-5ddf4d74c7cc&itok=hKuNtBOw)


.png?w=100&v=2695a42f-b099-4e31-bdbd-c1b445ff88c0&itok=Md9-7E8t)


%20(2).png?w=100&v=a9b7928b-cece-4e51-b913-62ae316129a9&itok=fEHREjki)
_ANZ-Group-shot.png?w=100&v=72a4a24c-7670-47f7-a68e-edeaafa41c8d&itok=k25pq8iJ)
_ANZ-Group-shots.png?w=100&v=4d5e1cd2-60a9-45da-bcfb-1b8500ccaea9&itok=v6A67Pxg)


Drill into timber, soft metal and hard materials including brick and concrete with the RYOBI 18V ONE+ Hammer Drill.

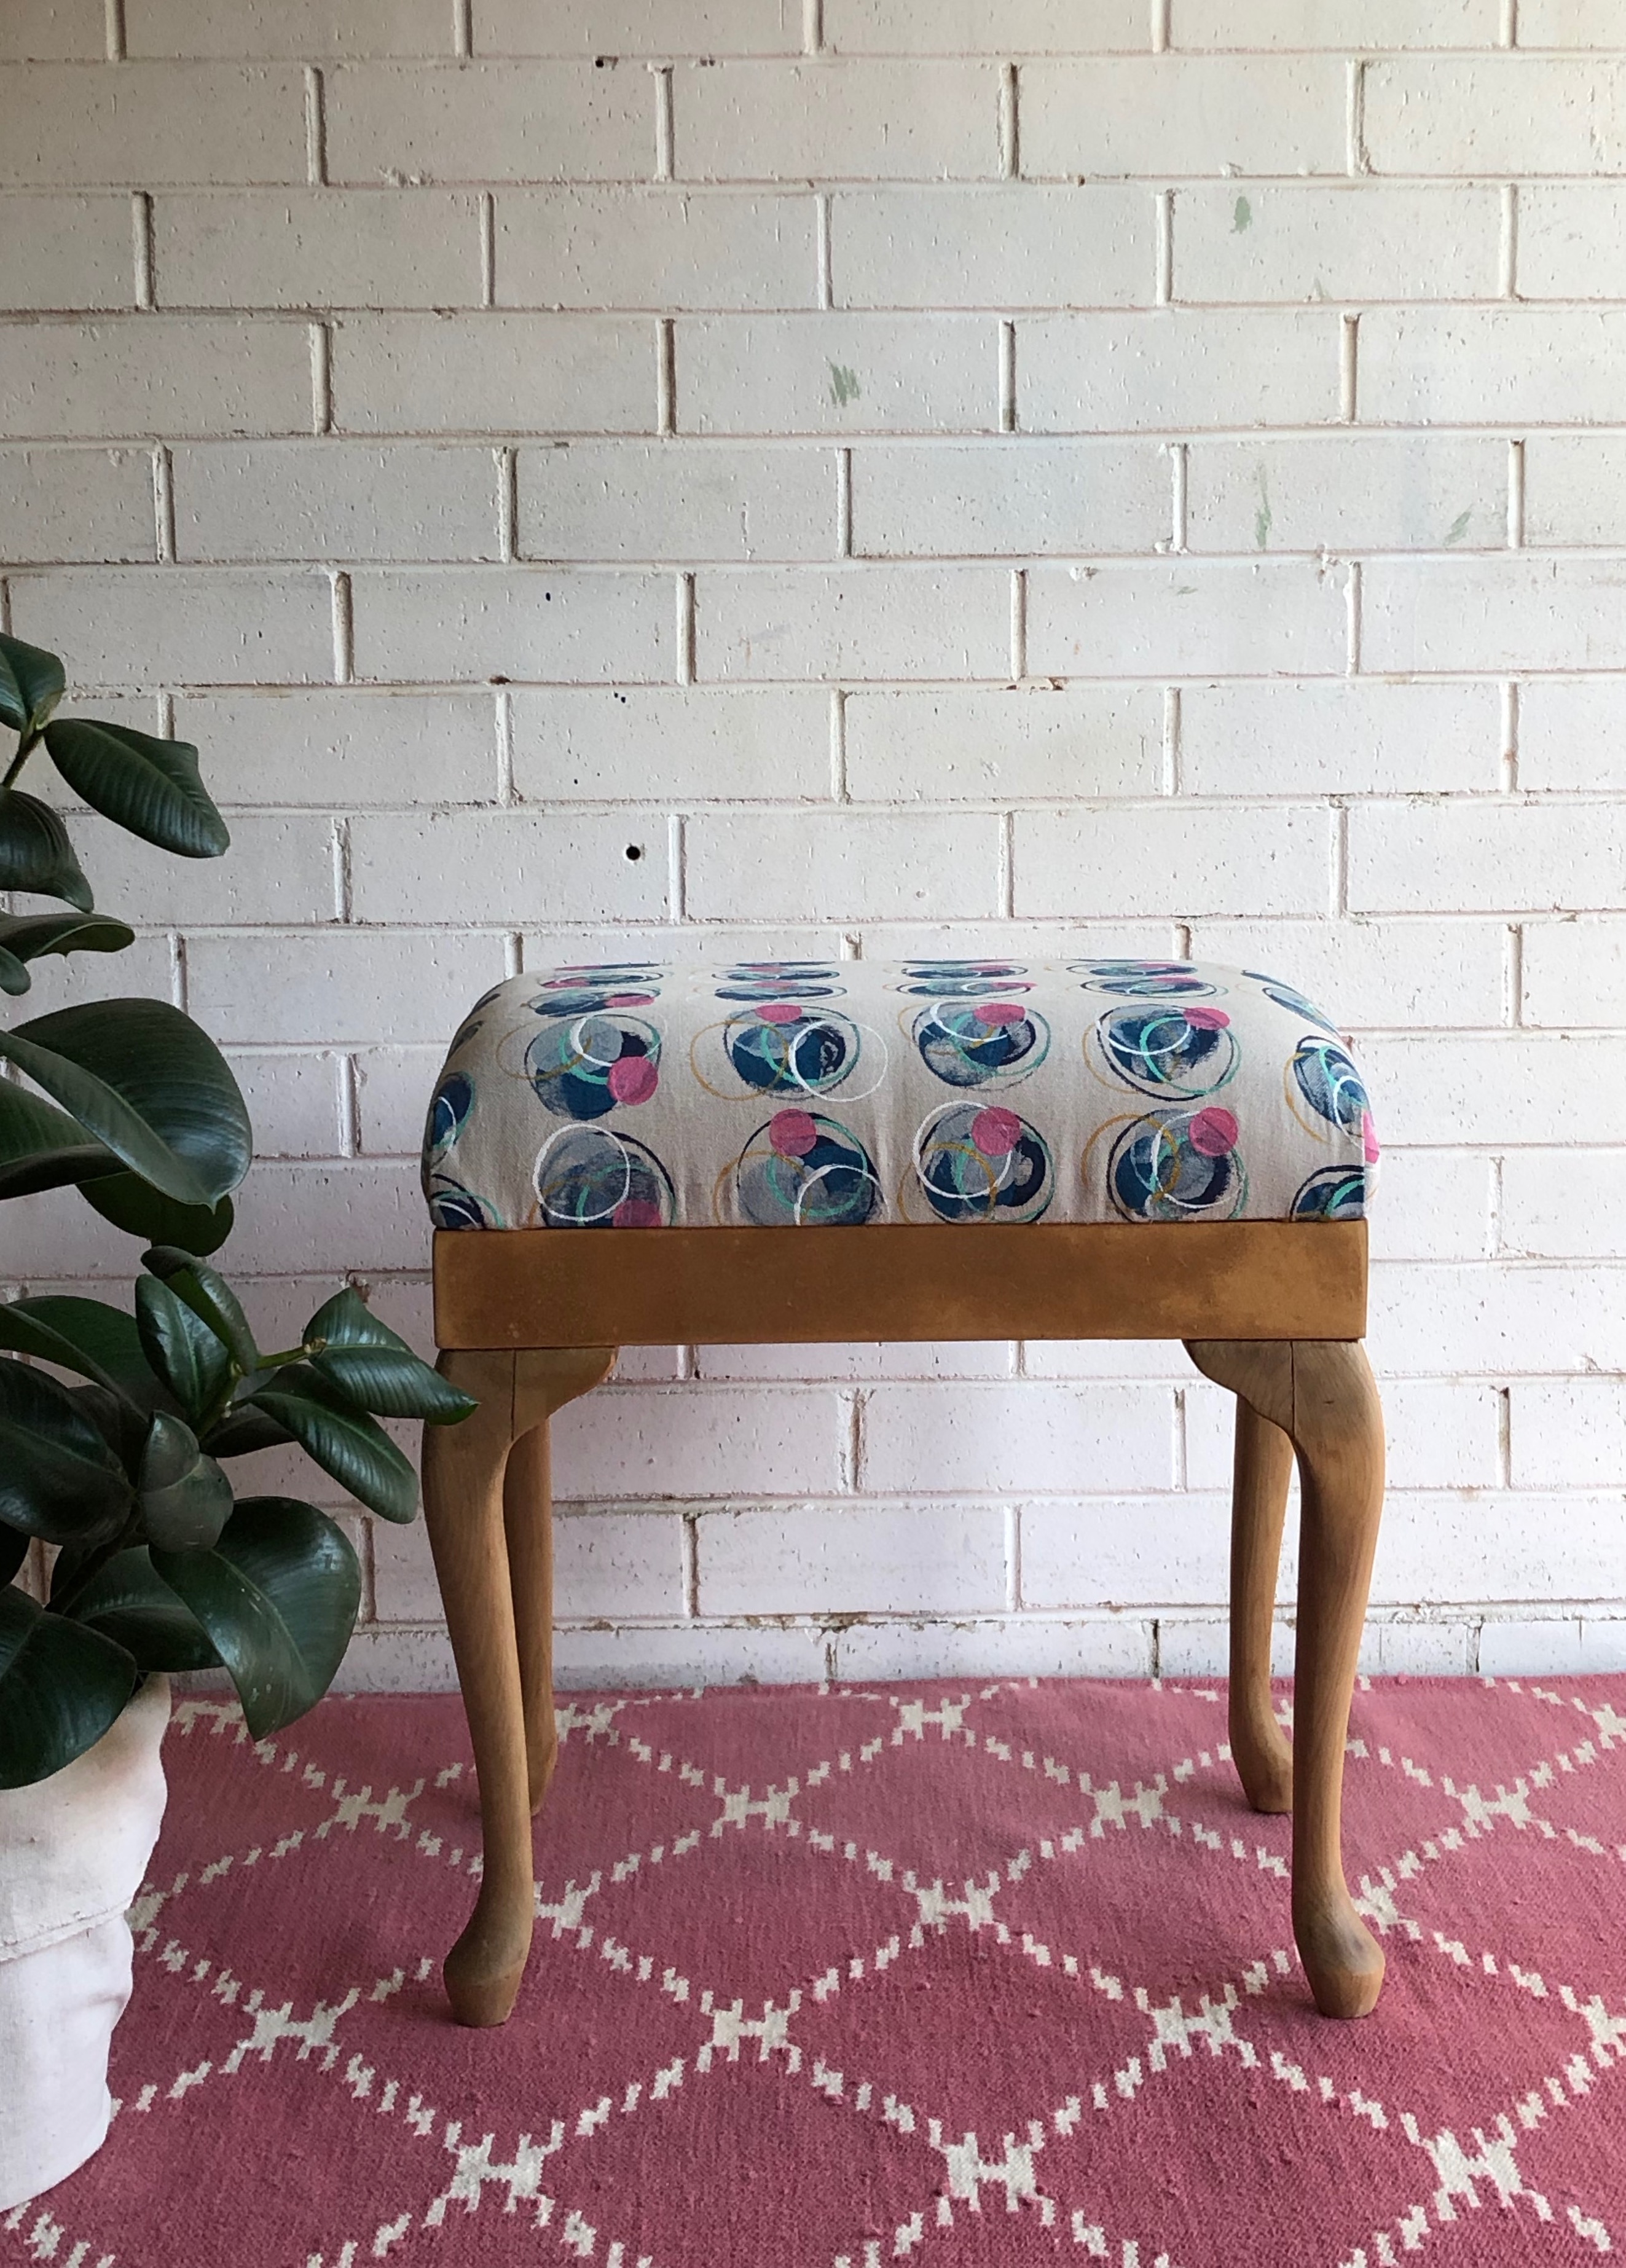
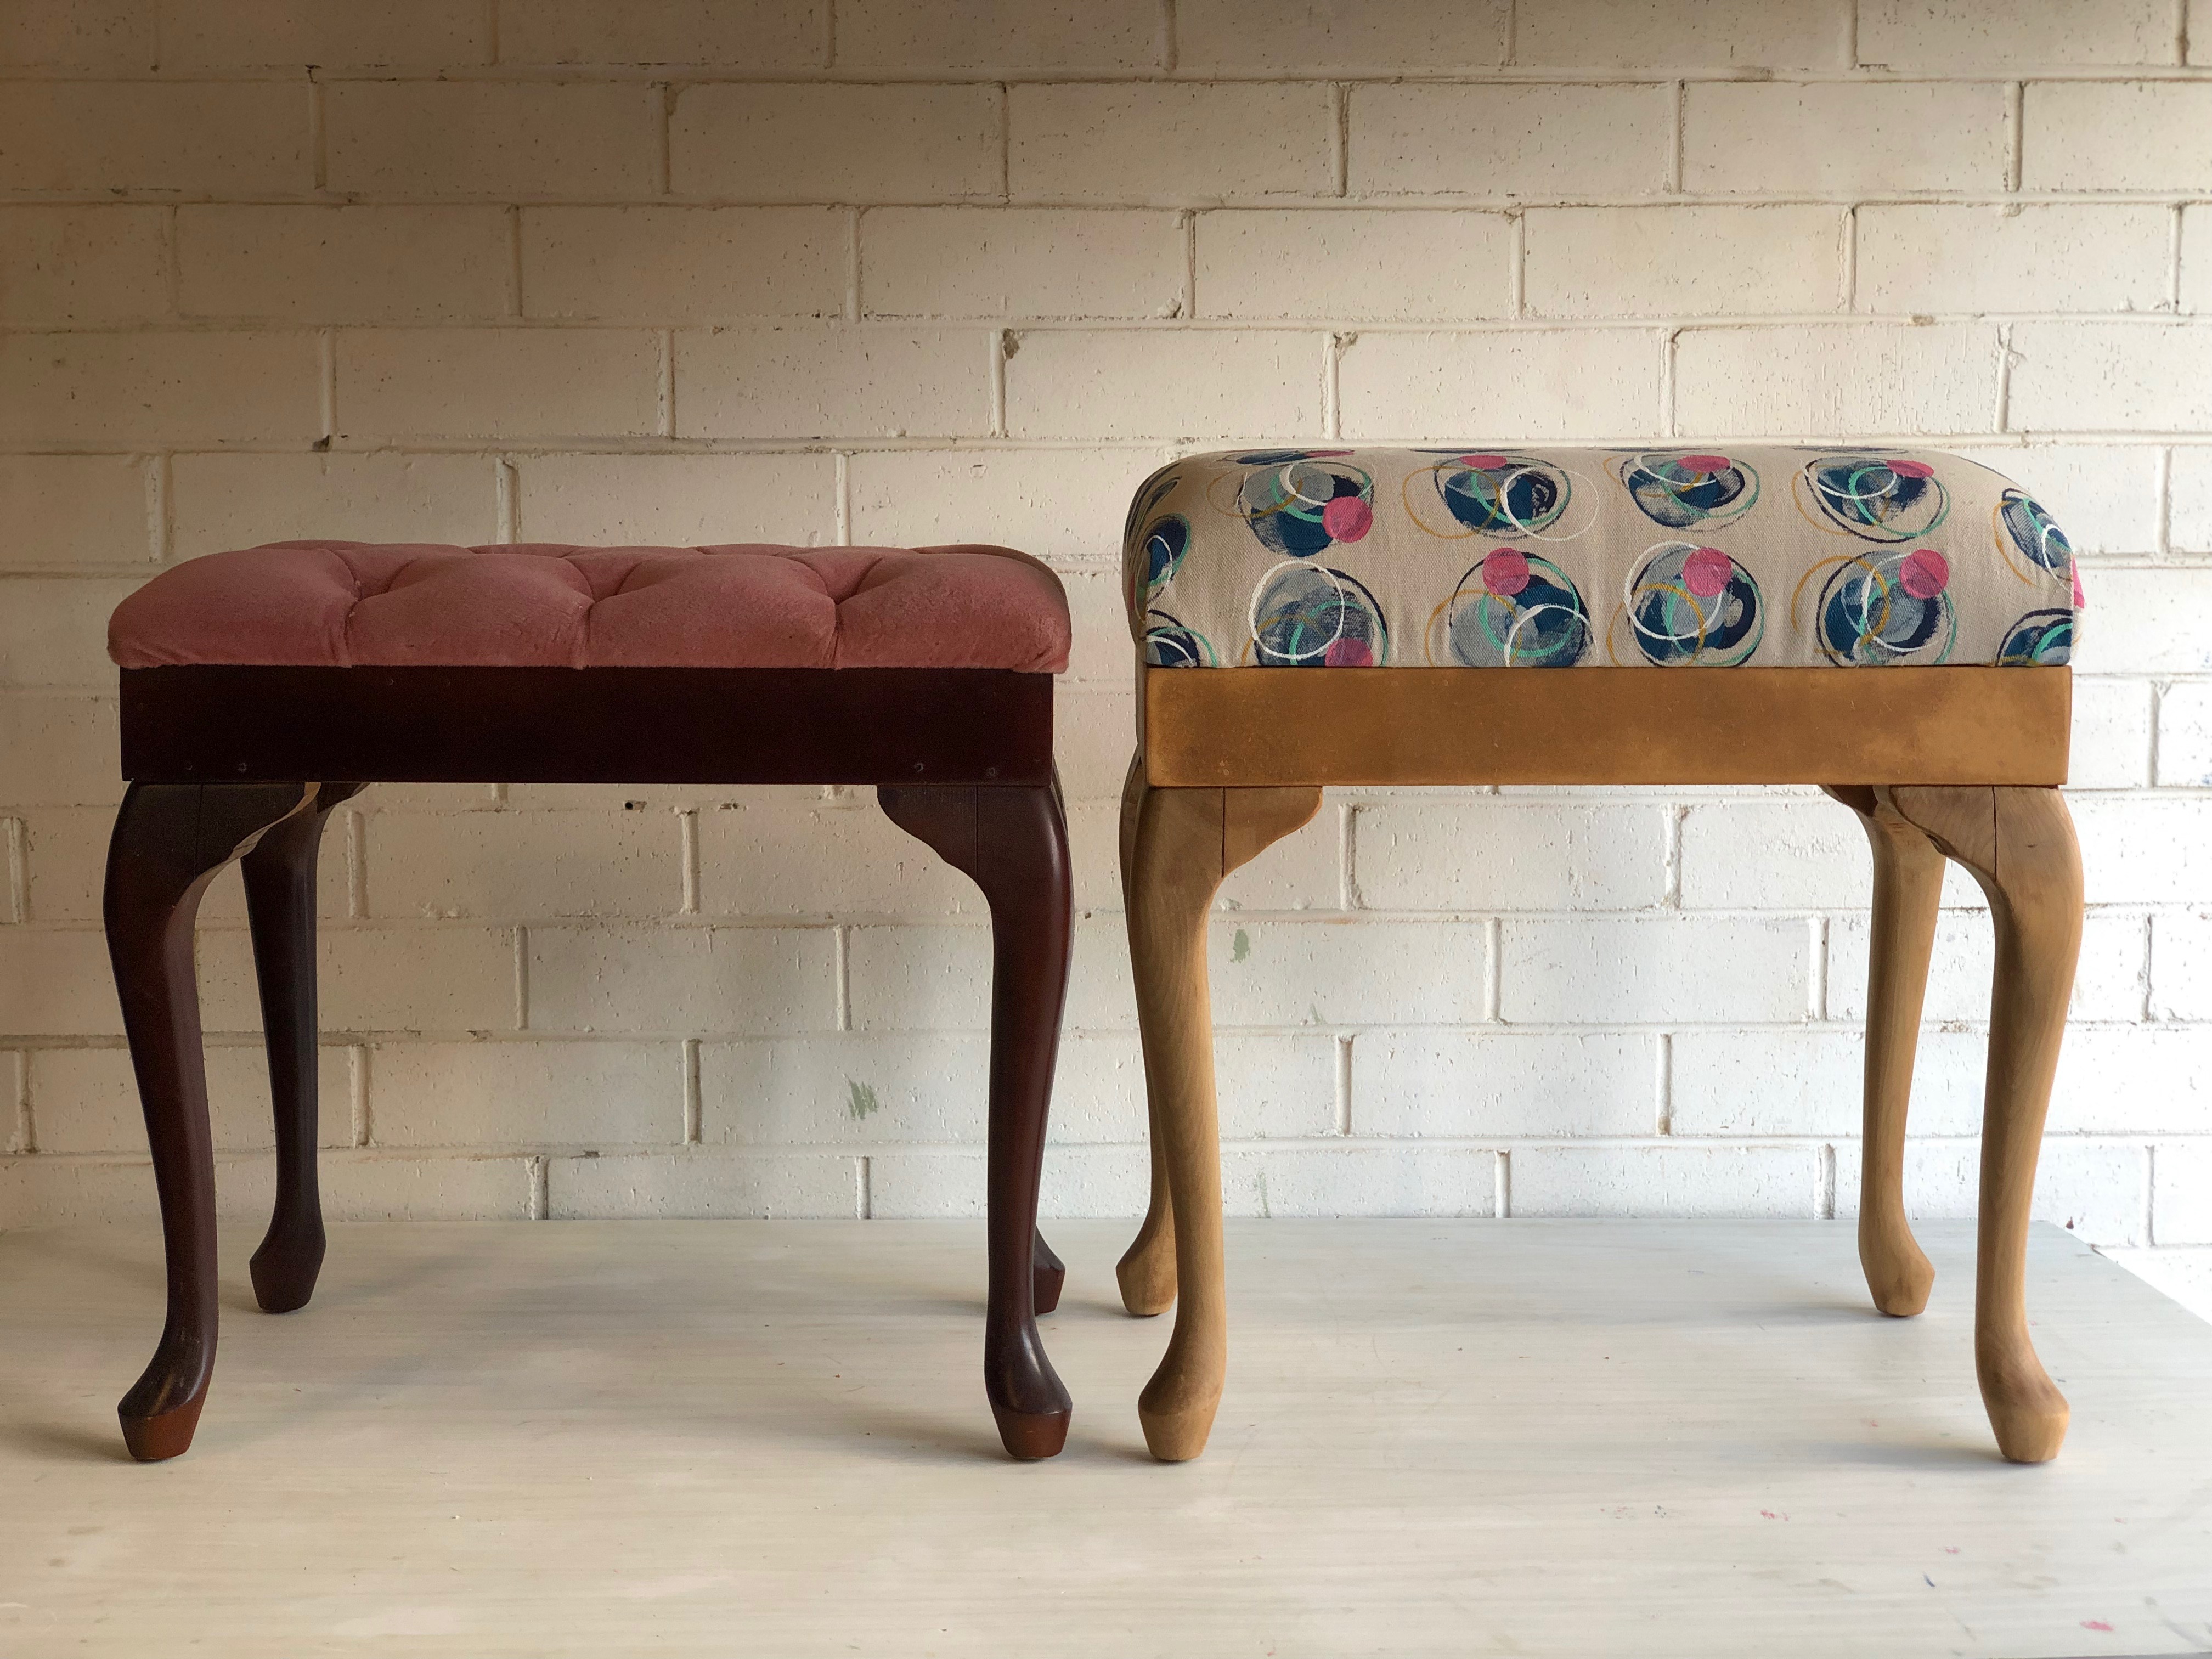
‘The key to revamping timber furniture is to remove the often dated varnish to reveal the natural woodgrain,’ says DIY specialist Natasha Dickins at Little Red Industries.
Difficulty: Easy
Category: Outdoor furniture

Separate the seat and frame by turning the stool over and using a drill to remove the fasteners. To remove the upholstery, work from the back of the seat, using a screwdriver to loosen the staples while pulling the fabric away.
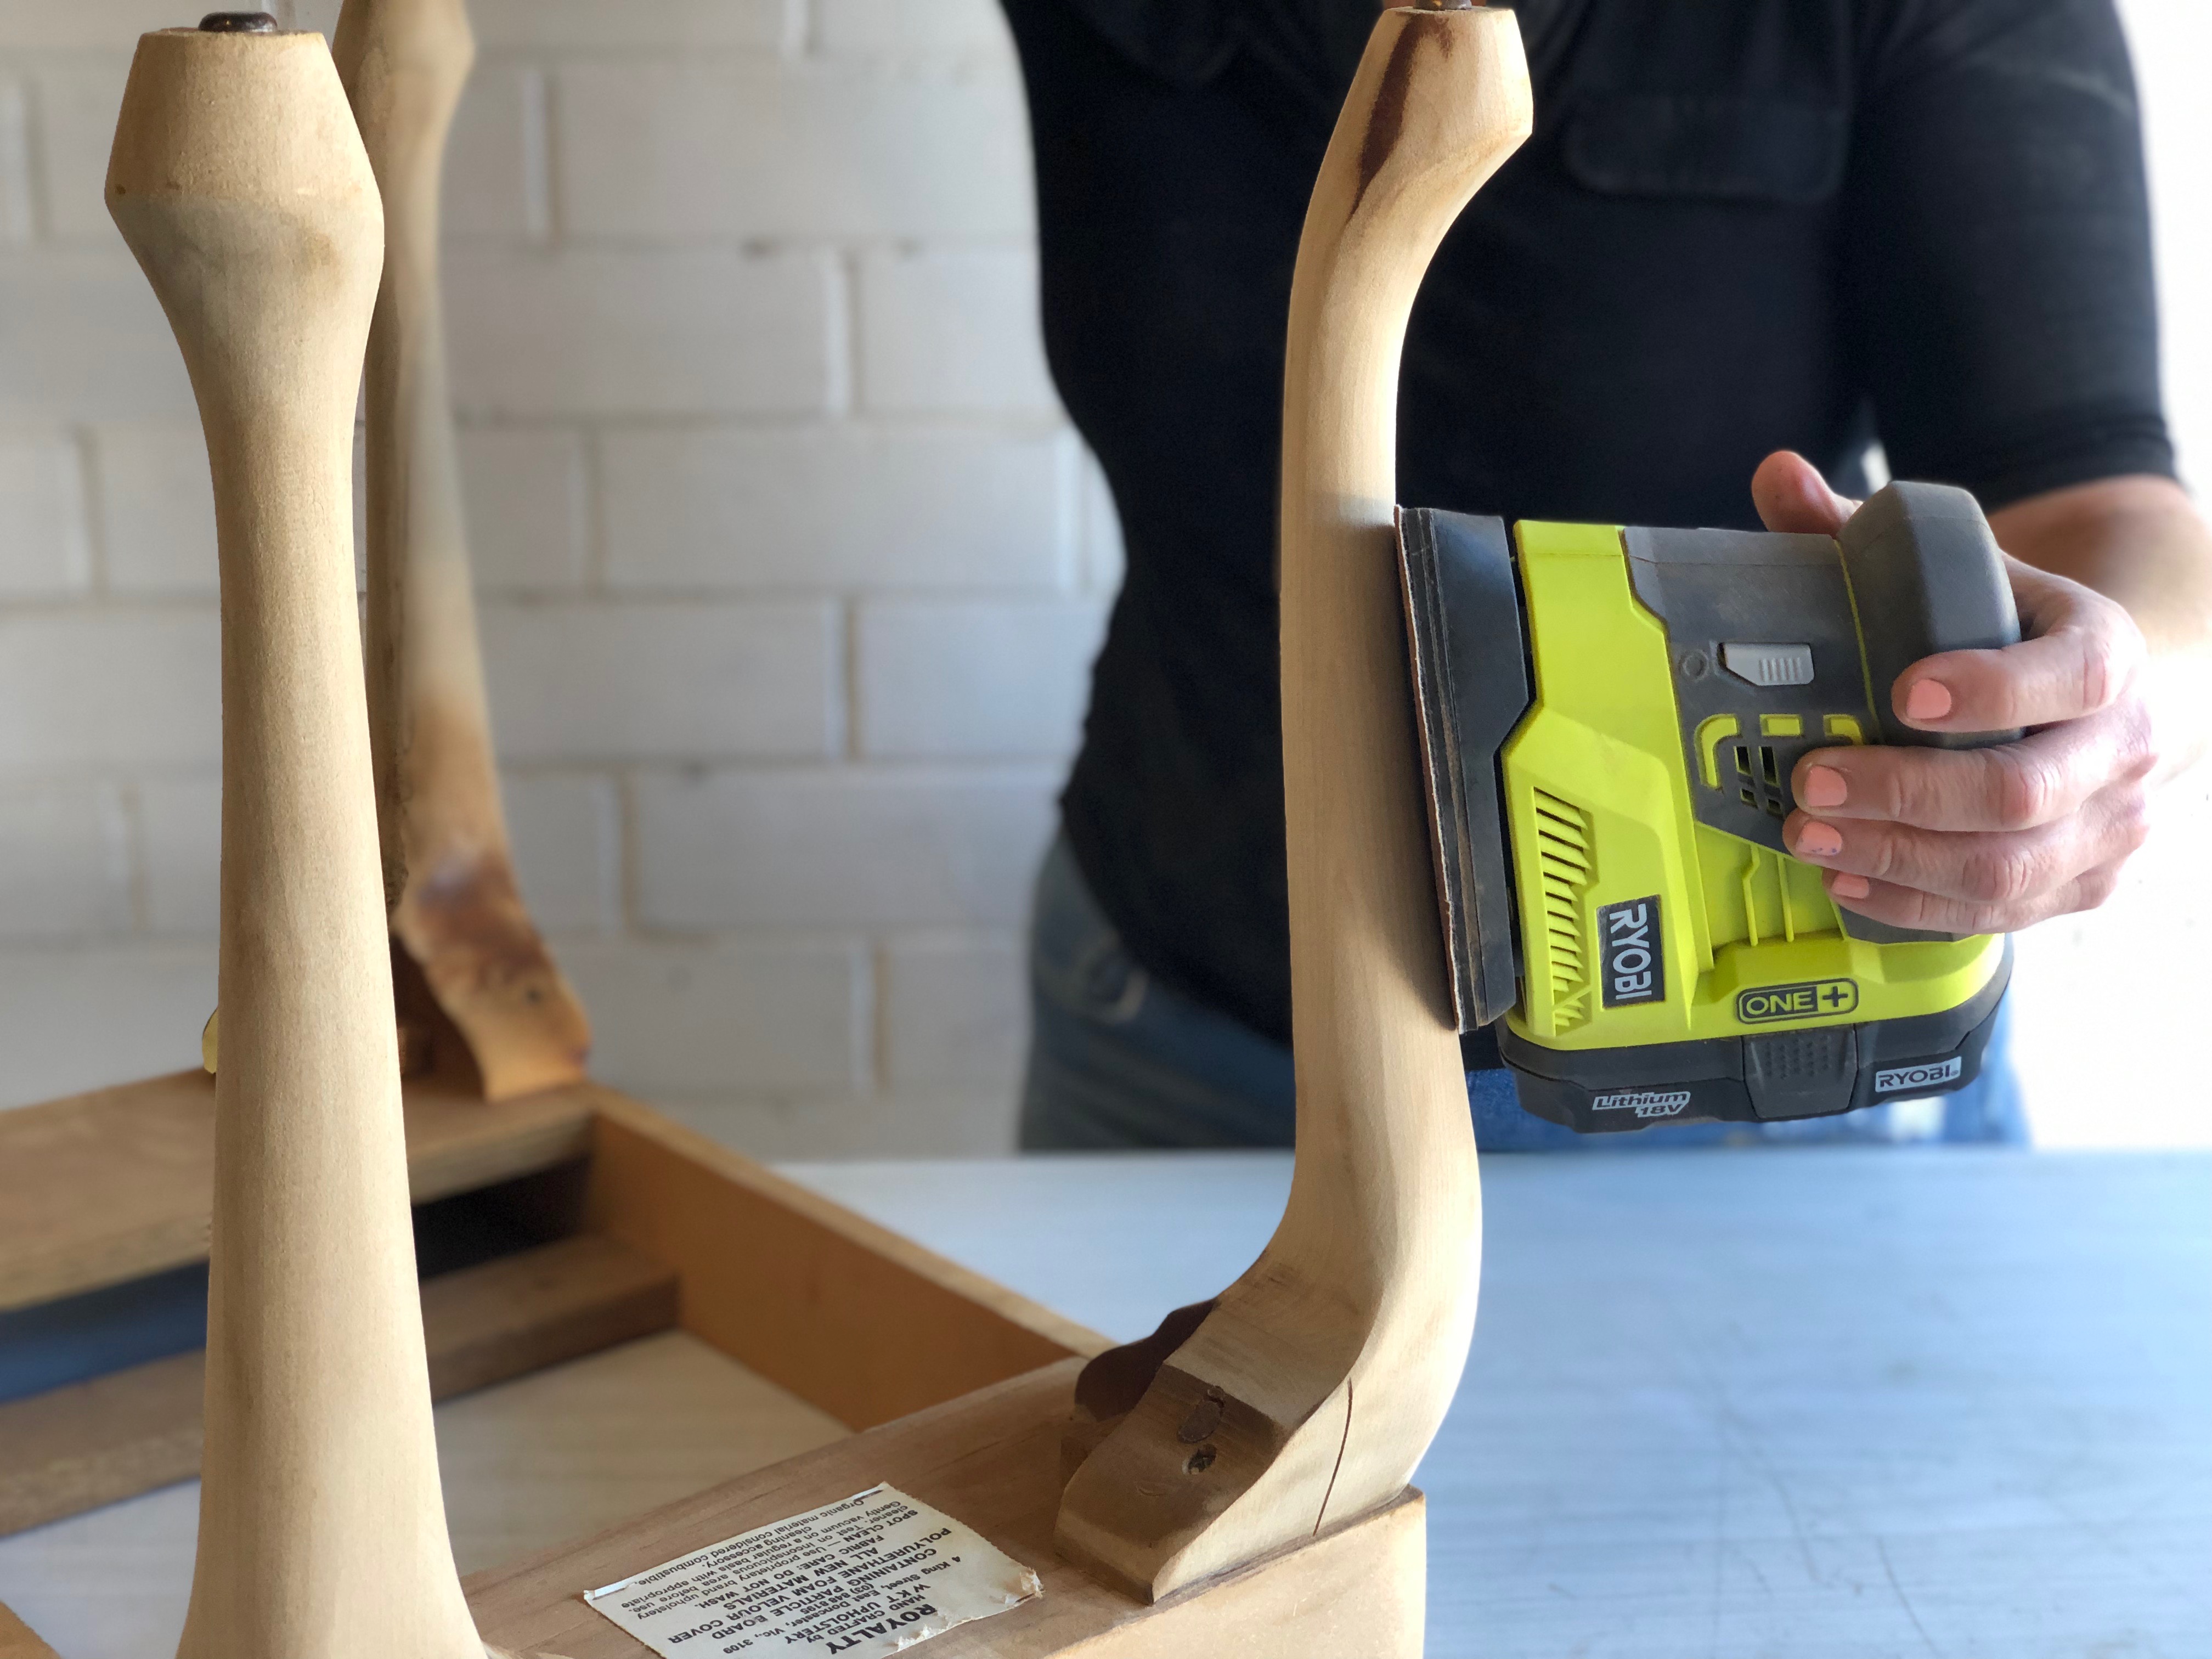
Remove the varnish completely by sanding all over with a corner sander using a 60-grit sanding pad. Use a rotary tool with 60-grit drum to sand into the joints, around corners and over the curved areas.
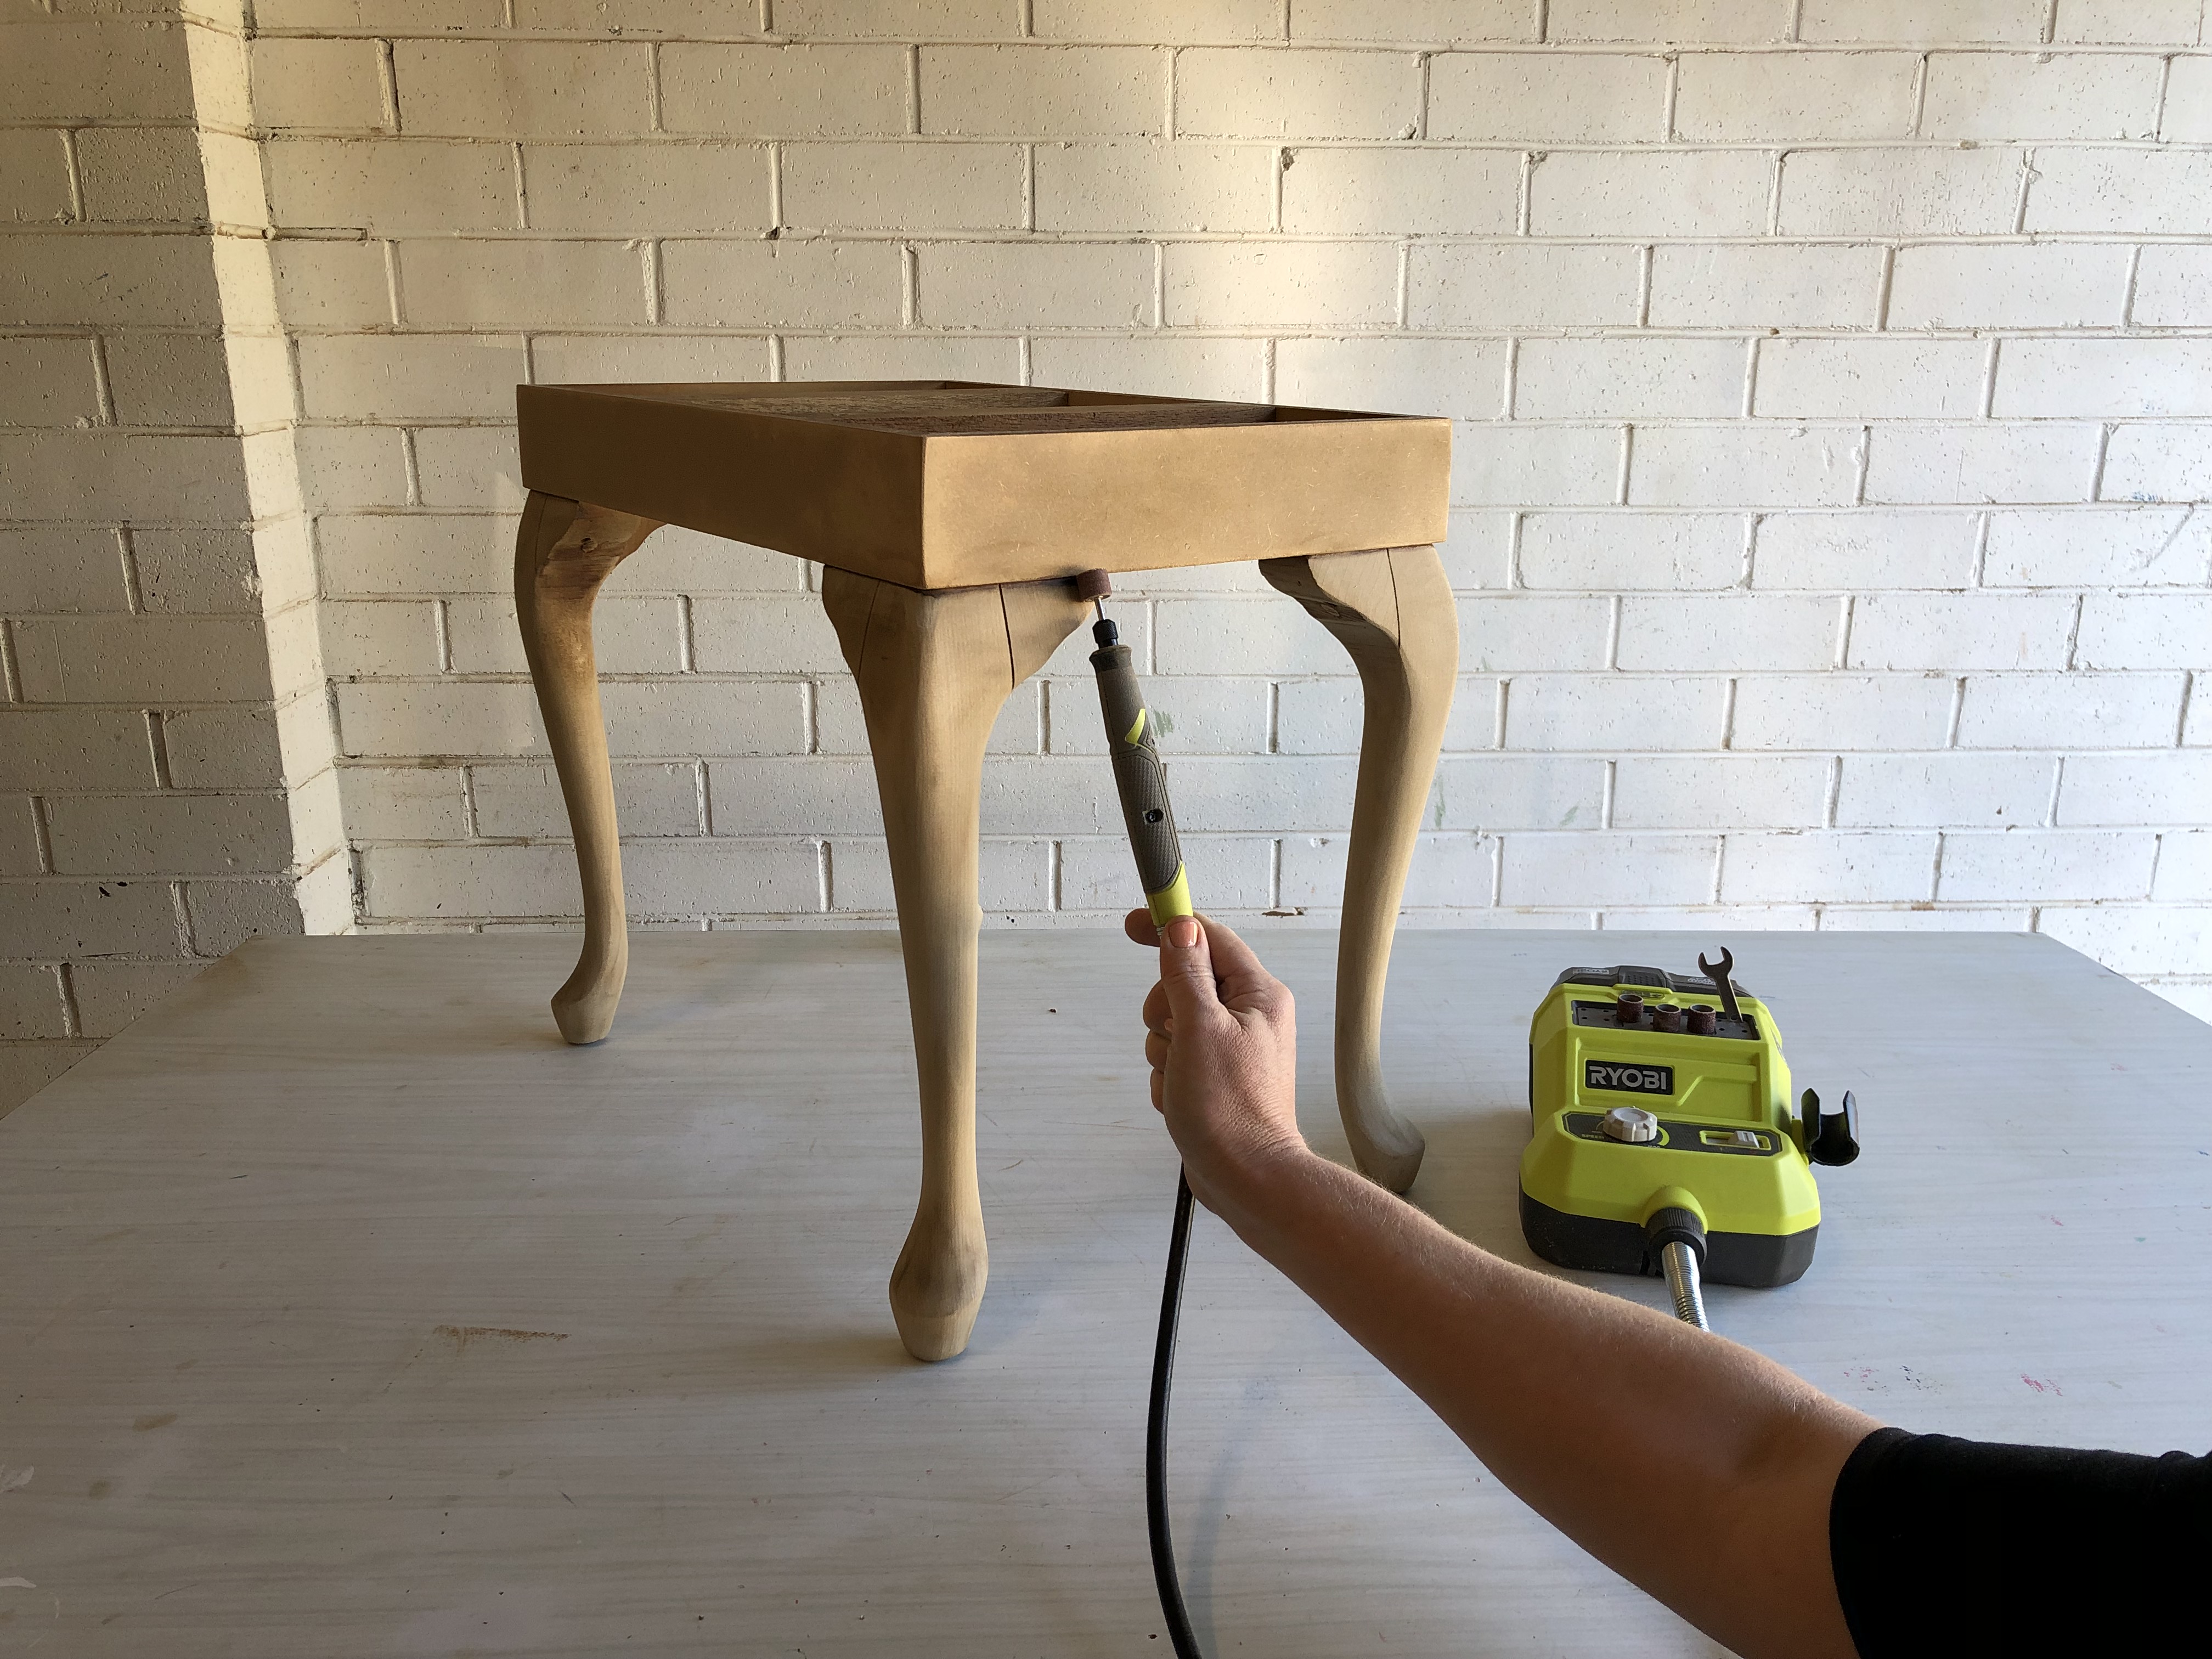
After removing the varnish, use the corner sander smooth over all surfaces with a 240-grit sanding pad, using the rotary tool with 240-grit sanding drum to detail into the joints, edges and curves.
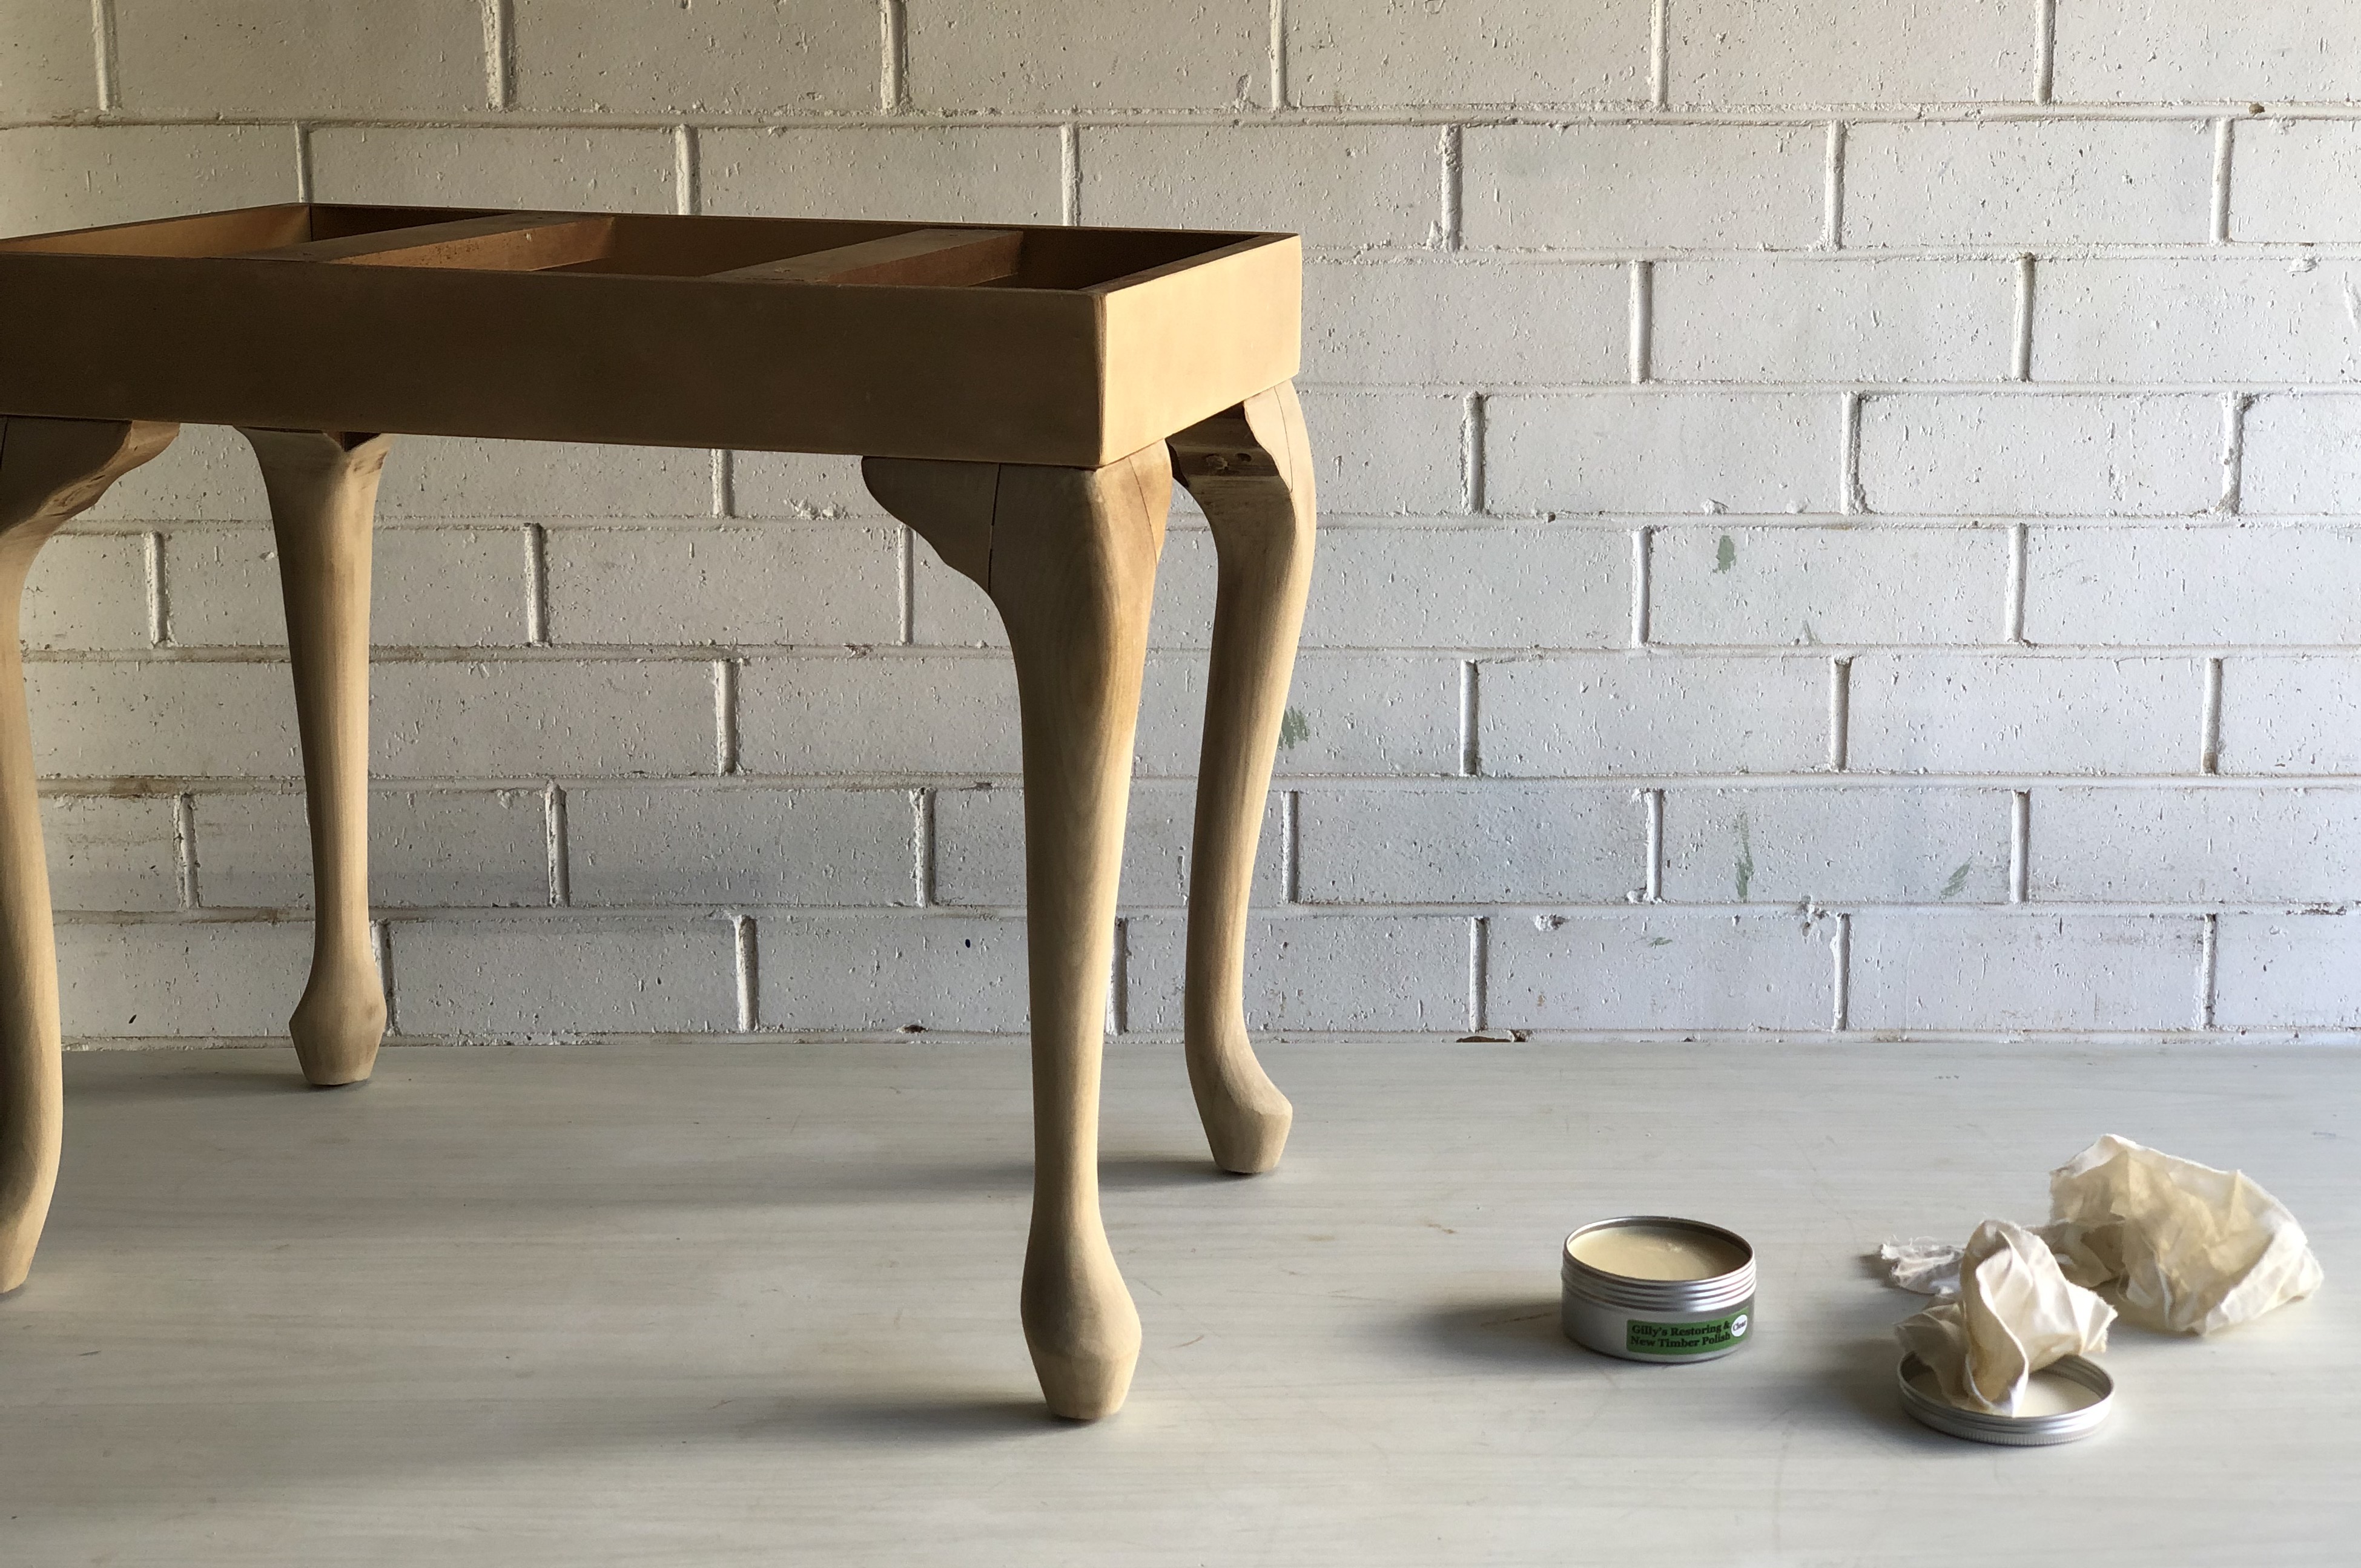
Use two small clean cloths to apply furniture wax, using one to rub the wax into the timber and the other to buff it as you go, applying at least two coats.
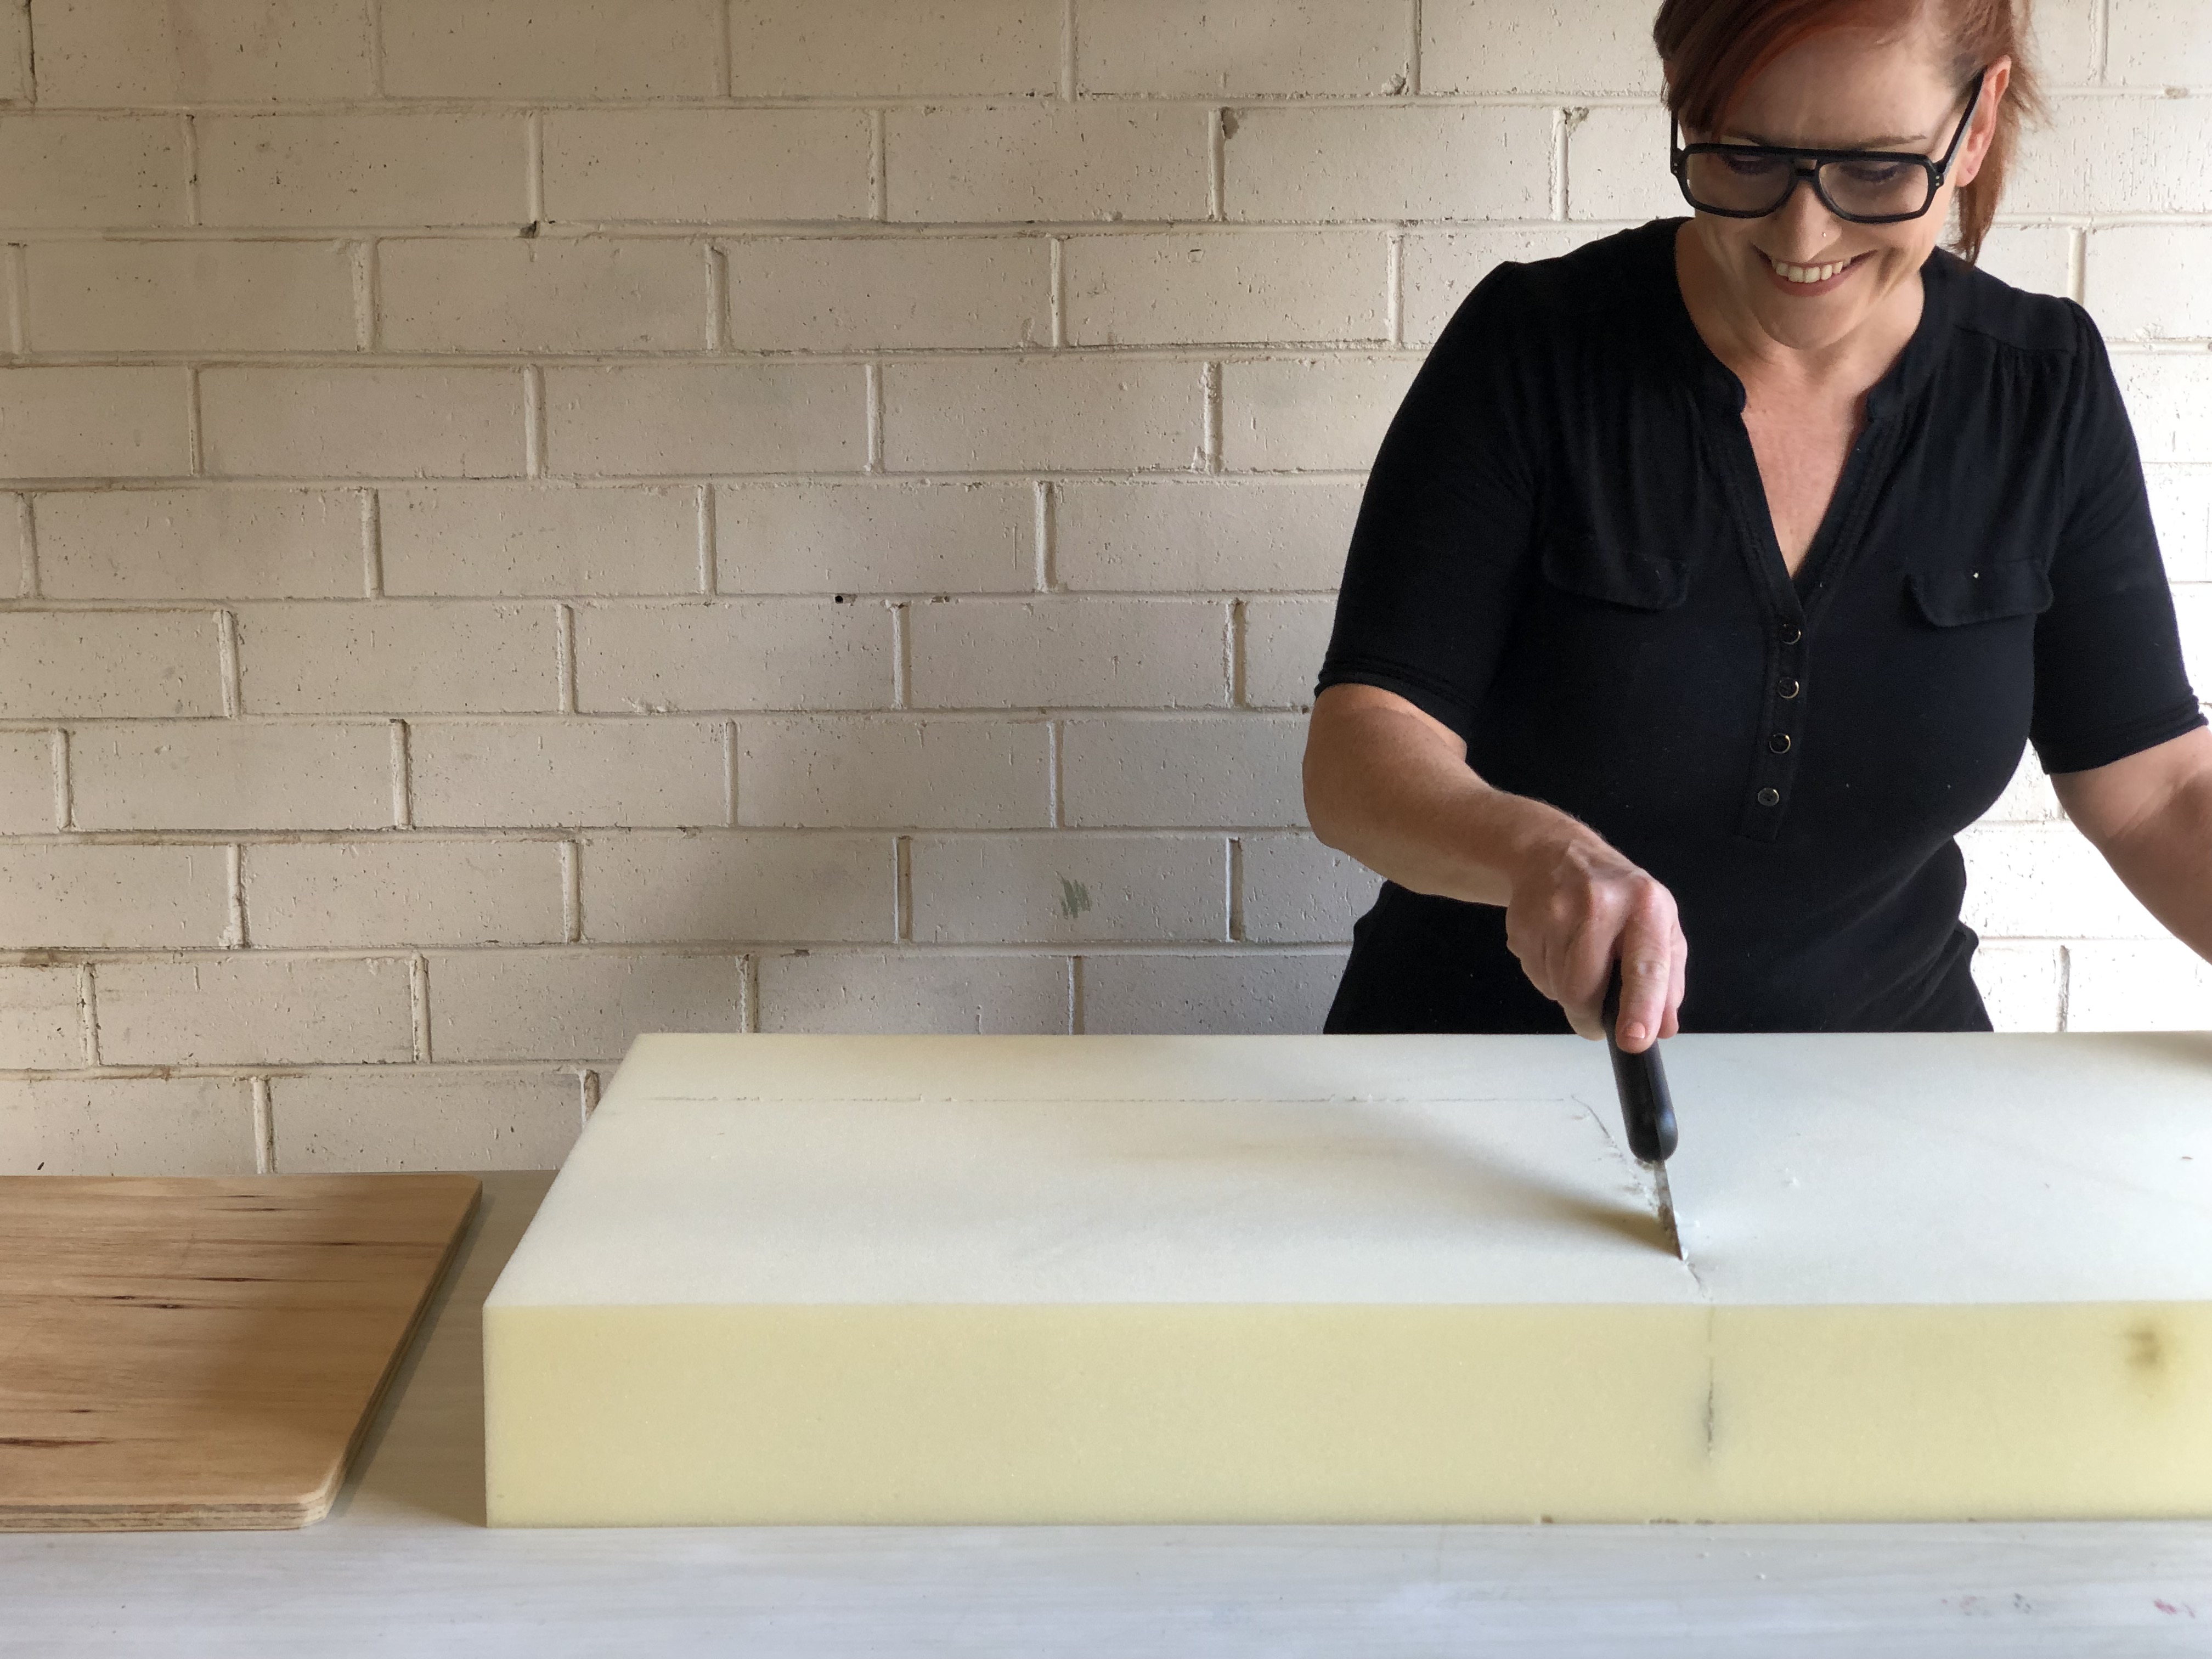
Position the base onto the foam, mark 5mm from all edges then cut using a small pull saw.
NATASHA’S TIP: While you could use a bread knife to cut the foam, I used a small dovetail pull saw. The blade’s teeth face the opposite direction to most saws, so it cuts with a pulling motion, rather than pushing as with most saws, making it easier to use.
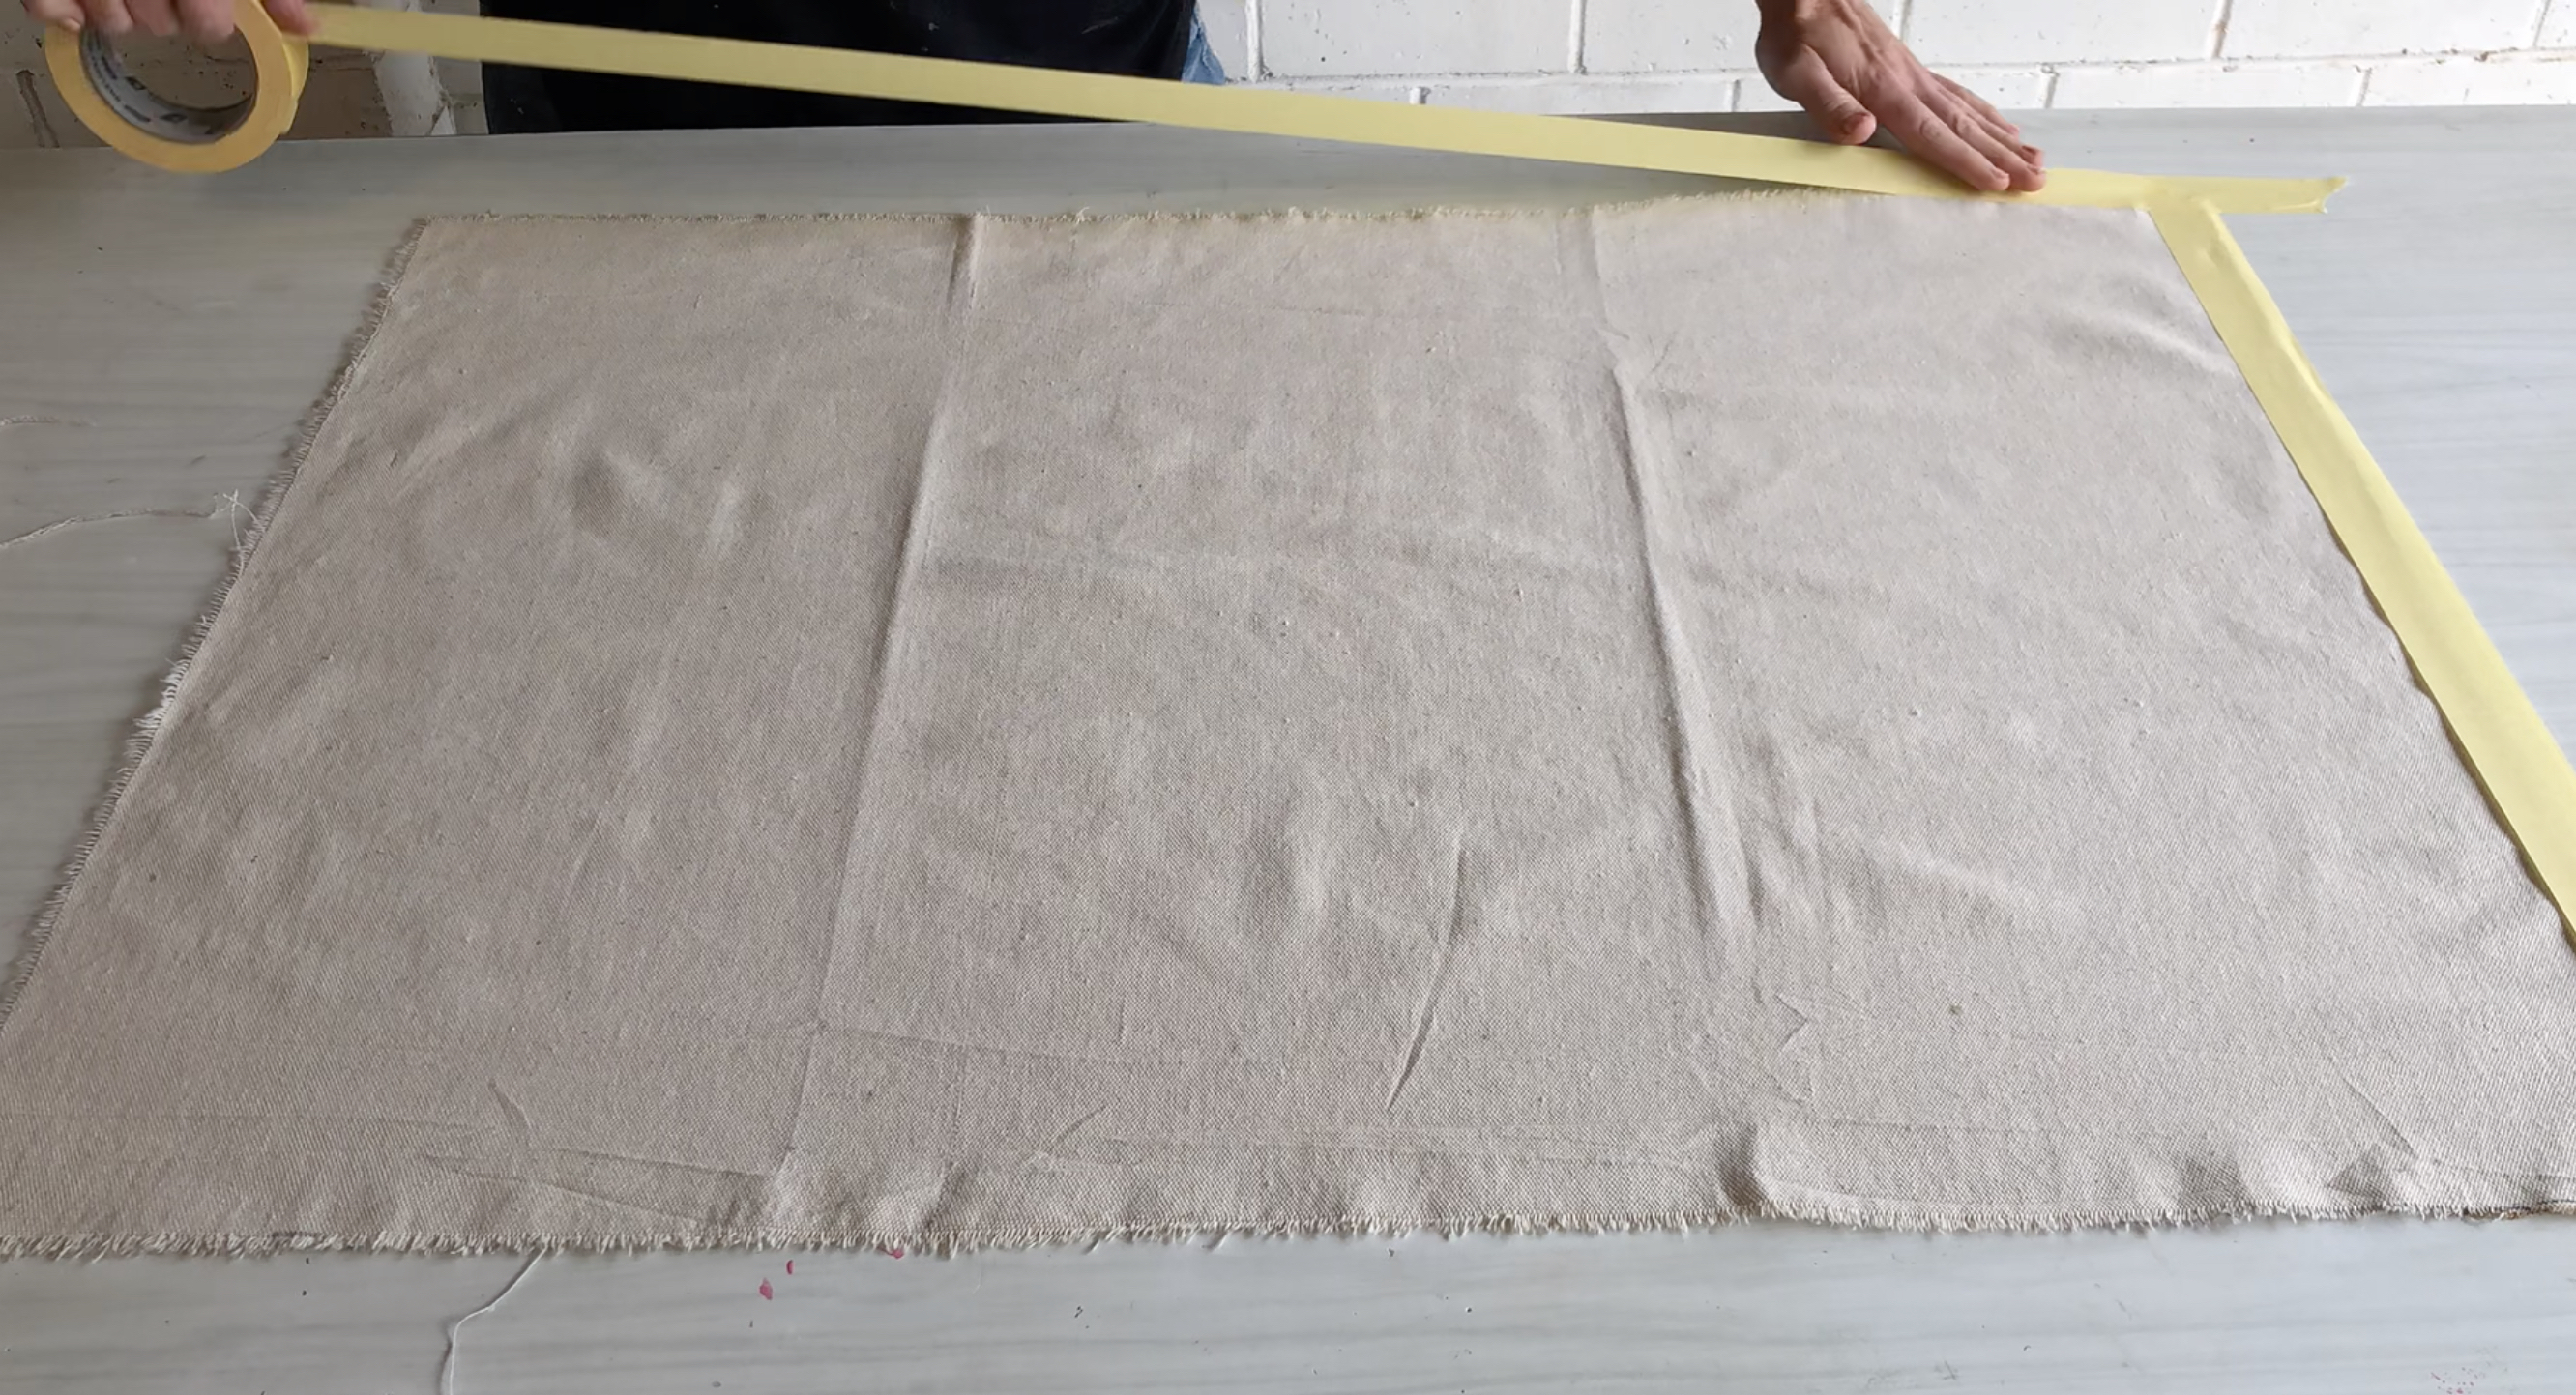
Spread out the drop sheet, measure and mark 900mm x 600mm, snip the marks with scissors then rip the fabric to size. Tape around the edges to secure it to the work surface.
NATASHA’S TIP: Your footstool may be a different size, so check there’s enough cloth to wrap over and around the foam, with 50mm excess to fold underneath.
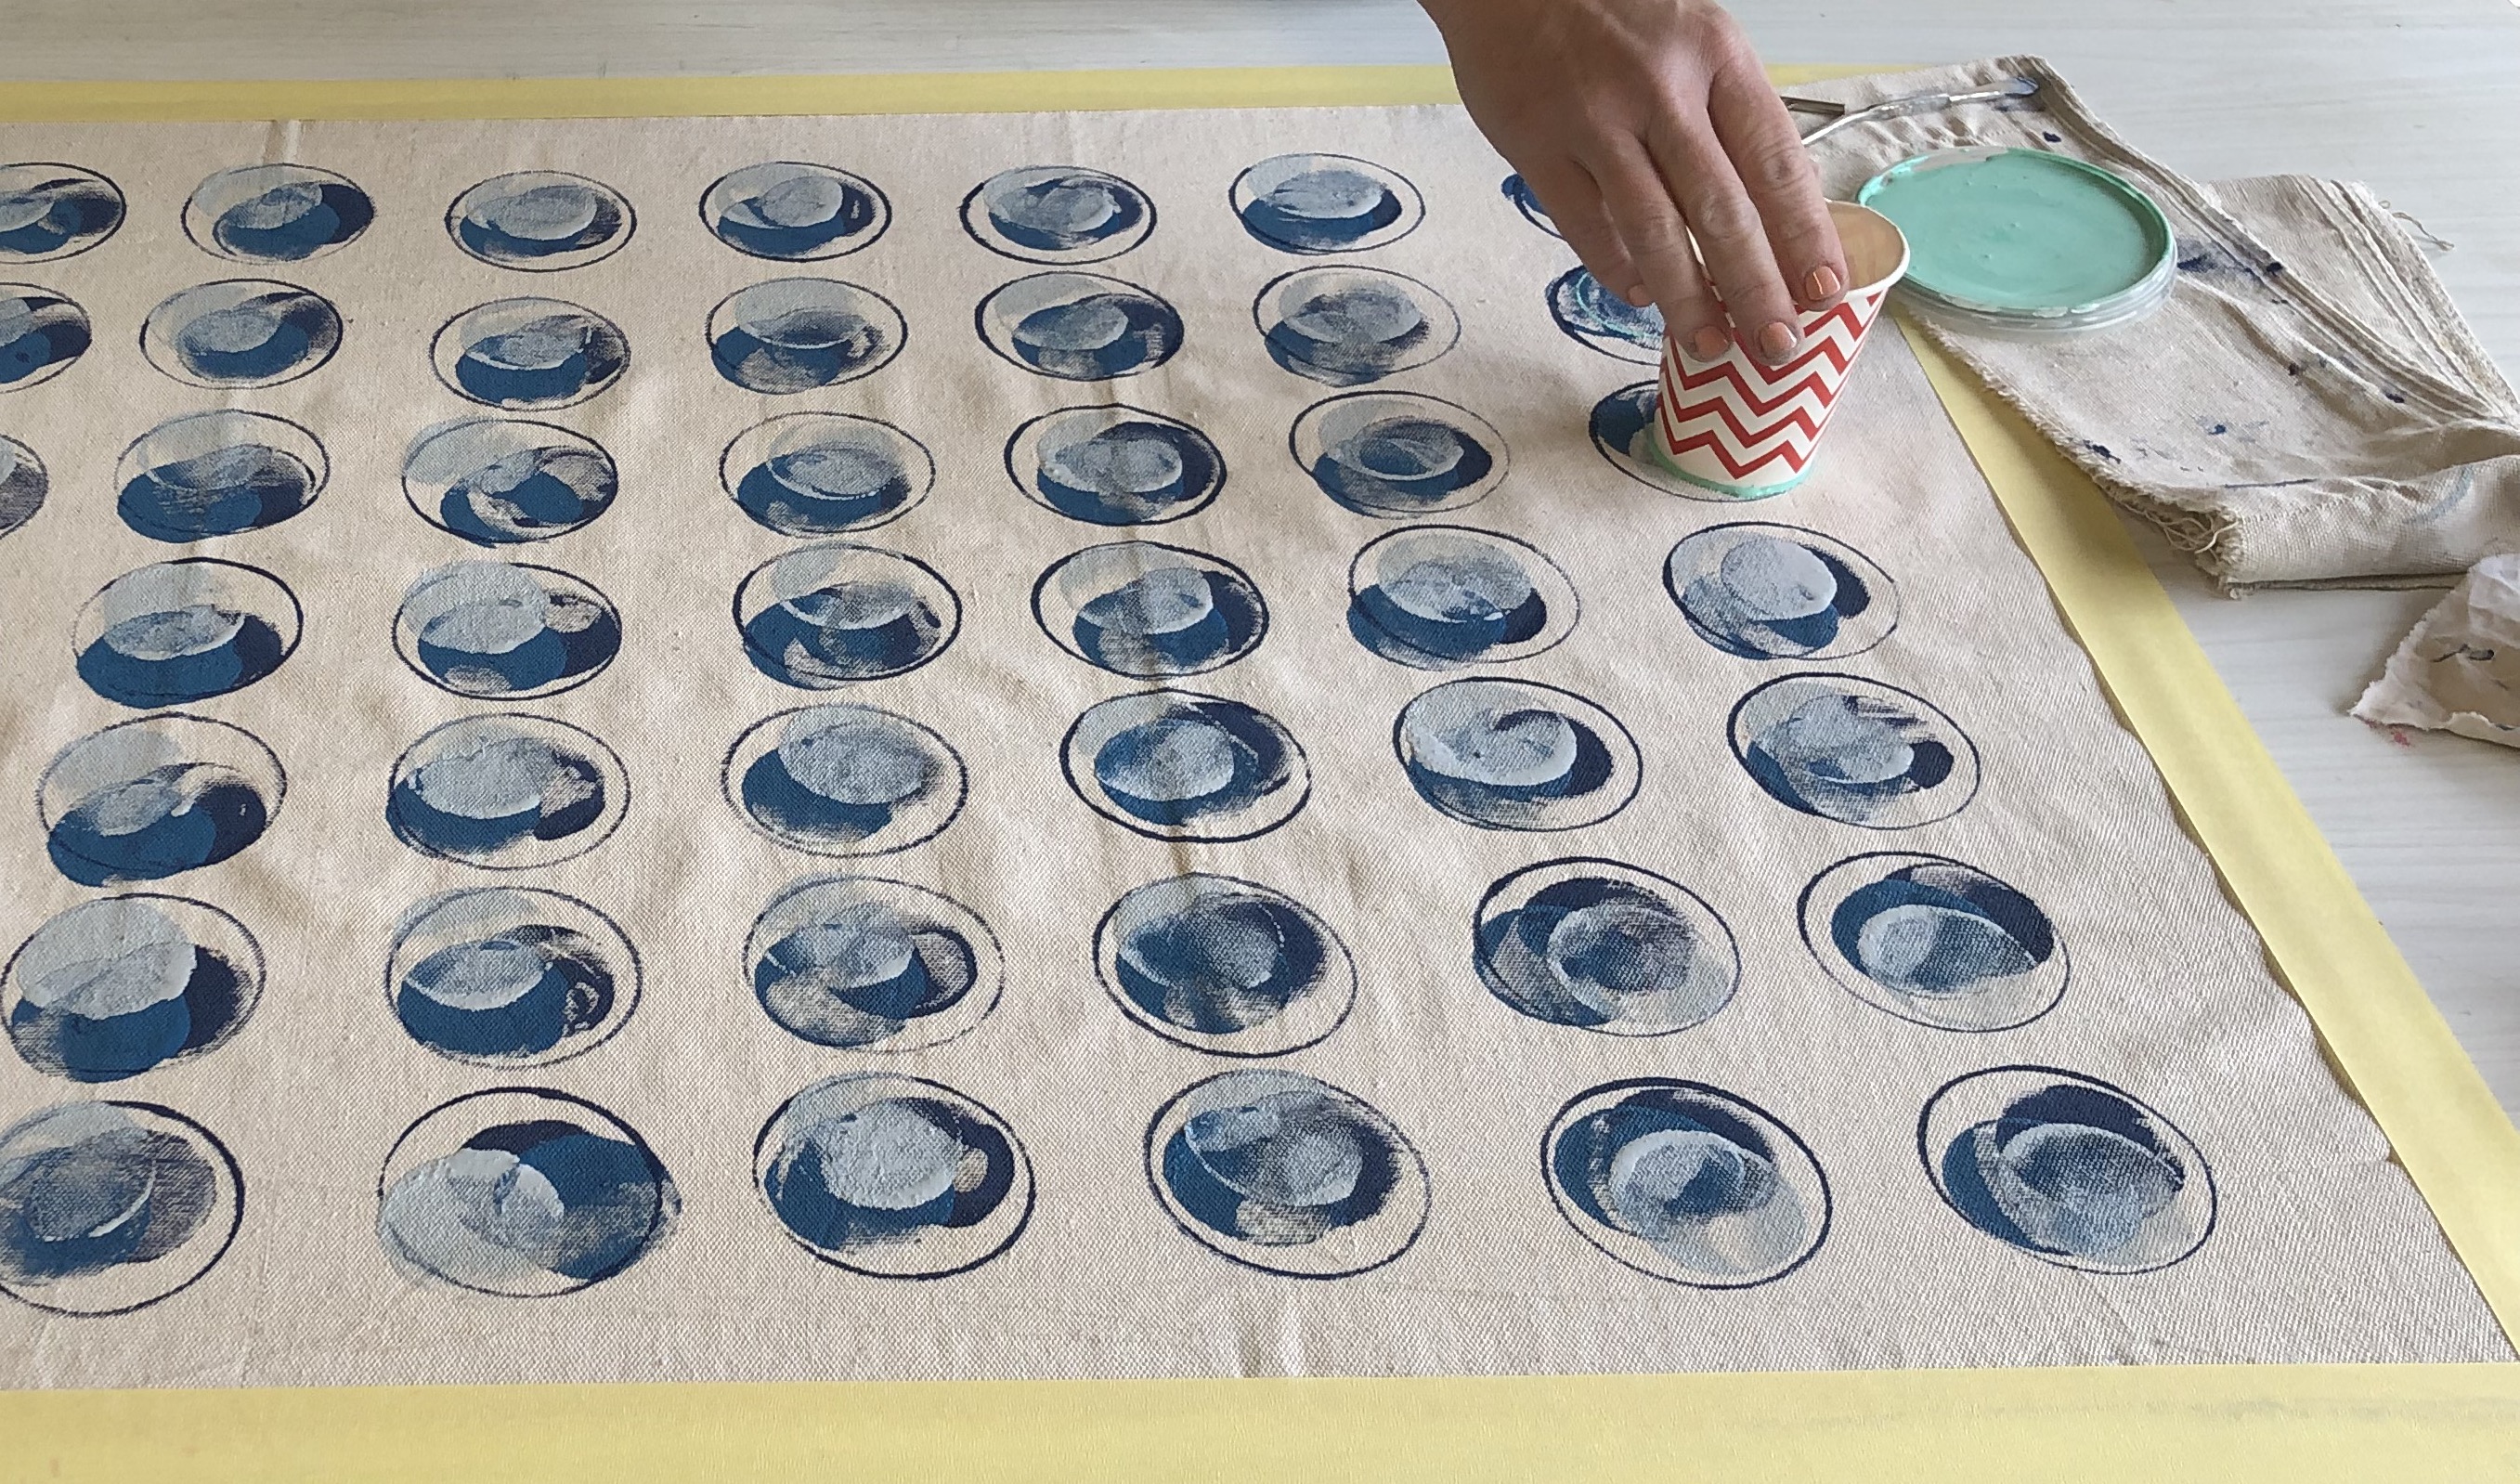
Press the navy paint tin lid onto the cloth, in rows about 50mm apart, tipping the tin onto the lid every second time, using scrap cloth to catch drips. Apply mid blue, slightly to one side of the first circles then repeat with light grey. Pour navy into a paint tray and use the lip of a paper cup to make large circles, and the base of the cup to apply mint, gold and white paint. Use a dowel offcut to dab on pink circles and leave to dry thoroughly.

Centre the foam on the cloth, checking the pattern is straight. Use a hot glue gun to apply glue over the base and position it on the foam.
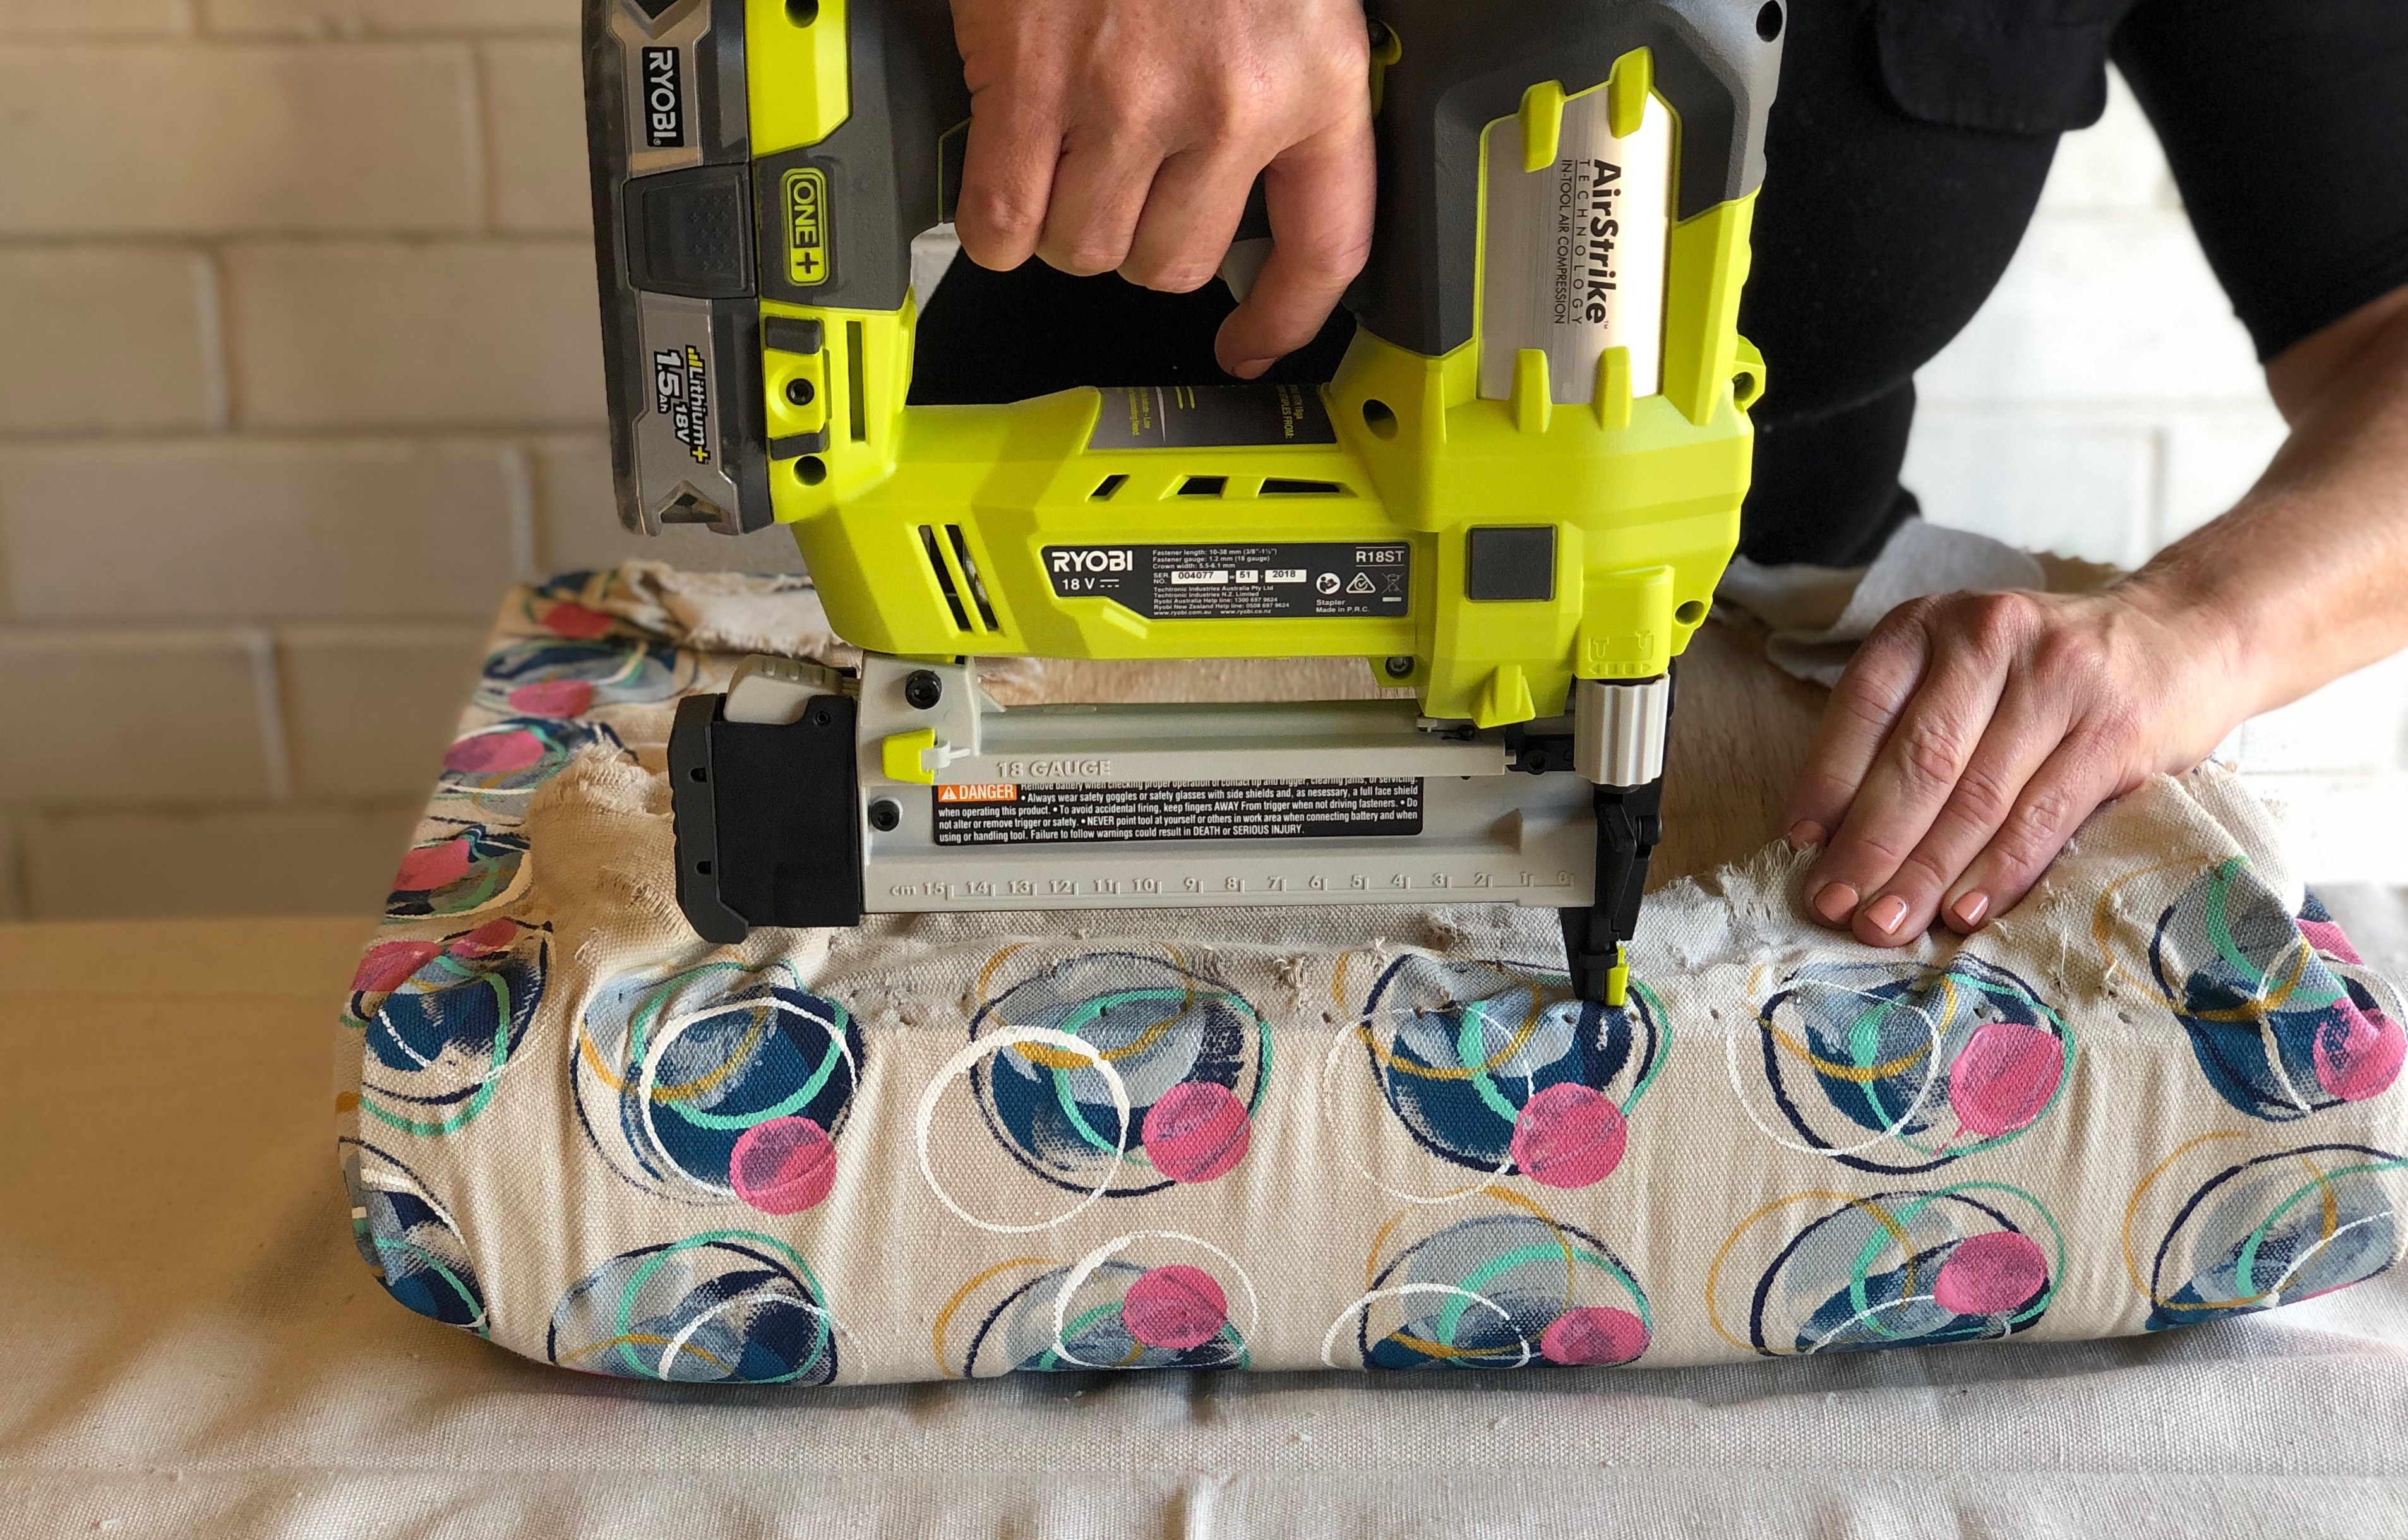
Beginning on one side, fold the cloth over and secure at the centre with three staples. On the opposite side, pull the cloth taught to staple the centre. At the ends, pull the cloth taught to secure the centres, then work around the base, ensuring the top and sides are smooth and crease free, leaving about 100mm either side of the corners.
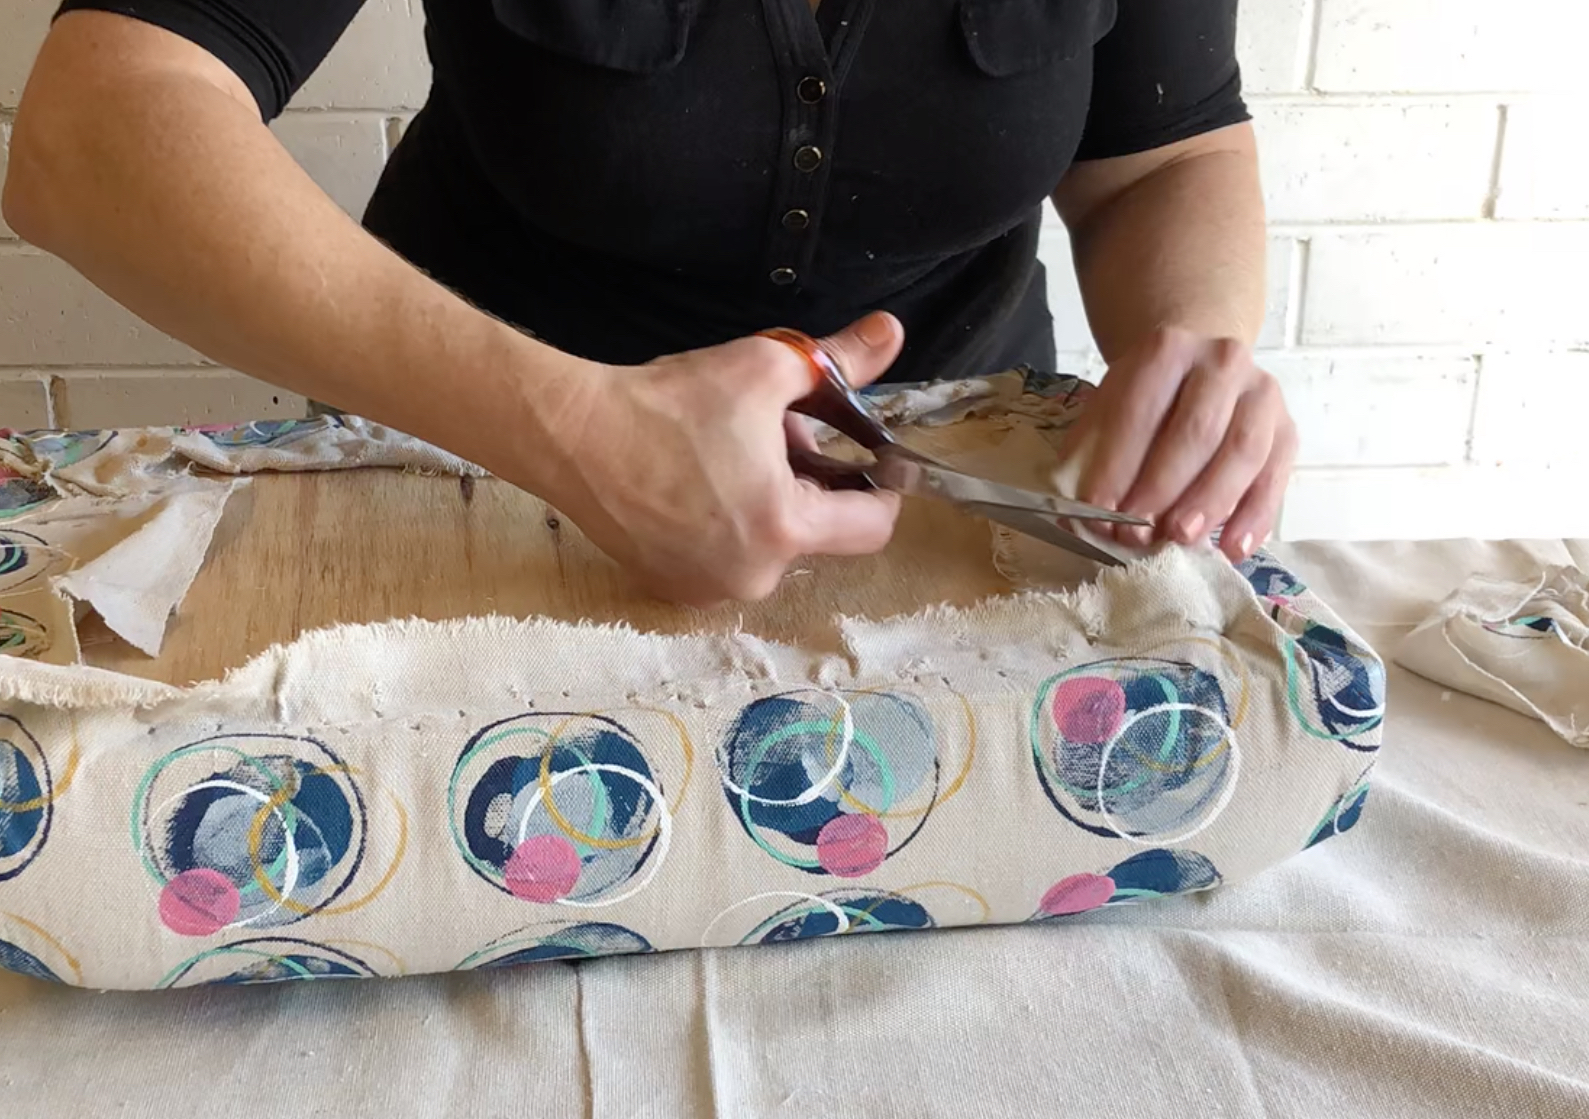
Fold the corners, tucking the sides into the ends and pushing the cloth into the fold with a screwdriver for a neat finish. Pull the cloth smooth and staple to secure. Use scissors to trim the bulk of the excess cloth from the corners.
NATASHA’S TIP: Fold the cloth over corners in the same way you would gift-wrap a box or do hospital corners when making a bed. Be prepared to remove some staples with a screwdriver and reattach the cloth if you need to manoeuvre creases from the sides.
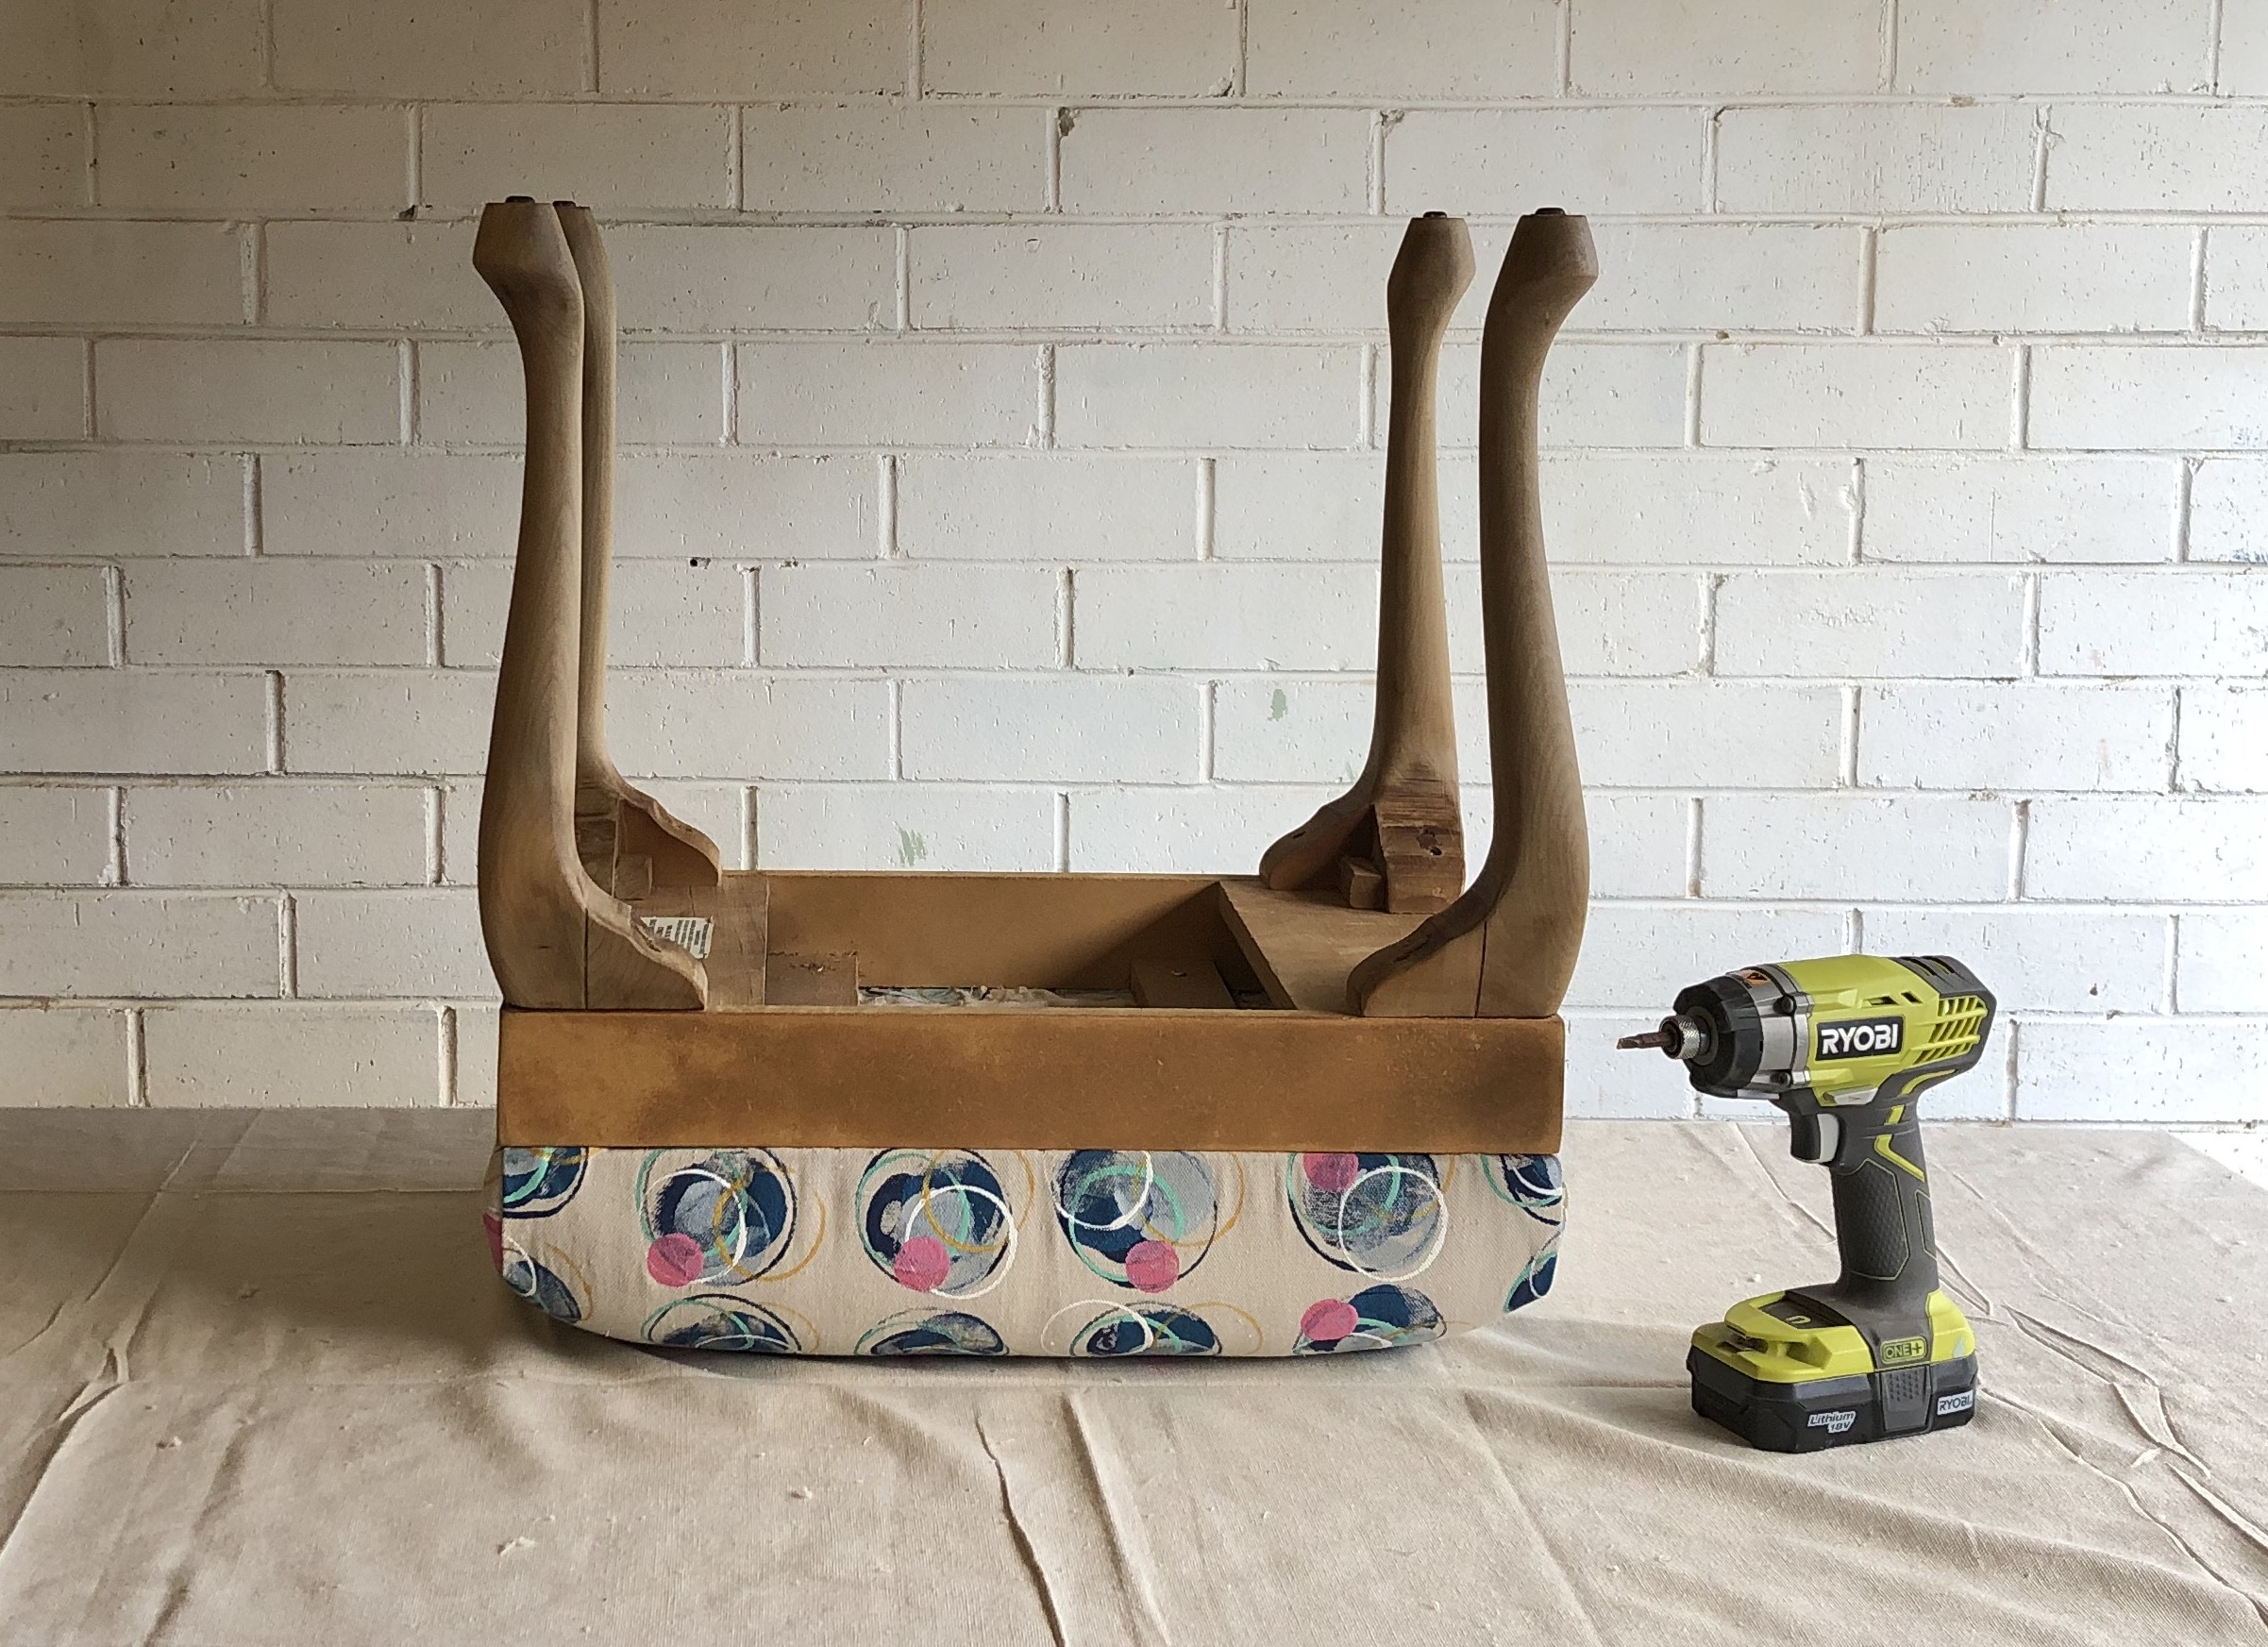
Position the base on the seat, reattach with the original screws and put your feet up!
.png?w=100&v=6c04e2a3-04b9-449c-97a0-86f8df82dcb1&itok=D7d8Umfz)

.png?w=100&v=07272864-2df4-45f0-aa93-568aa3920466&itok=Lj7SSICT)

.png?w=100&v=4297d0f7-8d6a-4632-bff2-7c593a97d3cb&itok=fnsLcLhG)


.png?w=100&v=6fe76245-ac4a-4aa3-986d-04347f143028&itok=dFif4A99)


_Group%20shots.png?crop=yes&k=c&w=125&h=125)


.png?crop=yes&k=c&w=690&h=690&v=cb99dbdc-8ba6-4cd0-9855-ba0df9cd733a&itok=2LvRkXnC)


