


_ANZ-Group-shot_v2.png?w=100&v=f3a4afac-70ac-4758-8474-ff17fe163b1c&itok=Z_Qi2FlQ)


.png?w=100&v=76611618-74f9-4150-85bd-f3f88e49eece&itok=5ehAJg_Q)


.png?w=100&v=5053a26b-c336-46d9-b44e-ab91738f07c9&itok=efvsqCNL)


.png?w=100&v=d5f9955a-145e-481e-8081-5ddf4d74c7cc&itok=hKuNtBOw)


.png?w=100&v=2695a42f-b099-4e31-bdbd-c1b445ff88c0&itok=Md9-7E8t)


%20(2).png?w=100&v=a9b7928b-cece-4e51-b913-62ae316129a9&itok=fEHREjki)
_ANZ-Group-shot.png?w=100&v=72a4a24c-7670-47f7-a68e-edeaafa41c8d&itok=k25pq8iJ)
_ANZ-Group-shots.png?w=100&v=4d5e1cd2-60a9-45da-bcfb-1b8500ccaea9&itok=v6A67Pxg)


Drill into timber, soft metal and hard materials including brick and concrete with the RYOBI 18V ONE+ Hammer Drill.

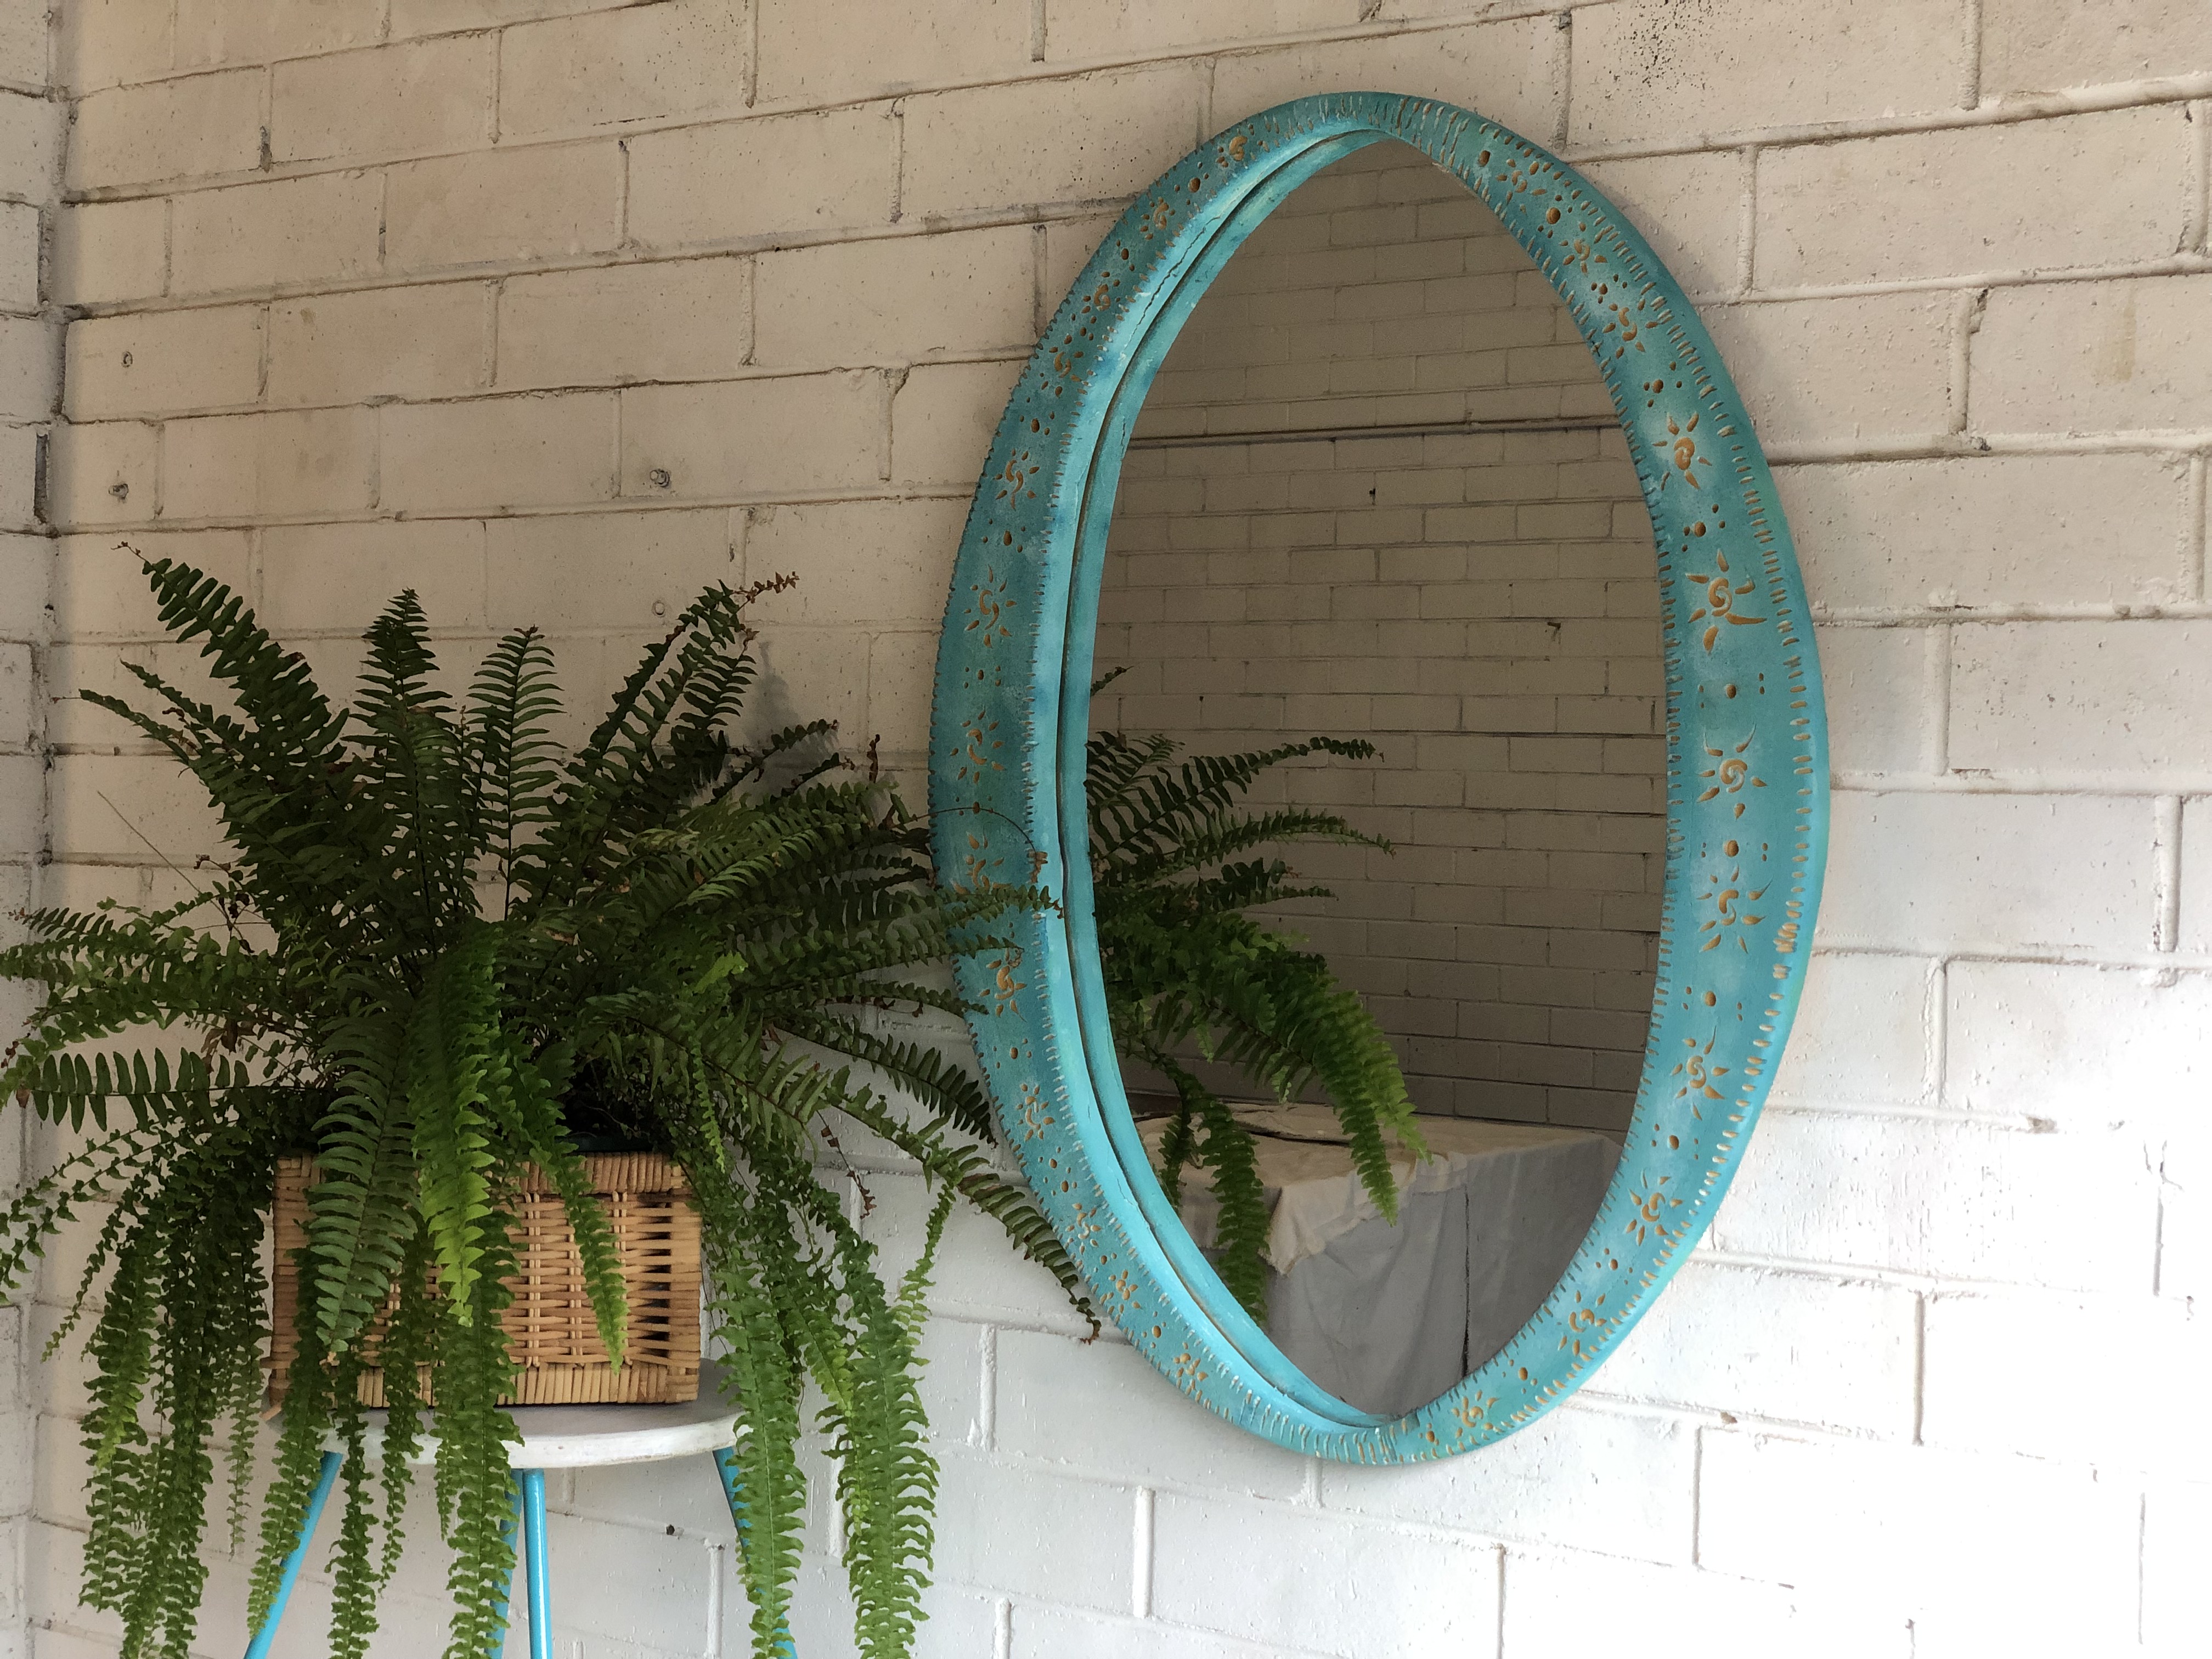
DIY specialist Natasha Dickins at Little Red Industries designed this frame to fit an oval mirror 750mm long x 500mm wide. You can pick up everything you need from Bunnings.
The trick to DIY-adapting a trend to suit your decor is to be practical about how it fits into your home. ‘I love the Moroccan-style but adding authentic mosaic tiles to a mirror makes it very heavy,’ says DIY specialist Natasha Dickins at Little Red Industries.
‘So I’ve come up with a new technique that takes a basic oval mirror and uses foam board to add an embellished frame for depth and texture.’
Difficulty: Easy
Category: Indoor Furniture
Tools used:
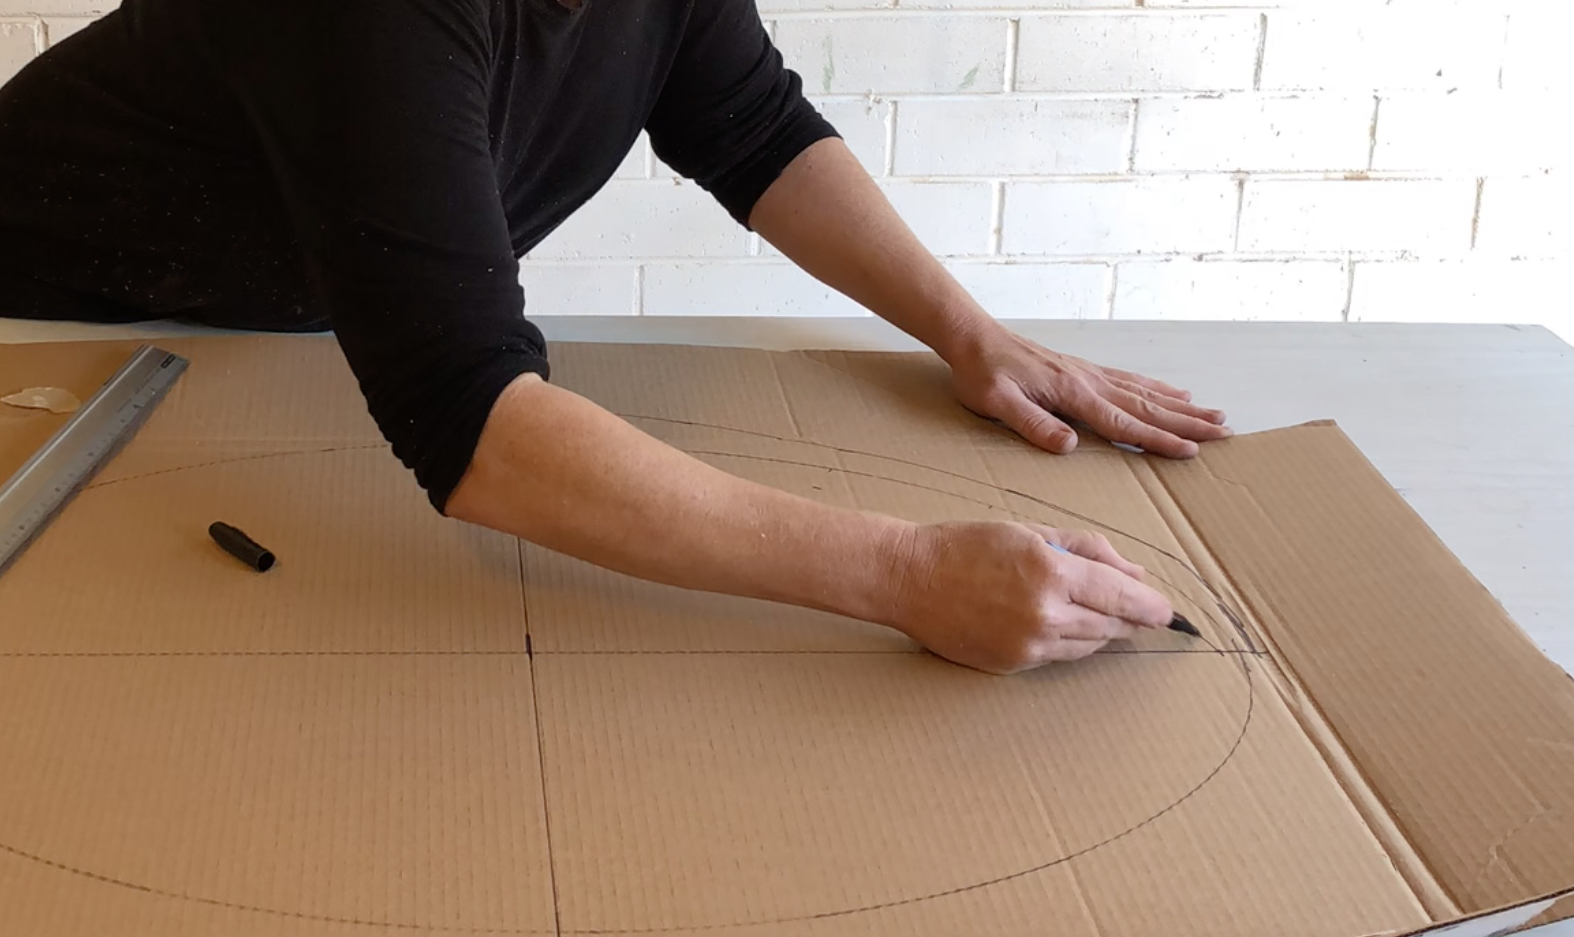
Transfer the shape of the mirror onto the inside of the cardboard packaging using a felt pen then use a ruler to mark the centre lengthways and sideways. Working on one quarter, mark along the line every 100mm. At the top, mark 20mm either side of the line. At the first 100mm, mark 30mm either side. At the second, mark 35mm either side, then 40mm and 50mm at the halfway mark. Join the marks then cut out the quarter with a utility knife.
NATASHA’S TIP: The frame is shaped so the inside is smaller than the mirror, but the outside edges are wider.
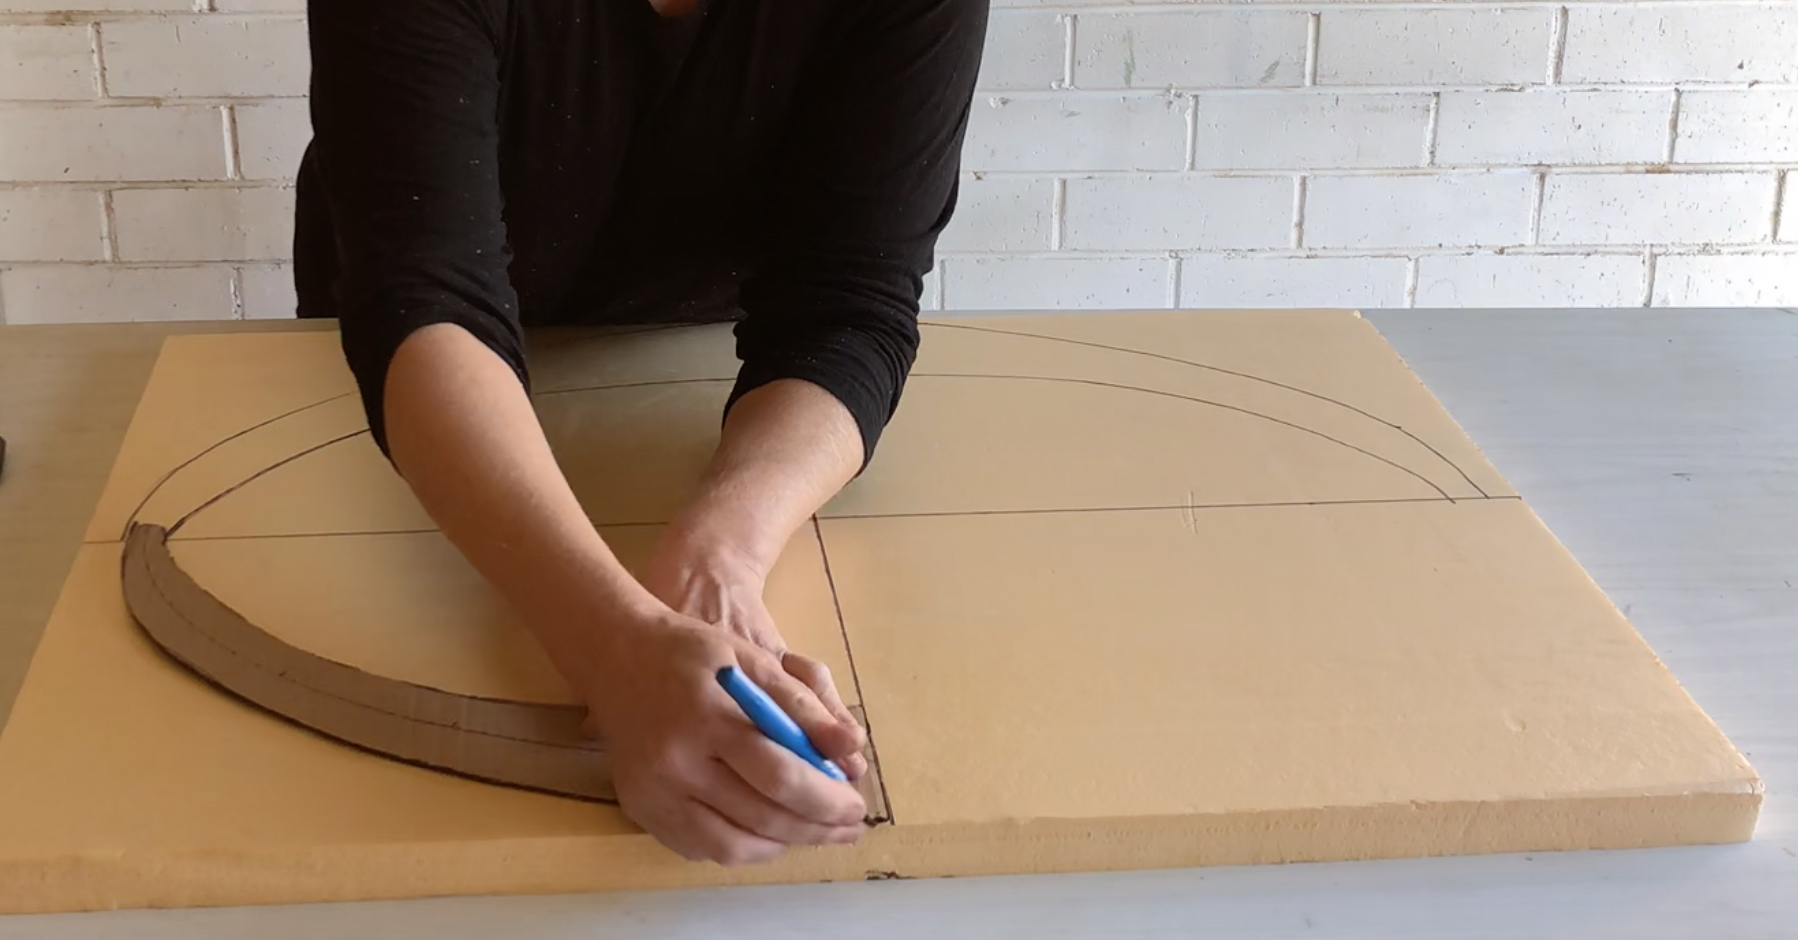
On the foam, mark halfway lengthways and widthways then position the template at the top, with the base of the template square on the halfway line to trace both sides. Move the template to the next quarter and transfer the shape, repeating to complete the oval.
NATASHA’S TIP: To mark the shape to the reverse side of the foam, transfer the ruler marks in the same positions then trace out the template.
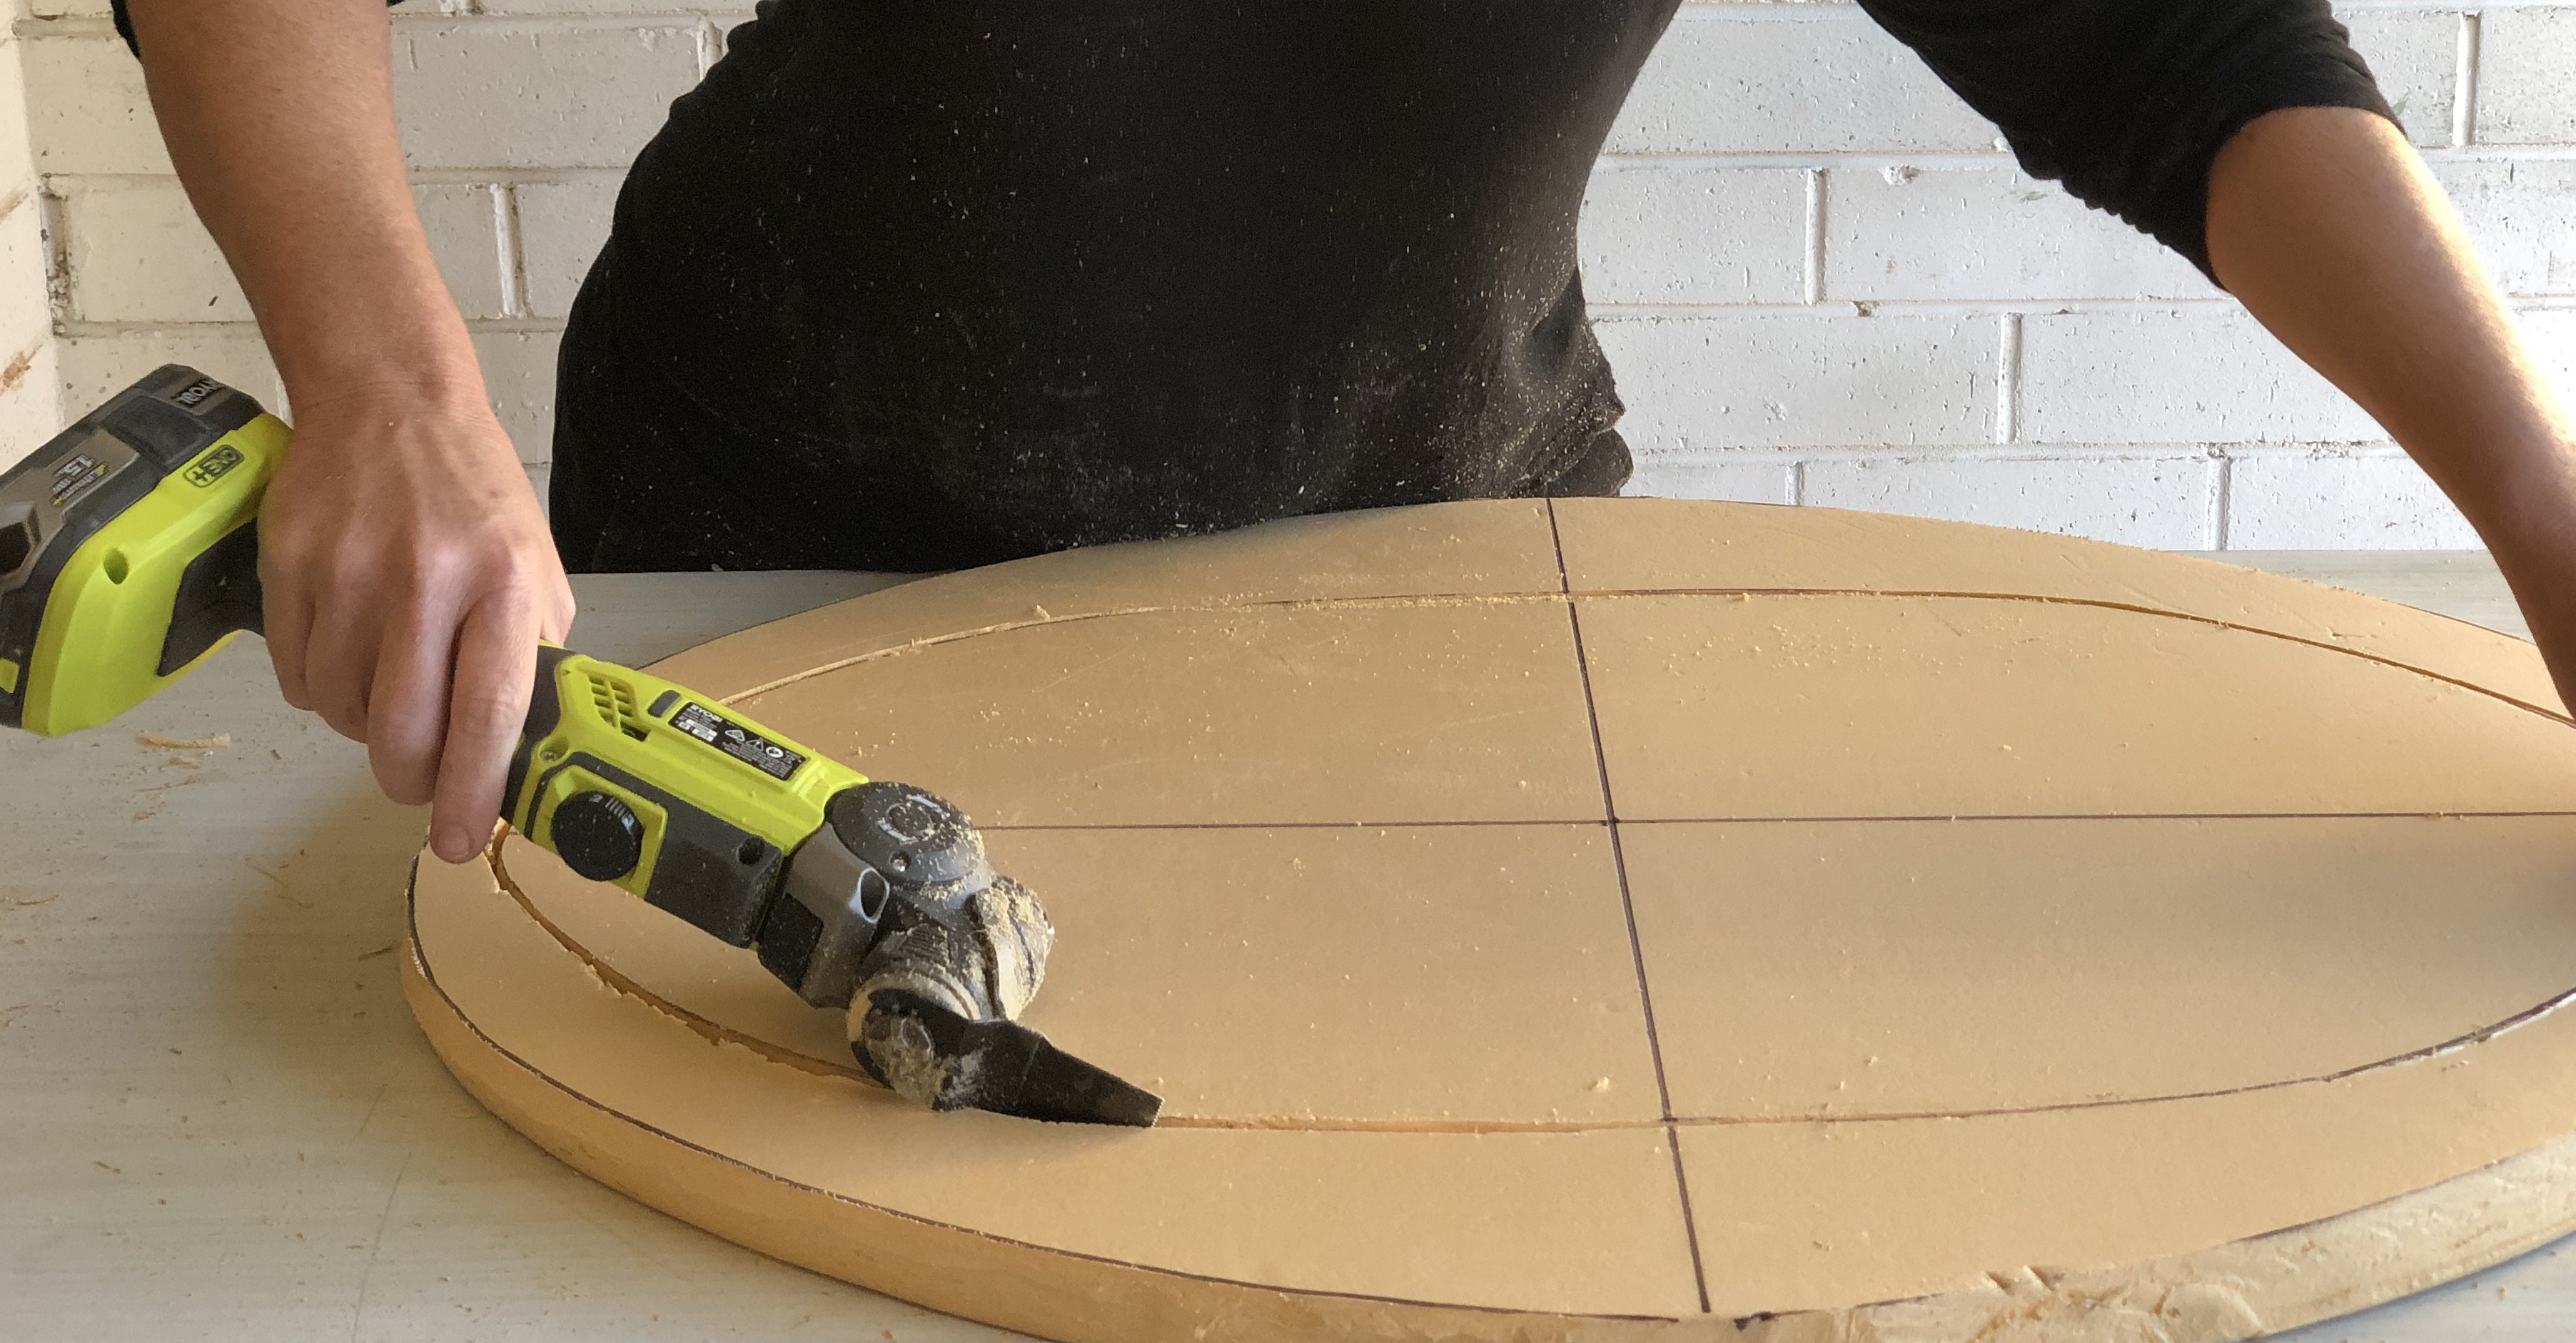
Use the Ryobi ONE+ MultiTool with the saw blade to cut from one side, holding the tool diagonally to cut around the outside and inside of the oval. Flip the foam over to cut the other side then tap out the excess.
NATASHA’S TIP: Wear a mask while cutting to avoid breathing in the fine foam dust created from the cutting.
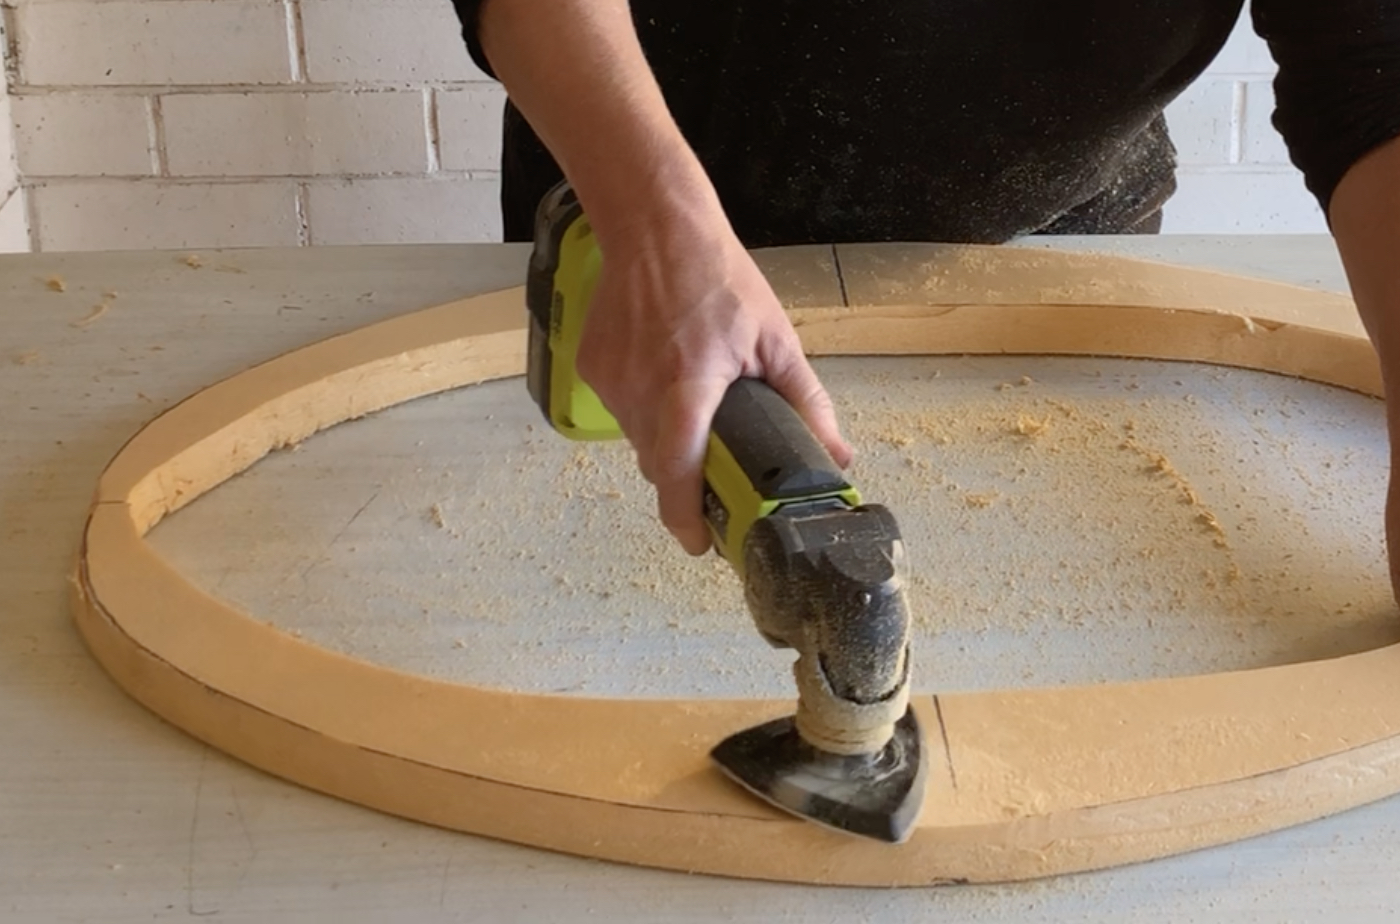
Swap the blade for the sanding attachment to smooth over the edges and the top face, moving the tool in a sweeping motion to work over any cuts.
NATASHA’S TIP: Begin with a course grit sanding pad to smooth out the cuts then finish with a fine grit. The frame is designed to have a hand-crafted finish so don’t be too fussy with inconsistencies.
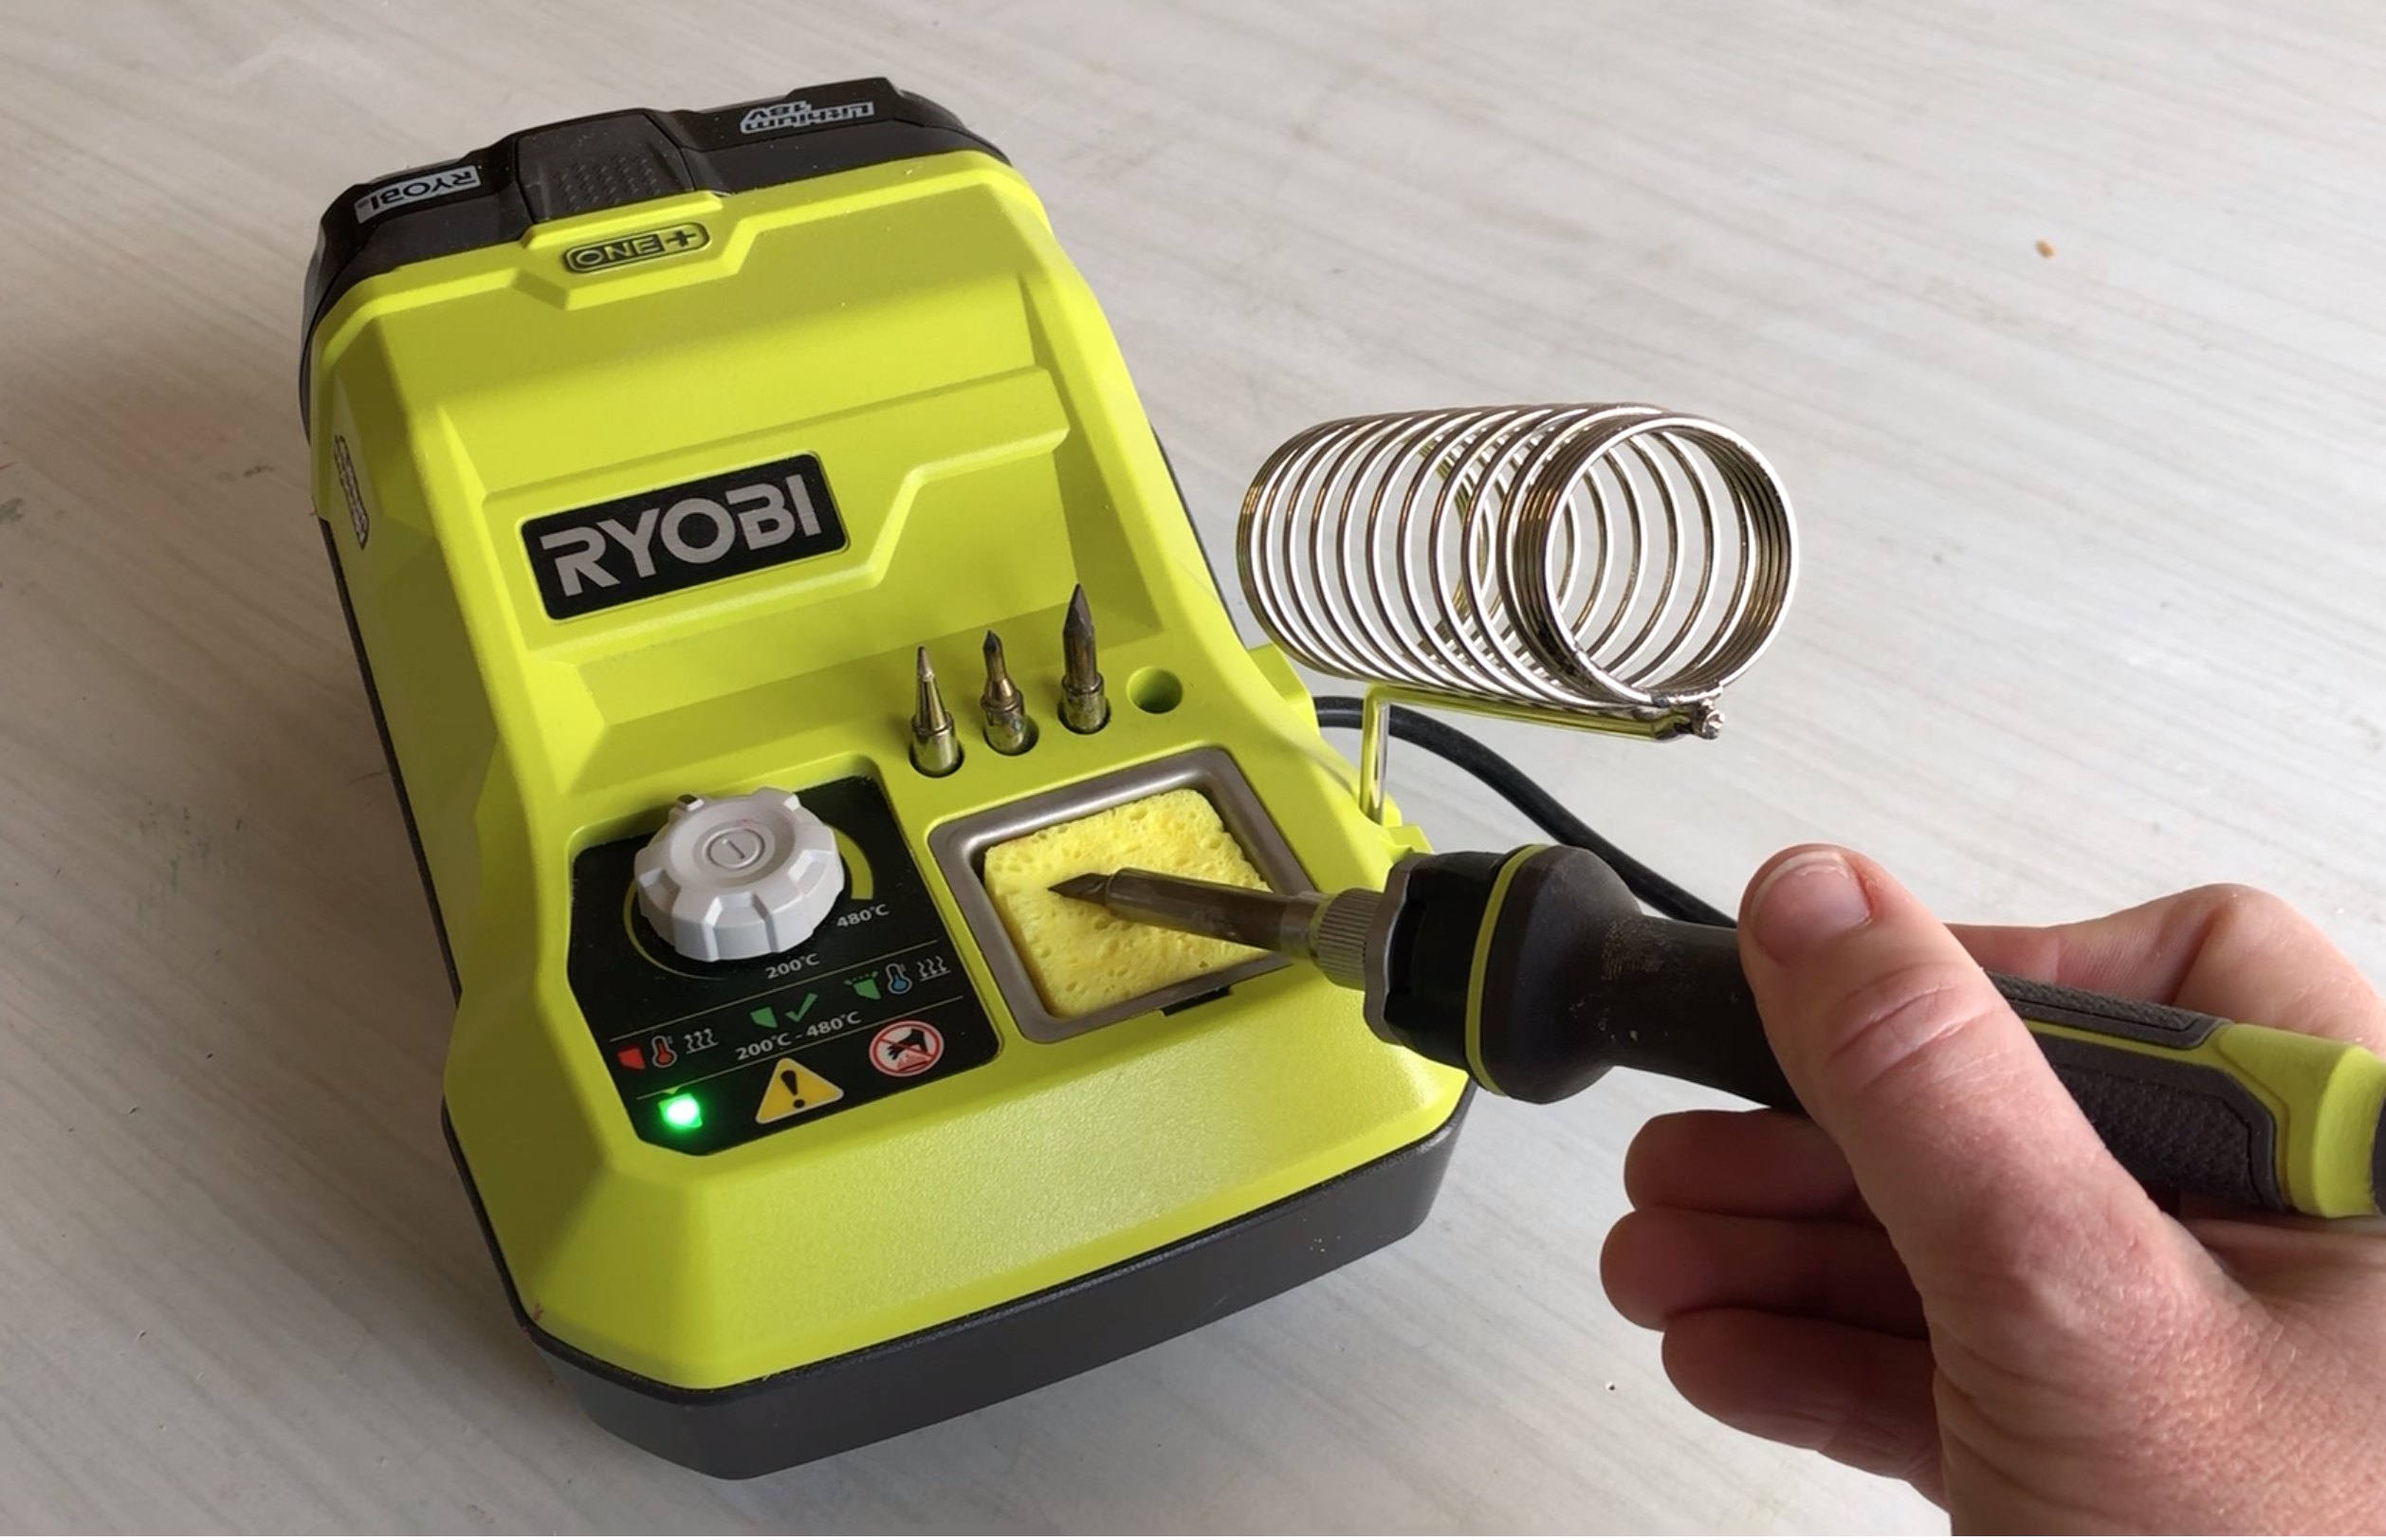
Set up the Soldering Station with the drawing tip, add a dab of water to the sponge, install the battery and turn it on to heat up.
NATASHA’S TIP: Wear a mask and work in a ventilated area. Always turn the Soldering Station off and leave it to cool before changing the tip.
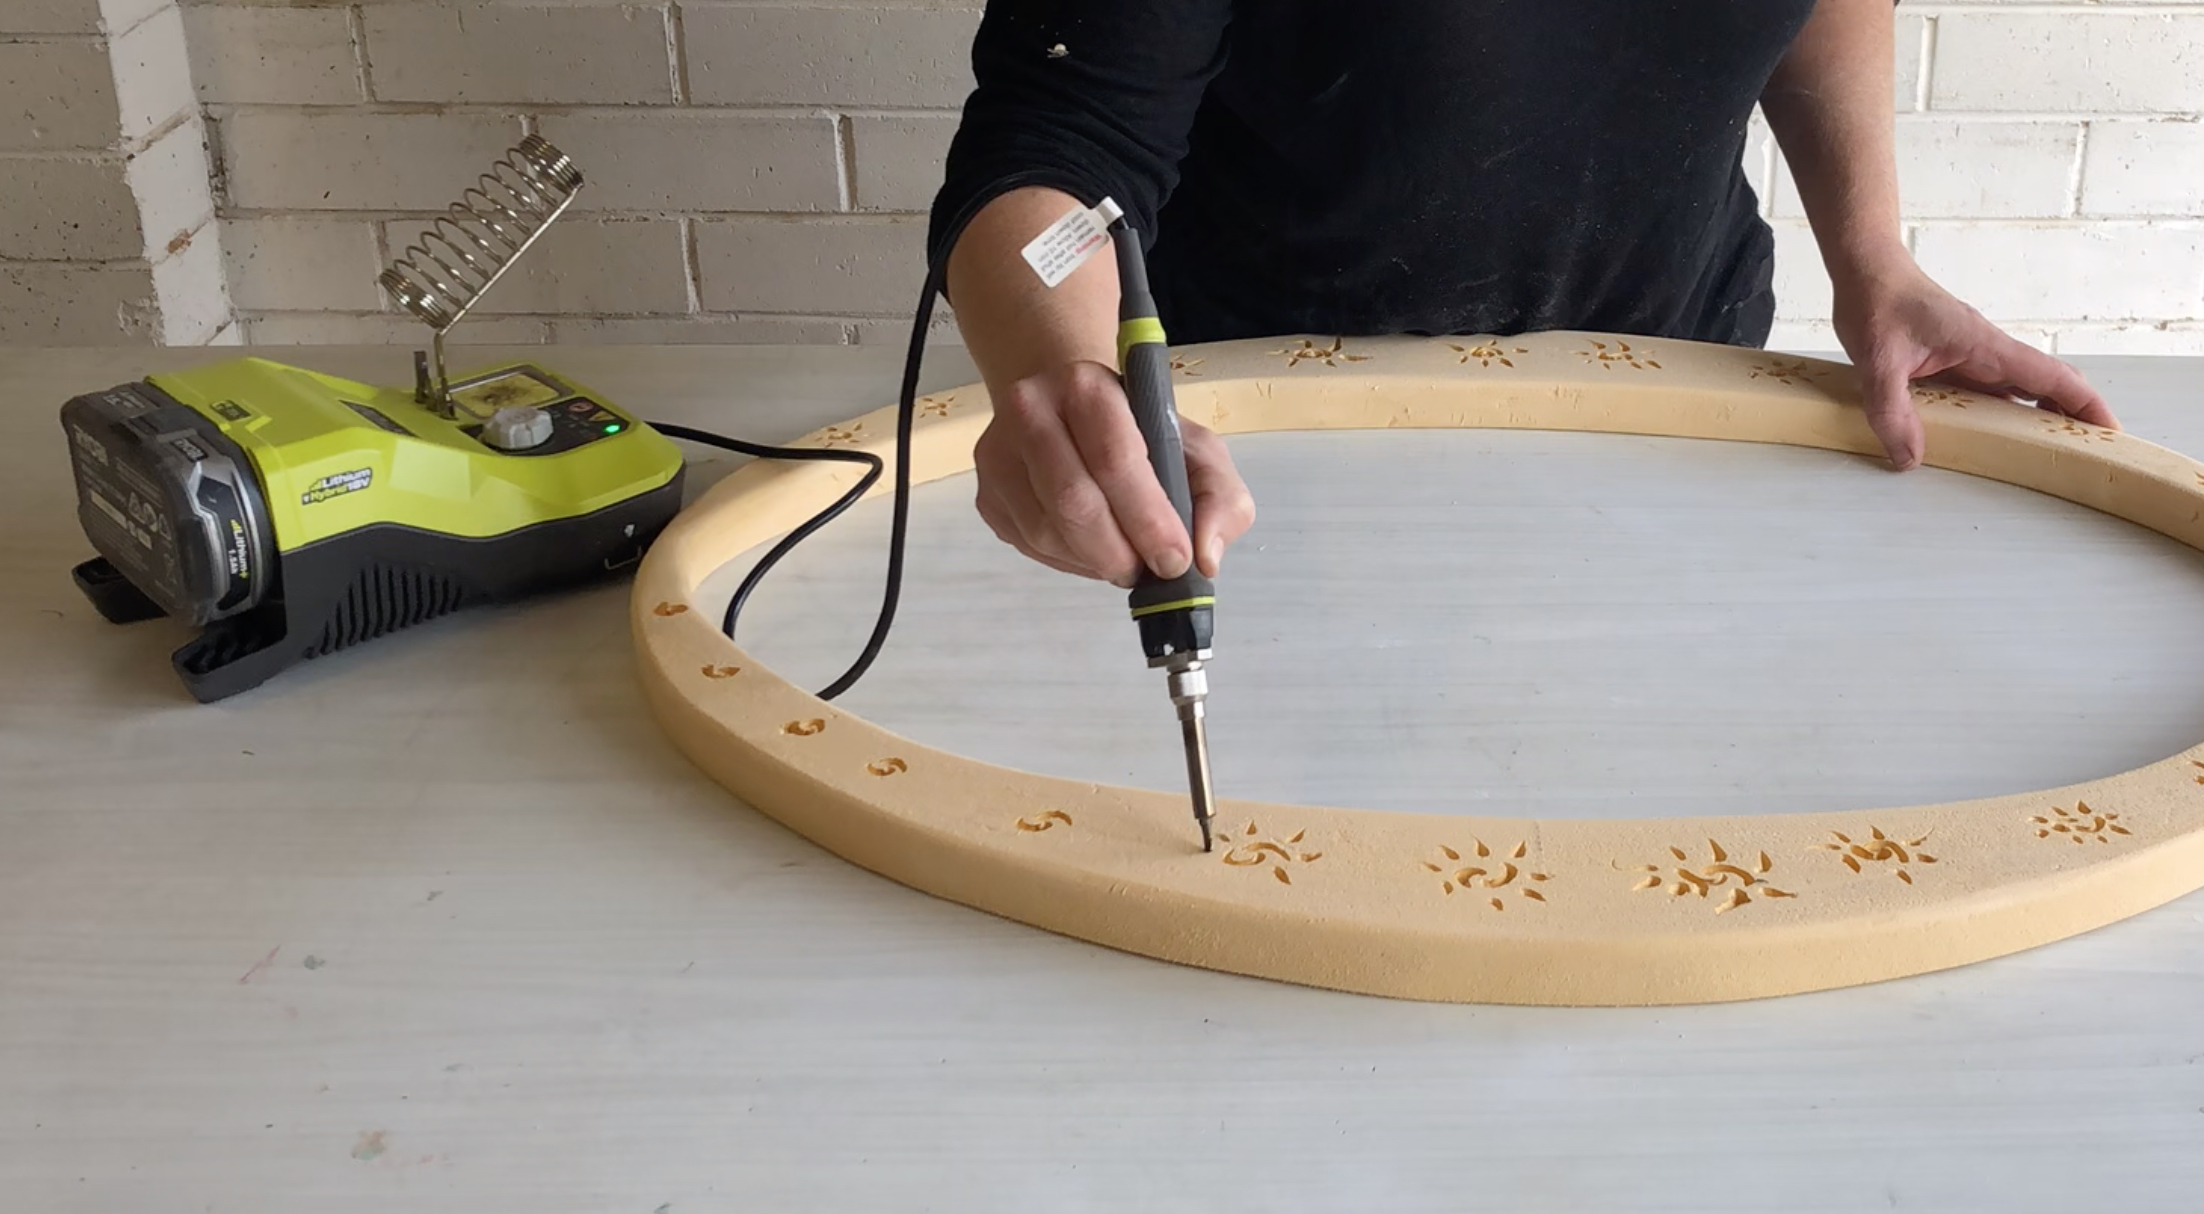
To make a series of apostrophe shapes around the frame, about 100mm apart, touch the tip the foam and simply draw the shape. Turn off the Soldering Station and leave it to cool before changing the drawing tip to the cutting tip to make a circle of dashes around each apostrophe then make close lines around the inside and outside edges.
NATASHA’S TIP: Work on a clear surface so you can turn the frame and make the patterns quickly to avoid melting the foam. Keep the tip clean by regularly dabbing it on the wet sponge.
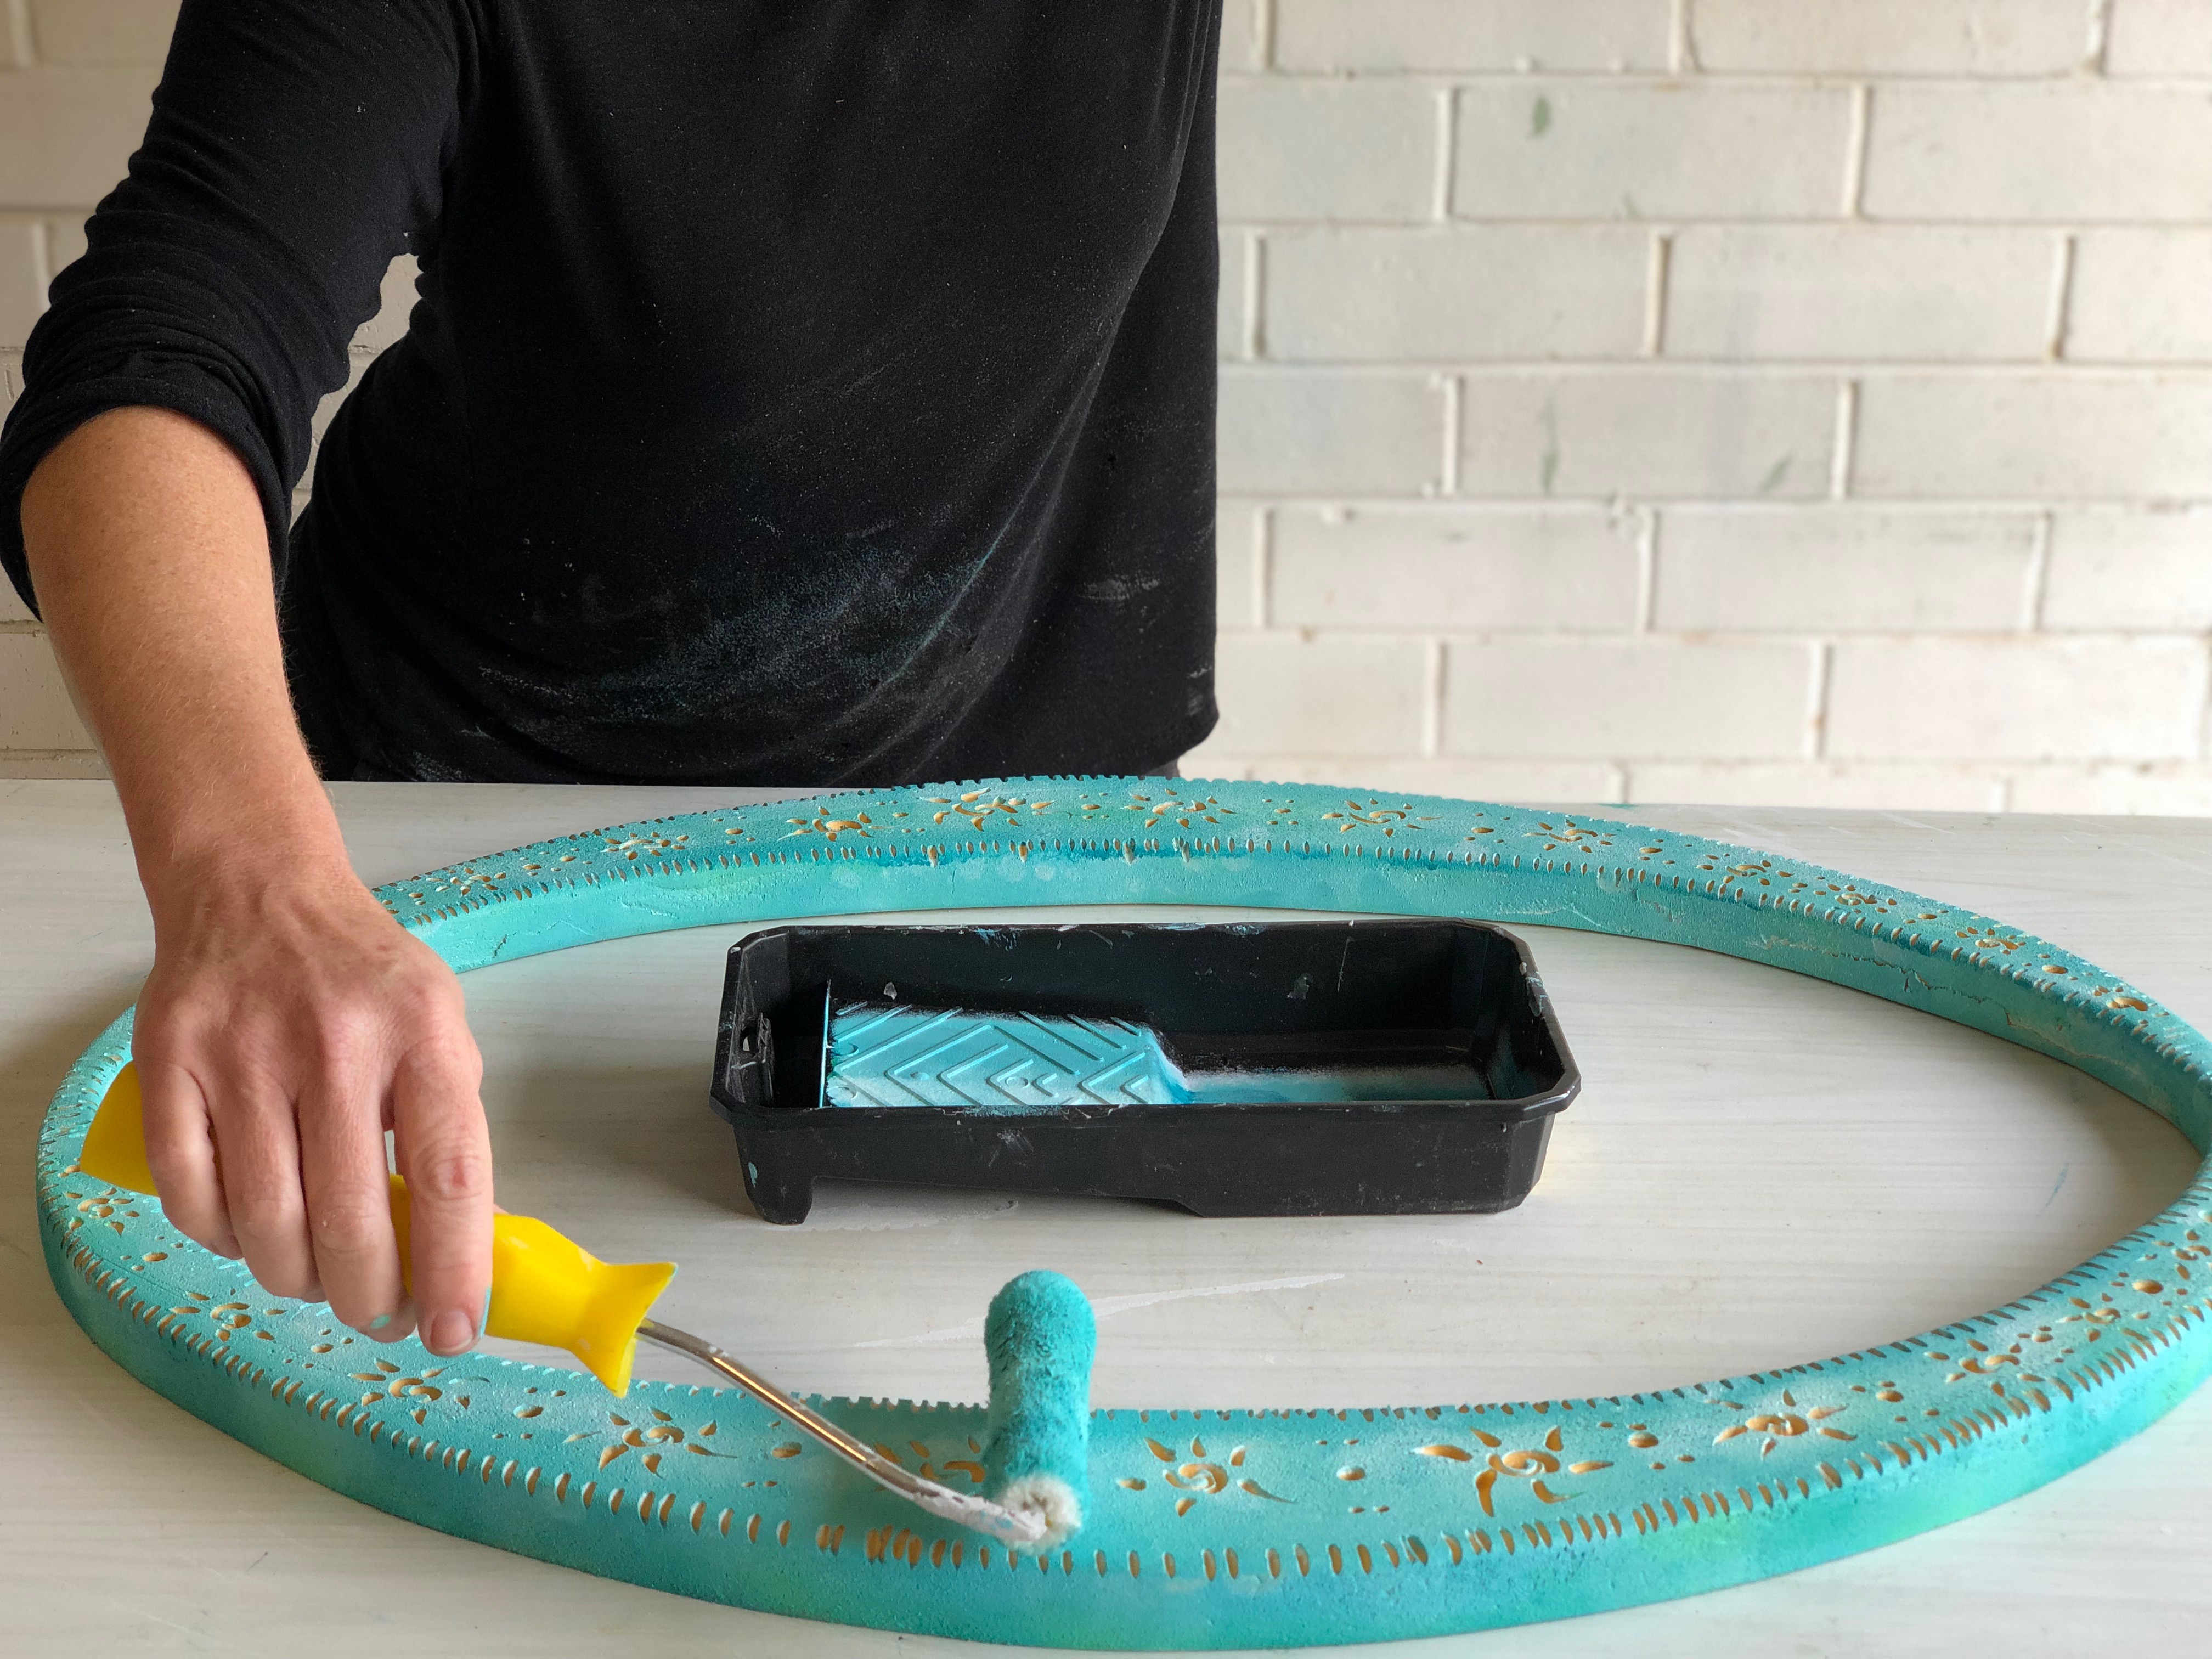
Use a mini roller with paint tray to apply white paint then layer a mix of blue and green. Finish by rolling white paint only over the patterns to give a layered effect. Avoid filling all the pattern with paint so the gold colour of the foam shows through.
NATASHA’S TIP: To avoid applying the paint in a solid layer, roll it on lightly and use a cloth to wipe away excess.
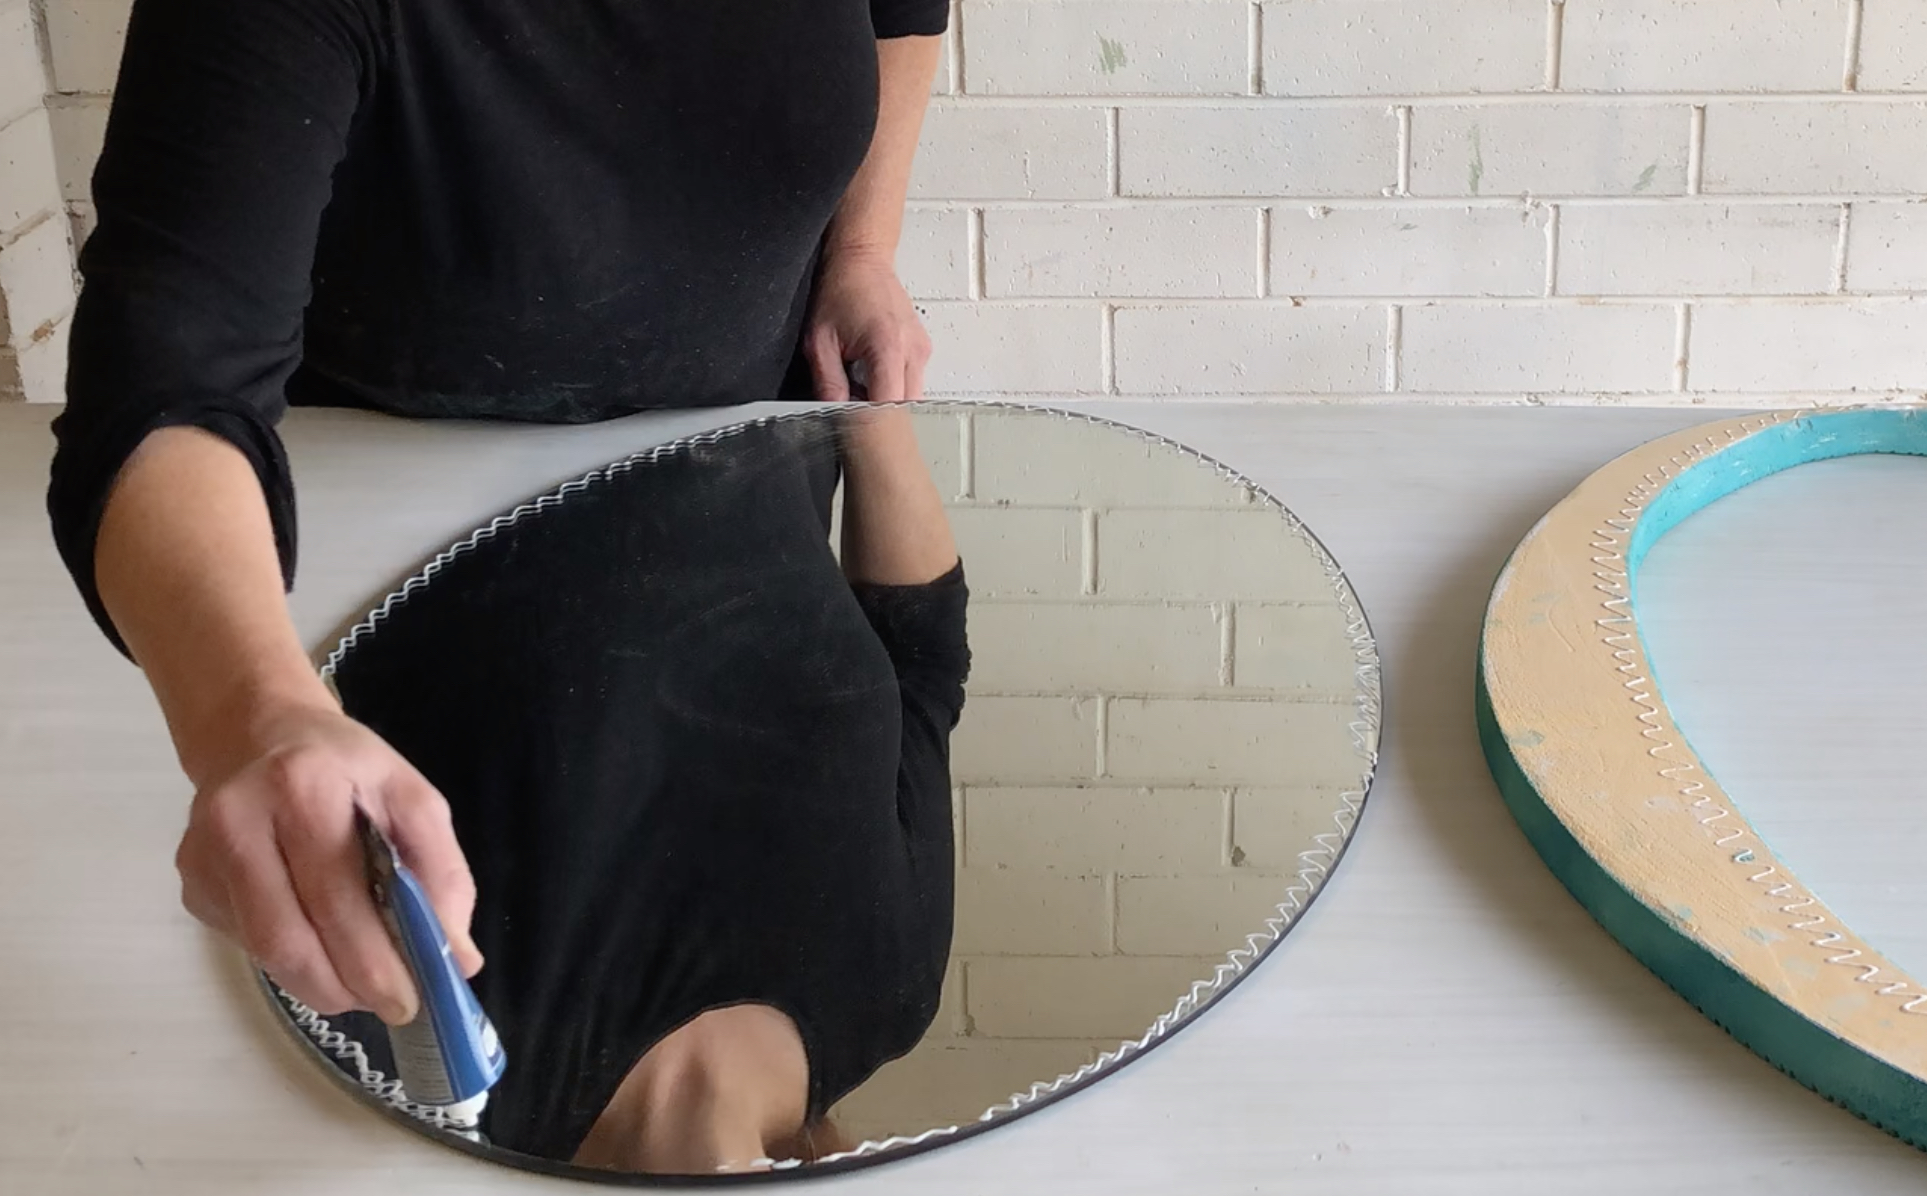
Apply mirror adhesive to the back of the frame and around the edge of the mirror in a zig zag motion. Position the frame on the mirror, clamp to the worktable and leave to dry.
NATASHA’S TIP: Use a clean damp cloth to remove excess adhesive immediately after clamping and leave it to dry overnight.
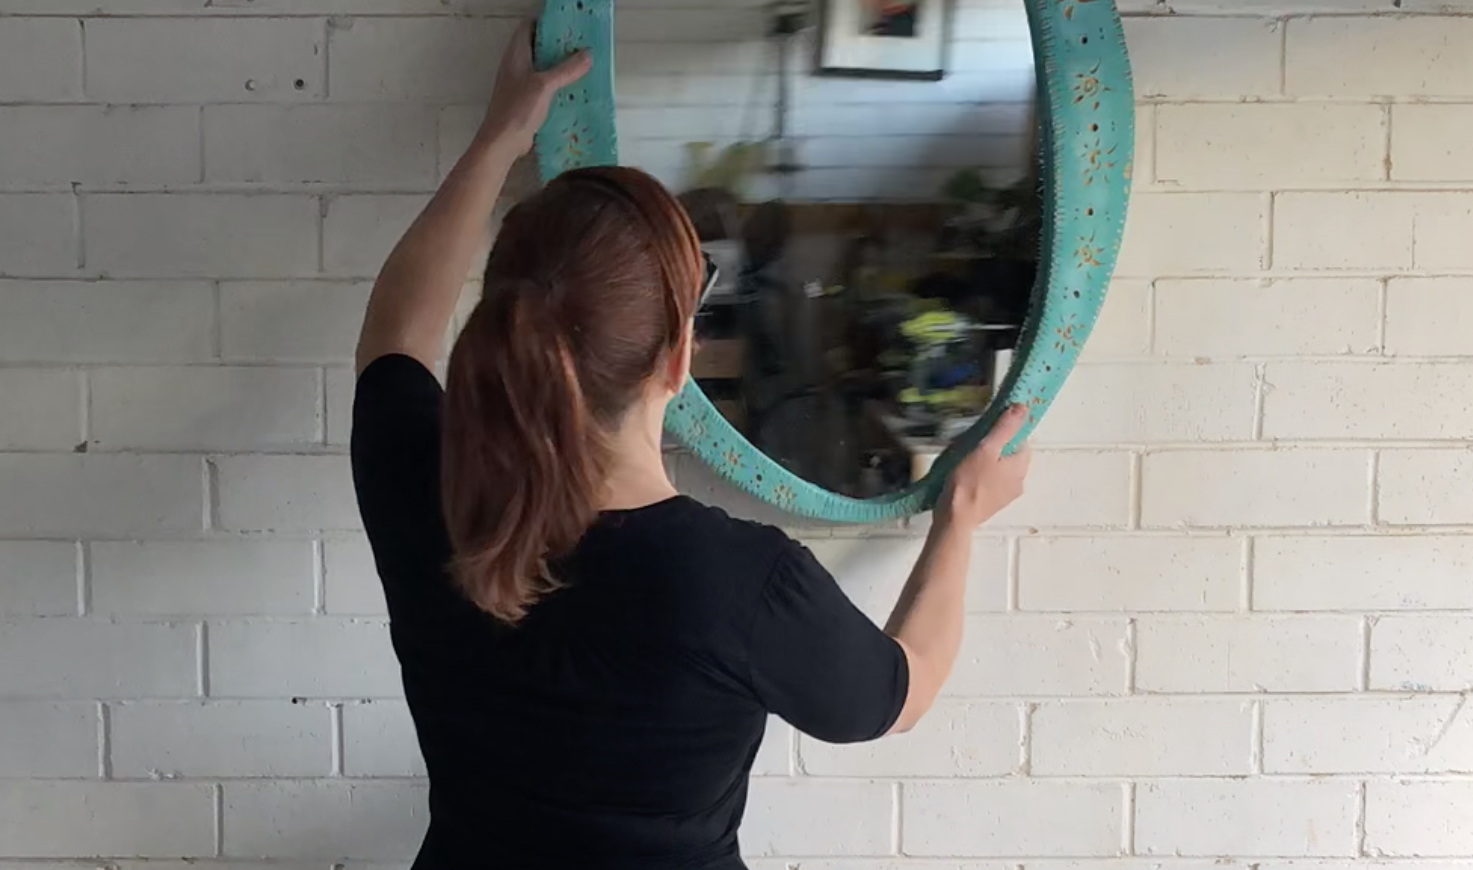
Use a spirit level to mark out the screw points on the wall to match the hooks at the back of the mirror. Install screws with the Ryobi ONE drill, using anchors if necessary, then hang your Moroccan-style mirror.
.png?w=100&v=6c04e2a3-04b9-449c-97a0-86f8df82dcb1&itok=D7d8Umfz)

.png?w=100&v=07272864-2df4-45f0-aa93-568aa3920466&itok=Lj7SSICT)

.png?w=100&v=4297d0f7-8d6a-4632-bff2-7c593a97d3cb&itok=fnsLcLhG)


.png?w=100&v=6fe76245-ac4a-4aa3-986d-04347f143028&itok=dFif4A99)


_Group%20shots.png?crop=yes&k=c&w=125&h=125)


