


Push Mowers
36V 46cm Lawn Mower 4.0Ah Kit
| R36LMW24
$ 629.00
Tiled splashbacks aren’t just for kitchens. They can add some personality and style to what might have been “just a laundry”. Make a statement or keep it simple with an array of tiling options to choose from.
Medium level DIY-er.
TIP: Before you begin, cover your benchtop and other surfaces in a protective material, like a thick plastic sheet or cardboard to prevent tile glue and grout sticking to it.
Step 1: Find and mark the centre of your benchtop – this will help determine your tiling starting point.
Step 2: Lay out the tiles on the benchtop starting from the centre mark to see how the spacing at each end will look. You may need to adjust the start position to avoid being left with a small slice of tile at one or both ends.
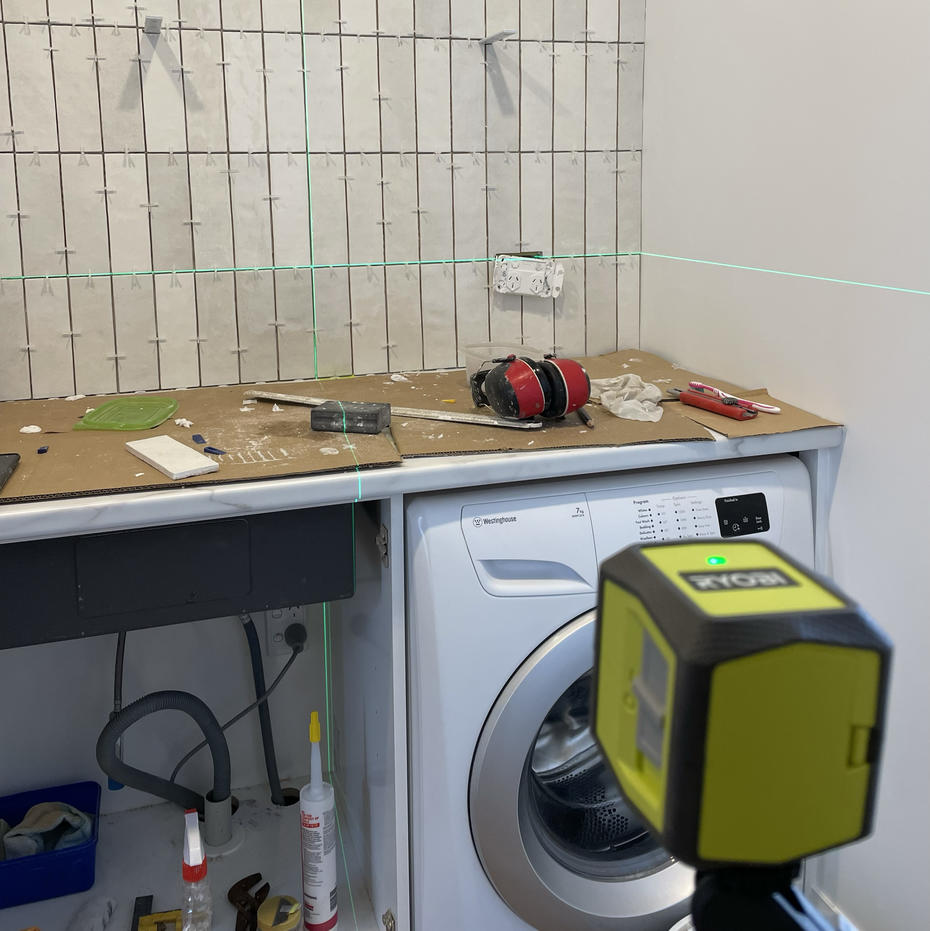
Step 3: Apply your tile adhesive to the wall using a notch trowel. Firmly press your tiles into position using a tile float and then use tile spacers to space them out evenly. As you go use your laser to check your tiles are level and straight.
TIP: There are products available that not only space tiles evenly, but also help to level them.
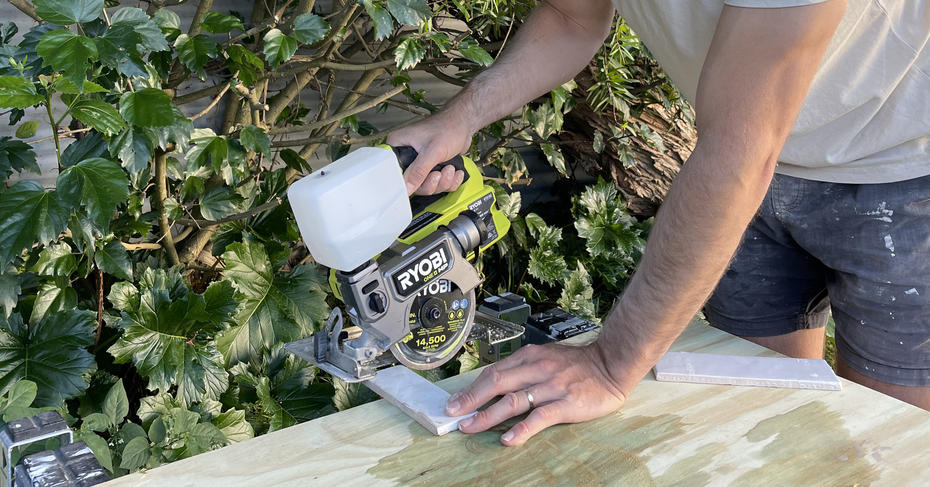
Step 4: You will eventually need to cut some tiles depending on tile size and layout. Measure and mark the tile with a pencil and make the cut using your tile cutter or RYOBI tile saw.
Step 5: Carefully remove any excess glue from the tile surfaces before it dries. This will be much harder if the glue is left to dry.
Step 6: Once finished, leave tiles for 24 hours to dry. When dry, remove the tile spacers and give the tiles a good clean.
Step 7: Mix up your grout according to the manufacturer’s specifications and apply it to the gaps using a grout applicator or float.
TIP: Spread grout diagonally to begin with to fill the gaps
TIP: Don’t apply grout to a wall corner or your benchtop as this will most likely crack and won’t be waterproof. Instead, fill these gaps with silicone caulk (see Step 9).
After 15-20 minutes, use a damp (not wet) sponge and clean water to gently wipe off the excess grout. Repeat until all excess grout has been removed.
Step 8: When the grout is dry your tiles will most likely have a ‘chalky’ looking finish to them. Give them a clean with a microfibre cloth. You might have to repeat this process until your last pass is with a polishing action.
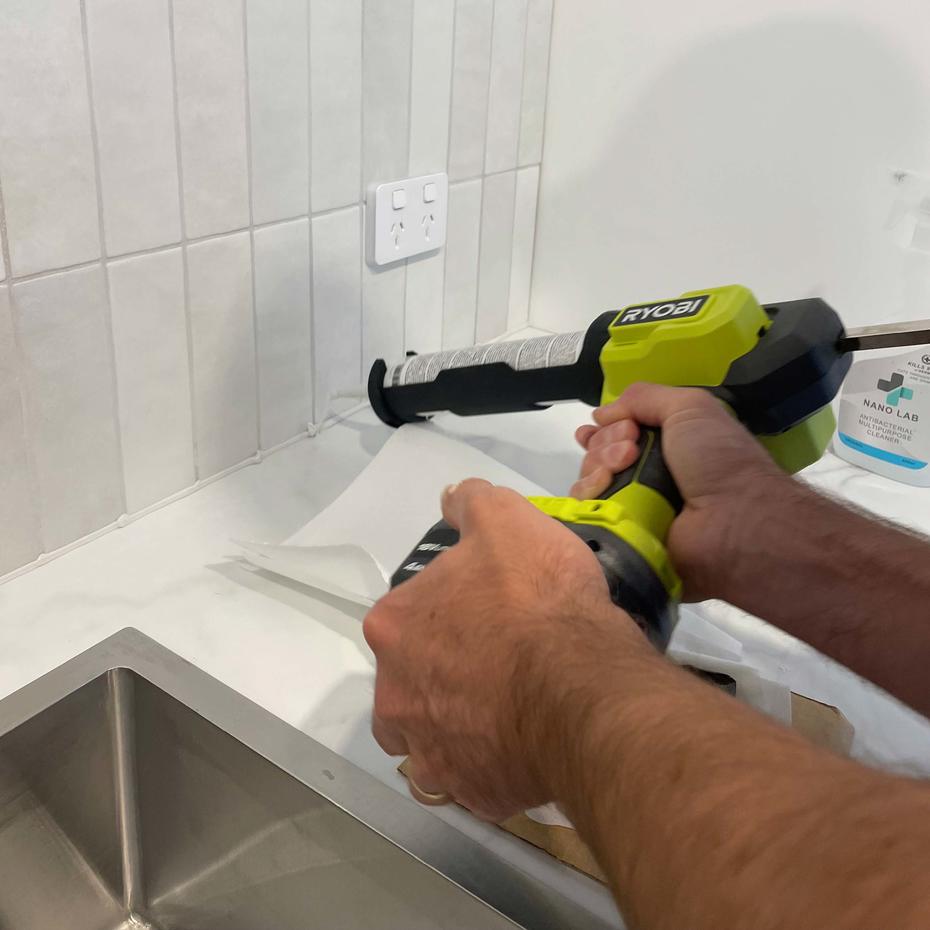
Step 9: Using your caulking gun, apply a bead of silicone caulk along the bottom between the tiles and benchtop and up the sides. Use dishwashing liquid and water or a product like Spray and Wipe to wet the bead of silicone to reduce friction when using your silicone tool to remove the excess while leaving behind a smooth, clean bead.
TIP: There are a selection of grout and silicone caulk products that have the same matching colour
Looking for inspiration, tips and ideas? Create a home that reflects your unique personality and taste.


.png?crop=yes&k=c&w=690&h=690&itok=XNeI_VJt)