


Push Mowers
36V 46cm Lawn Mower 4.0Ah Kit
| R36LMW24
$ 629.00
It’s the season for hats, scarves and beanies. Keep them within easy reach with this simple hat rack project. Step-by-step guide by Nick Compston.
Some DIY experience helpful.
NOTE: We recommend that before drilling into internal walls that you turn off the power to the that section of your home to avoid injury or damage.
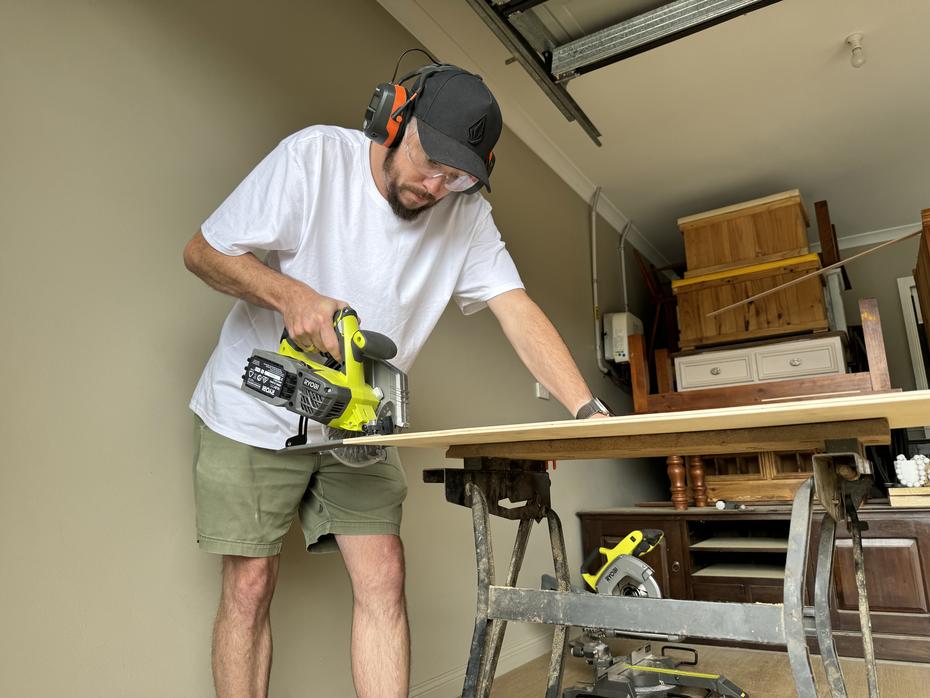
Measure and cut the 7mm Plywood Pine to 800mm x 240mm using a Circular Saw and then measure and cut the Tasmanian Oak Rounded Edging Bead to 800mm (or use a mitre saw for its accuracy).
From 2 x 2.4m lengths, you should end up with 6 x 800mm lengths that collectively will measure 240mm wide.
Glue your Tasmanian Oak Rounded Edging to the 7mm Plywood Pine backing board using a timber construction-strength glue, then clamp it between two flat surfaces to ensure even bonding.

Use you’re a mitre saw to cut your Picture Framing Tasmanian Oak to size - ensure you set your saw angle to cut at 45o – so it resembles a picture frame.
Assemble your framing pieces, glue the mitred cuts together and staple the back with a staple gun for added strength and stability.
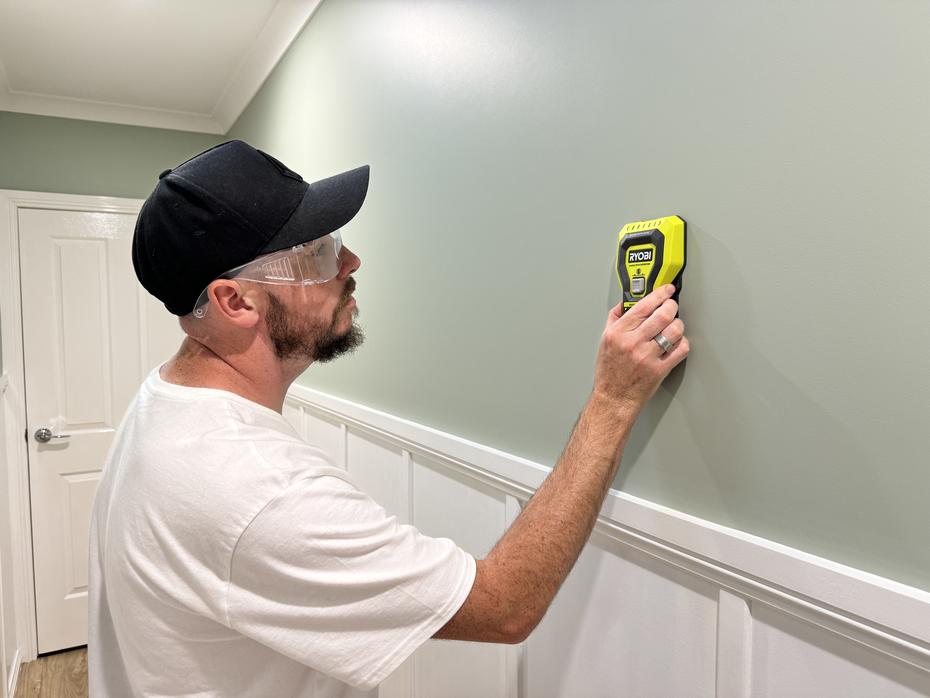
Use your Stud Finder to locate the stud in the plaster wall (studs are vertical timber that make up a wall frame), use your Drill/Driver to install the hat rack straight into the stud, ensuring to screw into the edge that will be covered by frame.
TAKE NOTE: If your Stud Finder locates any live electrical wires in the wall, DO NOT drill. Find another location for your hat rack.
Once on the wall, use your Drill/Driver on the low setting to gently install the hooks.
Use glue on the inside of the frame and fix it to the hat rack. Use masking tape to ensure the frame is held firmly in place while the glue bonds.
Enjoy and show off your finished product!
Looking for inspiration, tips and ideas? Create a home that reflects your unique personality and taste.


.png?crop=yes&k=c&w=690&h=690&itok=J5F8BAY0)


